Building Global Scenes with Georeferenced Sublevels
The previous tutorials have covered several ways to build projects and explore 3D Tiles tilesets with Cesium for Unreal. However, up until now you have been limited to building Unreal scenes centered around only one location on the globe at a time. In this tutorial, you'll learn to use georeferenced sublevels to build scenes in multiple locations, and ensure your placed actors stay where they belong—even when you're on the other side of the world.
Build sublevels across the world and seamlessly explore them.
Still using Cesium for Unreal v1? We recommend upgrading as soon as possible, but you can find the tutorial for the old version here.
- Know how to set up a basic Cesium for Unreal application. If you are new to Cesium for Unreal, check out the Cesium for Unreal Quickstart to learn how to install Cesium for Unreal, connect with Cesium ion, and create a simple world.
- Know how to place objects on the globe.
- A Cesium ion account to stream real-world data into Unreal Engine.
- A project with the Cesium for Unreal plugin installed.
The levels you have built in previous tutorials have centered around a single location on the globe. This central location is determined by the CesiumGeoreference actor. The job of the CesiumGeoreference is to put this “central location” at the Unreal origin (0,0,0). As you get further away from this origin, some parts of Unreal Engine or its plugins may struggle to cope with the inconsistent "up" direction and very large coordinates inherent in a round world the size of Earth.
This tutorial will introduce you to georeferenced sublevels. Creating georeferenced sublevels allows us to specify a unique “central location” per sublevel. Within each sub-level, +Z is "up" and coordinate values will be relatively small, so virtually all Unreal functionality will work without compromise. In order to make these guarantees, Cesium for Unreal ensures that no more than one georeferenced sub-level is active at any given time.
After this tutorial you will be able to:
- Create a persistent global level
- Create and manage georeferenced sublevels within the persistent level
- Fill each sublevel with assets and game-logic using your typical Unreal workflow
- Understand tips and tricks for using georeferenced sublevels
If you have already completed the Quickstart tutorial, the below steps should be familiar to you. If anything is unexpected or confusing, please revisit that tutorial for more detail.
1Create a new completely empty level (File -> New Level -> Empty Level).
2Add a DynamicPawn, CesiumSunSky and Cesium World Terrain + Bing Maps Aerial imagery to the level using the Cesium panel. You will need to be signed in to Cesium ion.
3Turn Enable World Bounds Checks to OFF in the World Settings, under World -> Advanced.
4Leave the CesiumGeoreference origin at its default for now, in the foothills outside Denver.
5Save your level to its own sub-folder in your project. Name the sub-folder "SubLevelsTutorial" and the level "SubLevelsTutorialMain". This level will be the Persistent Level going forward. We will be adding several more levels during this tutorial, and its helpful to keep them all together in a folder.
At this point, you should be able to see the picturesque foothills of Denver under a beautiful blue sky.

We will set up our first sub-level in the nearby city of Denver.
1Add Aerometrex Denver High Resolution 3D Model to the level using the Cesium ion Assets panel (Window -> Cesium ion Assets). If you don't see it in the list, visit its page in the Asset Depot and click the Add to my assets button. Then return to Unreal Engine and refresh the Cesium ion Assets panel.
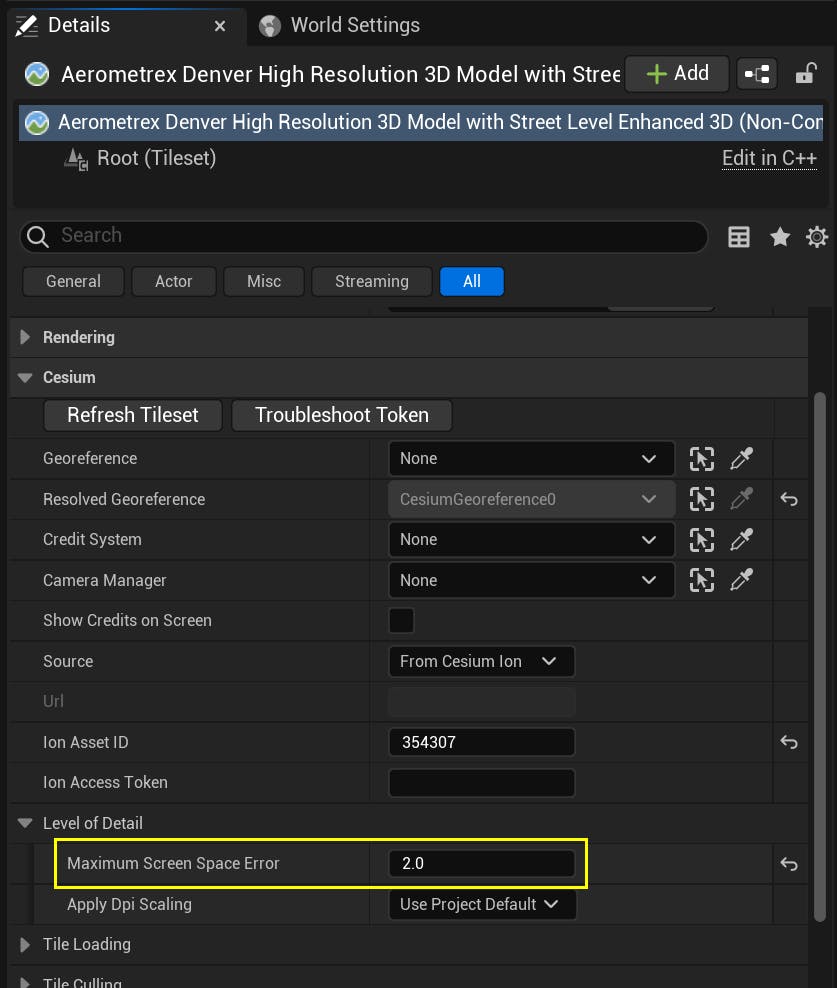
2Click the Aerometrex Denver High Resolution 3D Model tileset in the Outliner and in the Details panel change the Maximum Screen Space Error property (under Cesium -> Level of Detail) to 2.0 so that the model is rendered with more detail.
3Double-click the newly-created Aerometrex Denver tileset in the Outliner to zoom to it. Then manually fly the viewport camera toward the model to an area that looks interesting, such as the roof of a tall building.
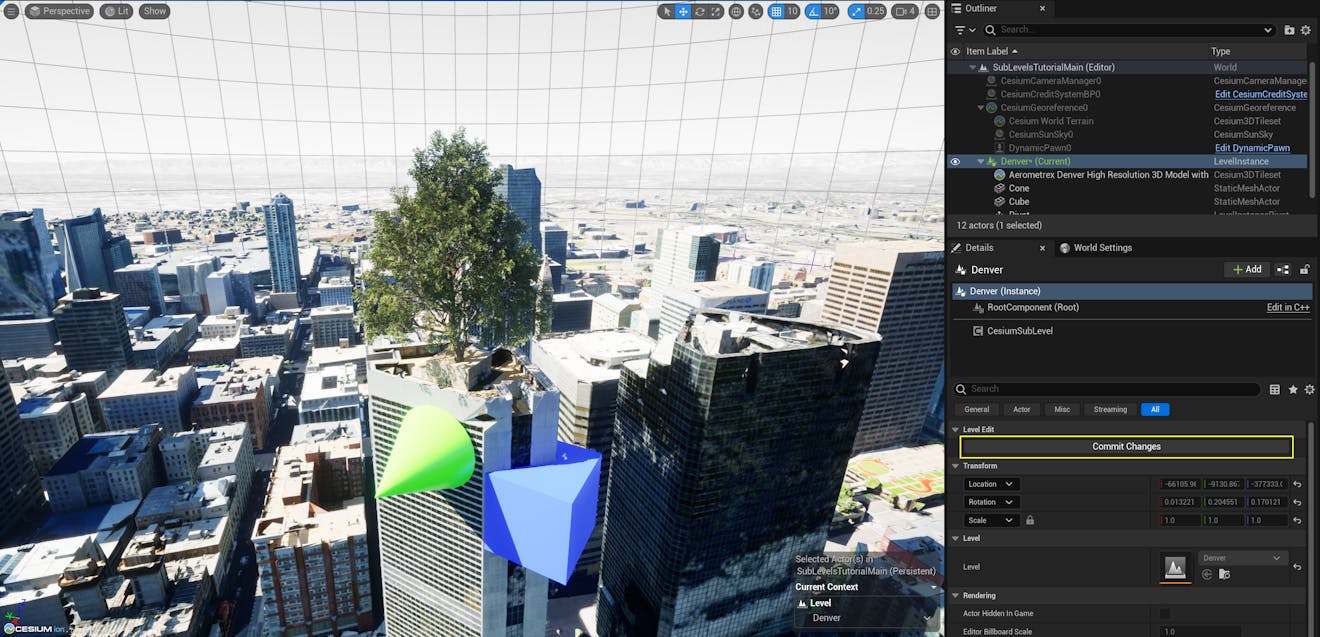
4Add some objects in this area. For example, add some cones and cubes, or some foliage.
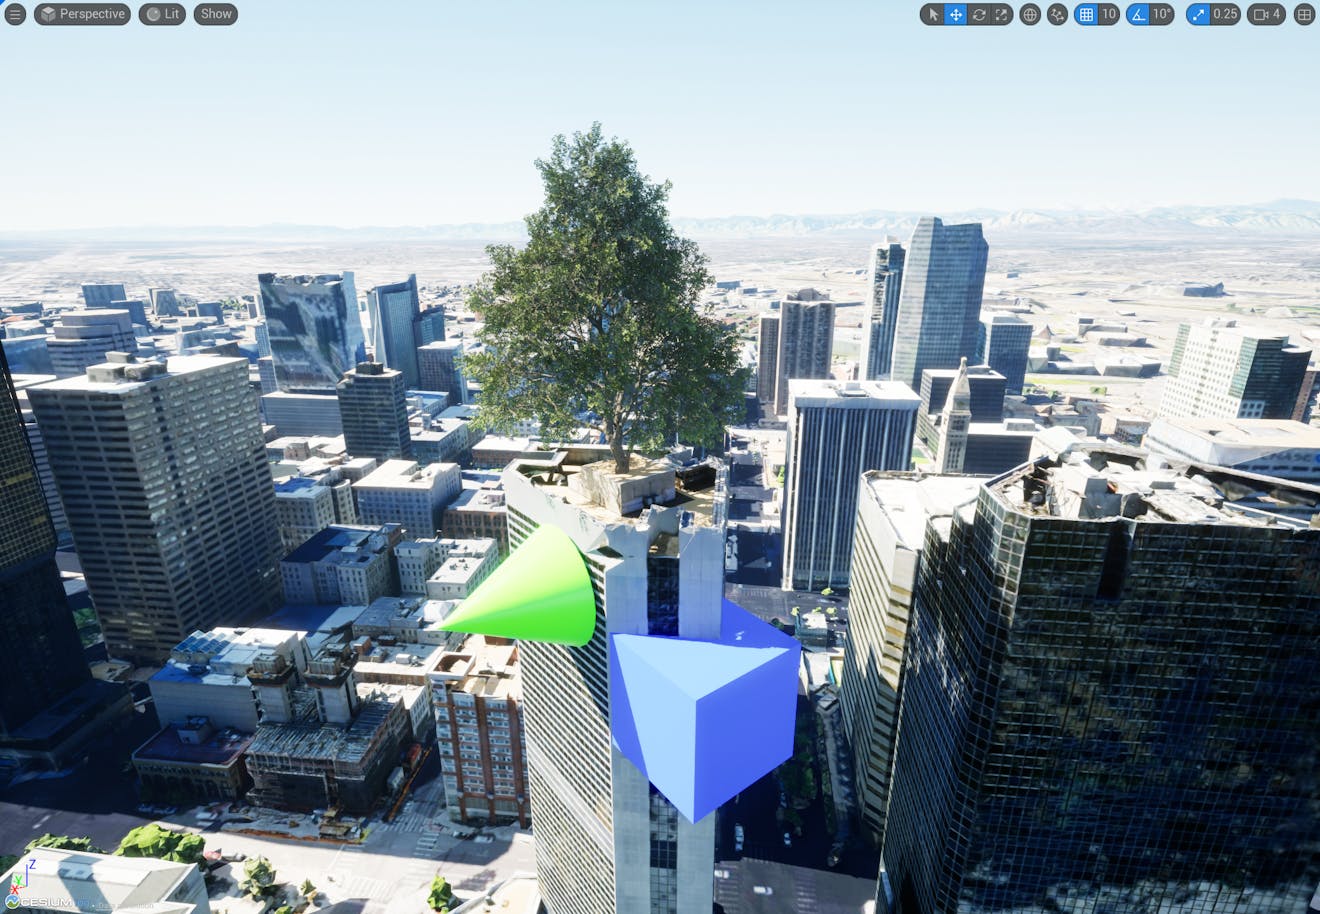
A building in Denver decorated with a green cone, a blue cube, and an unlikely tree.
1In the Outliner, select all of the objects you added in the step above, plus the Aerometrex Denver tileset itself. Hold down CTRL to select multiple objects.
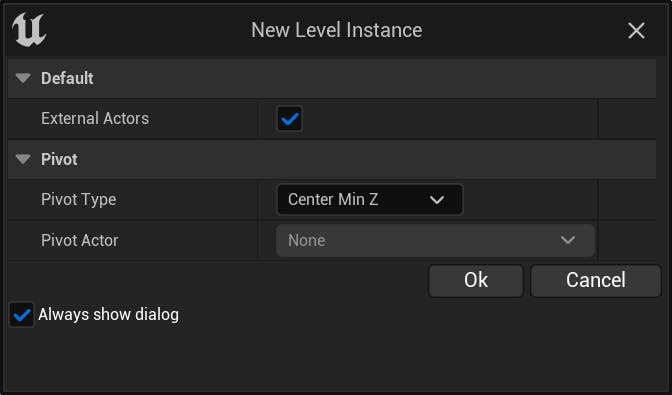
2Right-click on one of them, and then choose Level -> Create Level Instance. Accept the default settings and click Ok.
3When prompted to save the new sub-level, put it in the same sub-folder that you created above and name it "Denver".
Unreal extracts all of the selected Actors from the persistent level and puts them in a new Denver sub-level. It then creates a LevelInstance Actor that references that newly-created sub-level. The next step is to turn this into a Cesium sub-level. To do that, we add the CesiumSubLevelComponent to it.
4Select the Denver level instance in the Outliner.
5Clik Add, then select Cesium Sub Level.
The CesiumSubLevelComponent has its own Origin Latitude, Longitude, and Height properties, similar to the CesiumGeoreference. It also has a Load Radius property. The idea is that when the player (more on this later) moves inside the Load Radius, the CesiumGeoreference will adopt this sub-level's origin and the content inside it will become visible. When the player moves back outside the Load Radius, the level will be unloaded.
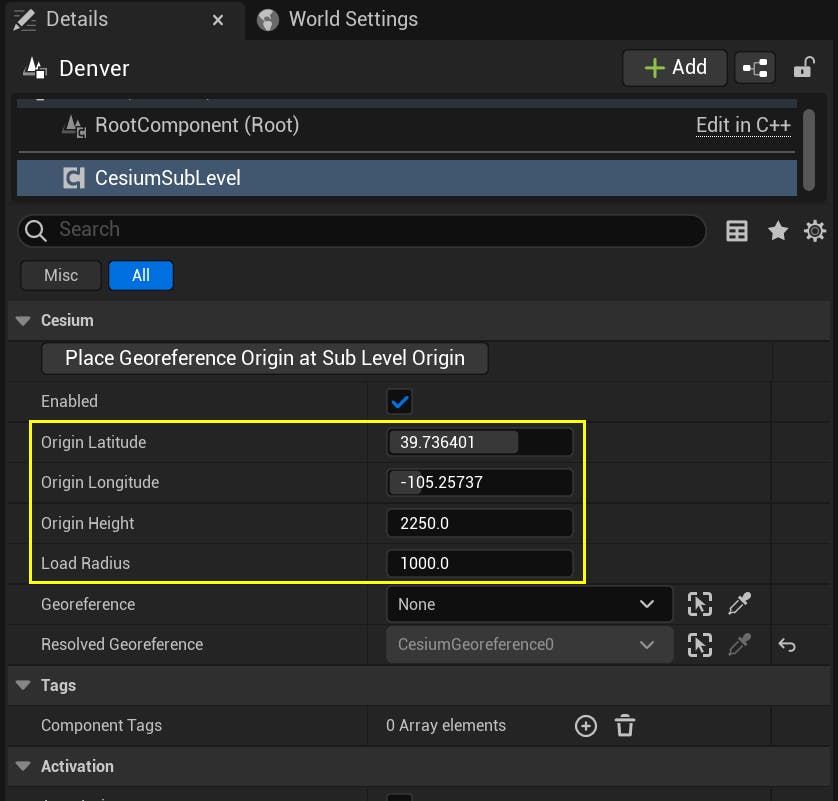
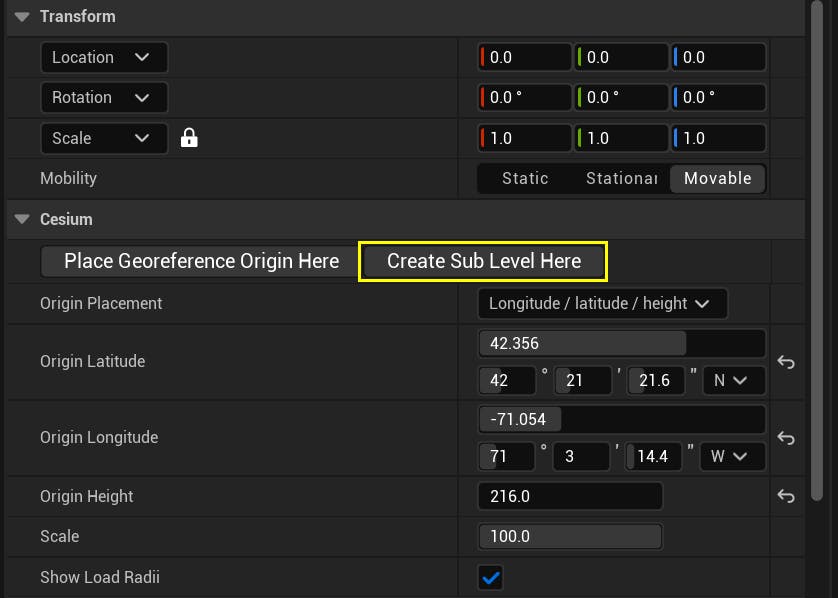
6The Load Radius is relative to the specified origin, which is initially inherited from the CesiumGeoreference, and is therefore back in the foothills. Let's move the origin here. Move the viewport camera near the center of your Denver design and click the Place Georeference Origin Here button to move the origin to the camera's current location.
7Because the sub-level contains a Cesium3DTileset (the Denver photogrammetry), Cesium for Unreal needs to modify the sub-level in order to move the georeference origin. Thus, after pressing Place Georeference Origin Here in the step above, the sub-level will enter "Edit" mode, causing all of the content outside the sub-level to turn grey. Press the Commit Changes button in the Denver level instance's Details panel to save these sub-level changes and return to the persistent level.
8Change the Load Radius to 10000 (10 kilometers) so that it encompasses the Aerometrex Denver tileset, and so that our sub-level is loaded as we approach it.
A wireframe sphere is visible in the distance, showing the volume that the player must enter in order to activate this sub-level.
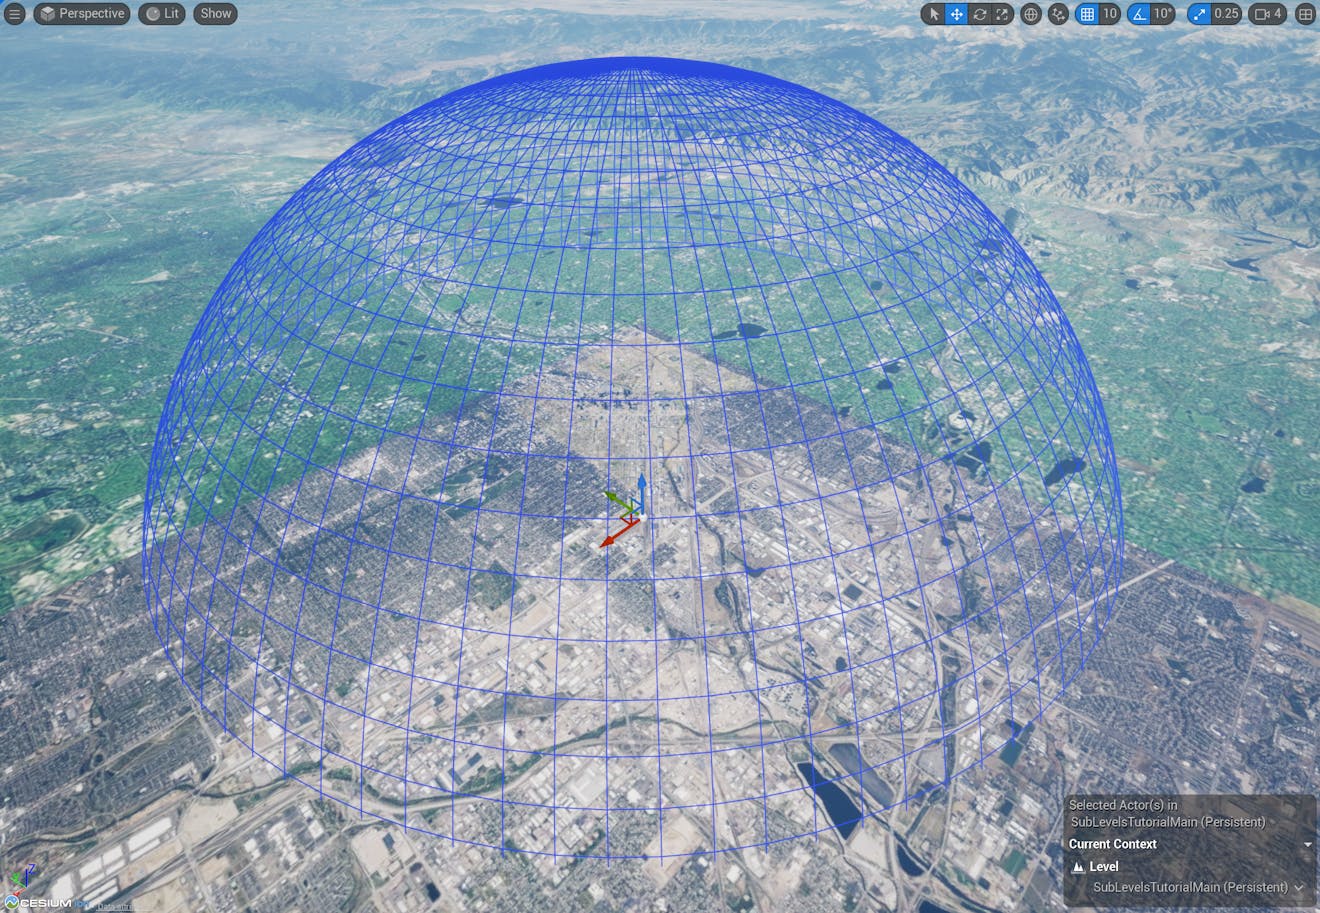
A wireframe sphere indicates the Load Radius of a sub-level. It is not visible in-game.
At this point we can Play-in-Editor and fly from the foothills where we start, directly East toward Denver. When we get within 10km of the center, the Denver sub-level will load, including the photogrammetry model and the decorations we added to the building. When we move away again, the sub-level will unload.
Now let's add a second sub-level in a different location.
We are going to create our second sub-level in Boston. Before we can do that, we need to move the Editor viewport camera to Boston. We could do that by manually flying the camera there, but that would take awhile and, when we arrive, the camera controls would behave strangely because the Unreal Editor is trying to maintain its usual Z-up orientation even though Boston is tilted sideways relative to a coordinate system back in Denver.
Instead, we will use the CesiumGeoreference.
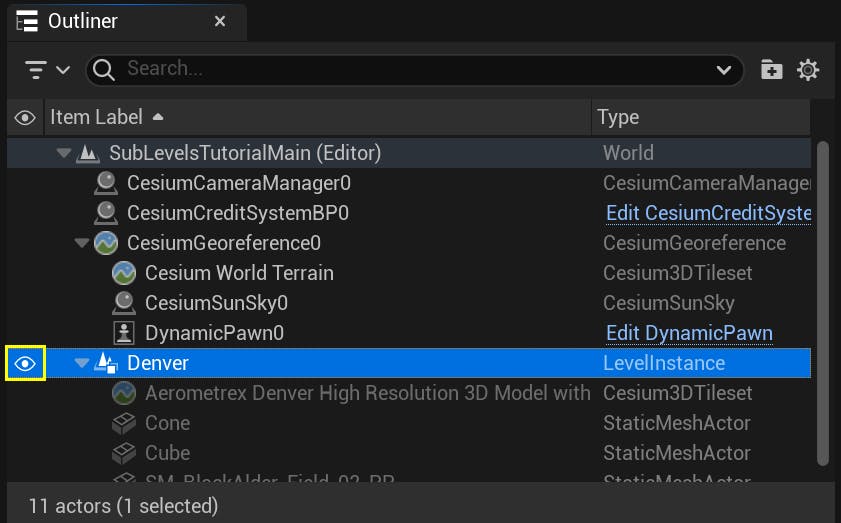
1Disable the Denver sub-level by clicking the "eye" icon next to it in the Outliner. The Denver Photogrammetry and all of the other objects in the Denver sub-level will disappear.
It is essential that we disable the Denver sub-level before changing the CesiumGeoreference origin; otherwise, we'll be unintentionally changing the origin of the Denver sub-level, too! If you accidentally forget to do this before changing the CesiumGeoreference origin, choose Edit -> Undo (or press Ctrl-Z) to undo the origin change.
2Click the CesiumGeoreference in the Outliner and set the origin properties as follows:
- Origin Latitude: 42.356
- Origin Longitude: -71.054
- Origin Height: 216.0
The view should switch to Boston.
3Create a new sub-level at this location by selecting the CesiumGeoreference and clicking Create Sub Level Here.
4When prompted, name the new sub-level Boston and put it in the same folder as the Denver sub-level.
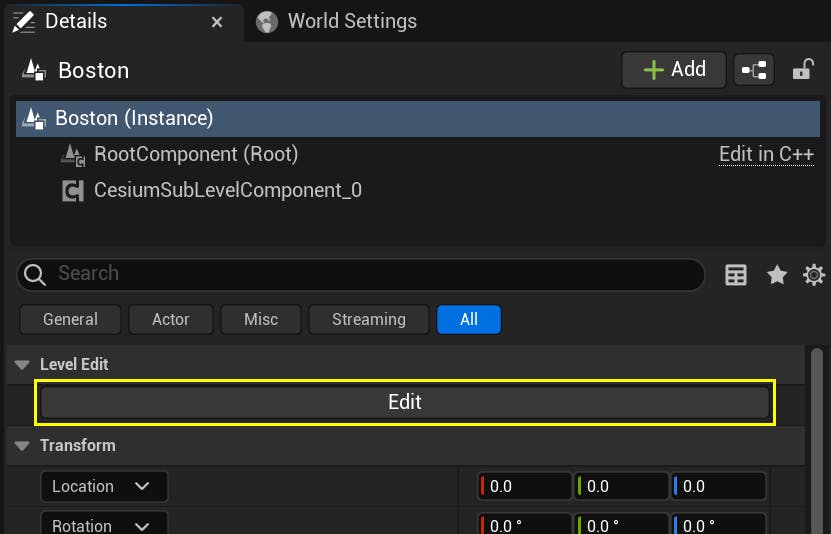
5Click the newly-created Boston sub-level and then click Edit to modify the sub-level.
6Using the Cesium ion Assets panel (Window -> Cesium ion Assets), add the Nearmap Boston Photogrammetry tileset to the sub-level. If you don't see it in the list, visit the tileset's Asset Depot page and click Add to my assets. Then, return to Cesium for Unreal and refresh the Cesium ion Assets panel.
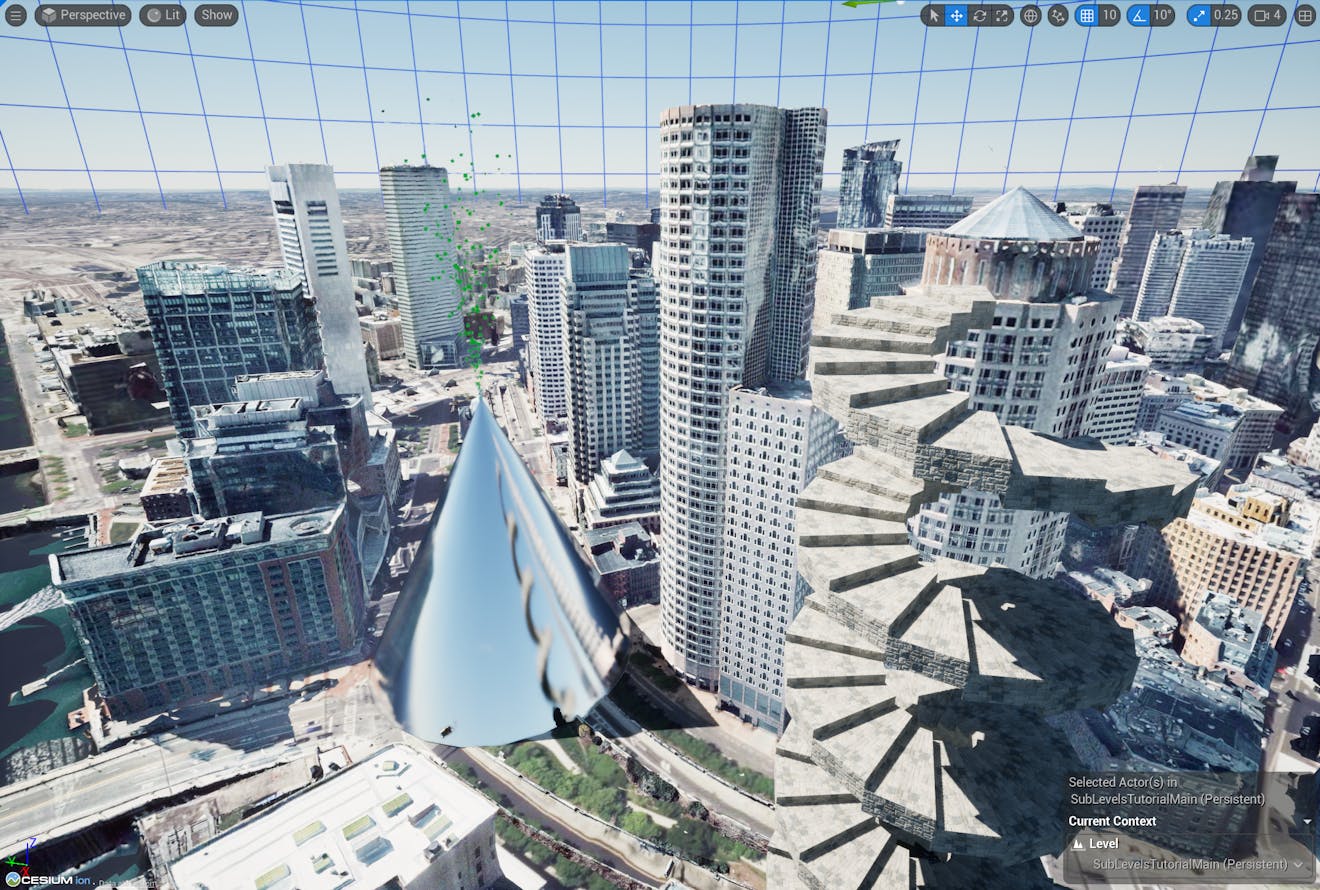
7Add some more Actors around Boston. Here, just for fun, we've added a chrome cone emitting some particles and a nifty spiral staircase.
Feel free to add more sub-levels at locations that interest you by repeating the steps above. It is not necessary to add a photogrammetry tileset to each location.
Only one Cesium sub-level can be active at any given time. This is true both in the Editor and in-game.
In the Editor, click the "closed eye" icon next to a sub-level in the Outliner in order to switch to that sub-level. All other sub-levels will automatically be deactivated.
Note that activating a sub-level changes the coordinate system of the Unreal world (by changing the CesiumGeoreference origin), but it does not change the location of the Editor viewport camera. It's often helpful to double-click the sub-level Actor to zoom to it after activating it.
Clicking the "eye" icon on an already-active sub-level will deactivate it. Be sure to deactivate all sub-levels before changing the CesiumGeoreference! Otherwise, all objects in the sub-level will move to the new location.
In-game (or in play-in-Editor), a sub-level is automatically activated by the CesiumOriginShift component. The DynamicPawn Actor includes this component by default.
Whenever the Actor with this component enters the sub-level's Load Radius, the sub-level is activated. When it exits the Load Radius, the sub-level is deactivated. If the Actor is inside multiple sub-levels, only the closest sub-level is activated.
Only one Actor with a CesiumOriginShift component should be active at any given time. You can set the component's Mode property to Disabled if necessary.
Press Play, and try flying the DynamicPawn all the way into space and then finding your sublevels again. You may need a map! Notice that the entire world is explorable, and the transition into a sub-level is seamless, even though each sub-level has its own coordinate system.
The following tips may help you as you build with sublevels.
Avoid changing the CesiumGeoreference origin while a sub-level is active.
- It will cause all objects in the sub-level to move relative to the globe. If you accidentally change the georeference origin, you can use Ctrl-Z/Undo.
- An exception to this rule is the Place Georeference Origin Here button on the CesiumSubLevel component. This button will move the origin while preserving the relationship between the globe and the objects in the sub-level.
You can move placed Actors between sub-levels.
- This is useful if you have accidentally placed an object in the wrong sub-level.
- To move an object from the persistent level to a sub-level, select it in the persistent level and choose Edit -> Cut. Then click on the sub-level's Level Instance Actor, activate it if it's not already active, click Edit, and then choose Edit -> Paste. Finally, select the Level Instance Actor again and click Commit to save the changes.
- To move an object from a sub-level to the peristent level, select the sub-level's Level Instance Actor and click Edit. Select the Actor and choose Edit -> Cut. Select the Level Instance Actor again and click Commit to save the sub-level. Now that you're back in the persistent level, choose Edit -> Paste.
- Moving objects between sub-levels is a little trickier because the sub-levels have different coordinate systems. First, move the object to the persistent level using the procedure above. Then, add a CesiumGlobeAnchor component to the Actor. Activate the new sub-level, and the CesiumGlobeAnchor component will maintain the Actor's position relative to the globe. Finally, remove the CesiumGlobeAnchor component from the Actor and move it into the new sub-level using the procedure above.
Georeferenced sublevels are designed for non-georeferenced Actors.
- The purpose of georeferenced sublevels is to georeference actor types that cannot be georeferenced in the typical ways described in the Placing Objects on the Globe tutorial. As such, you should avoid adding a CesiumGlobeAnchor to Actors in a sub-level.
In the global-scale world provided by Cesium for Unreal, it's easy to become lost when aimlessly flying around. Fortunately, using the georeferencing system built into Cesium for Unreal, it is straightforward to not only determine your location on the globe, but also to move towards a target location. The CesiumFlyTo component, which is attached by default to the DynamicPawn, comes with built-in functionality to fly between locations.
Check out the next tutorial in the series to learn how to transition between global locations.