Hide Parts of Tilesets with Cartographic Polygons
With the Cesium Cartographic Polygon actor, you can define areas of a tileset to hide, or apply other material effects. Cartographic Polygons can be added to one or multiple tilesets with a Cesium Polygon Raster Overlay component.
This powerful tool aids in building levels with overlapping tilesets, defining custom water areas, and more. Read on to learn how to use Cartographic Polygons.

Here, a Cartographic Polygon is used to hide Cesium World Terrain and Cesium OSM Buildings where they overlap with the Aerometrex Denver tileset. To check out this scene and other helpful examples, download the Cesium for Unreal Samples project.
While Cartographic Polygons are helpful for material-based changes like clipping, they do not affect physics. If you are using physics as well as clipping with Cartographic Polygons, be aware that you can still collide with the hidden parts of a tileset.
You’ll learn how to:
- Create and edit Cesium Cartographic Polygons
- Connect Cartographic Polygons with tilesets by using Cesium Polygon Raster Overlays
- Clip out (hide) areas of a tileset
- Unreal Engine (4.26 or later)
- The Cesium for Unreal plugin (1.6.0 or later)
- A Cesium ion account. If you don’t have one, you can log in with your Epic Games account.
- Know how to set up a basic Cesium for Unreal application. Check out our Cesium for Unreal Quickstart guide for instructions on starting with the Cesium for Unreal plugin.
Cesium Cartographic Polygon is an actor with a Spline Component and a Globe Anchor component. The Globe Anchor component keeps the Cartographic Polygon properly geolocated in your level. The Spline Component is used to define an area, which is then rasterized for use in a Raster Overlay.
By default, Cartographic Polygons will clip out, or hide, sections of a tileset. You can also use them to define other material effects.
1Add a Cesium Cartographic Polygon actor to the level. You can find the actor by searching in the Place Actors panel and dragging it into your level, or add it in one click from the Cesium Quick Add panel.
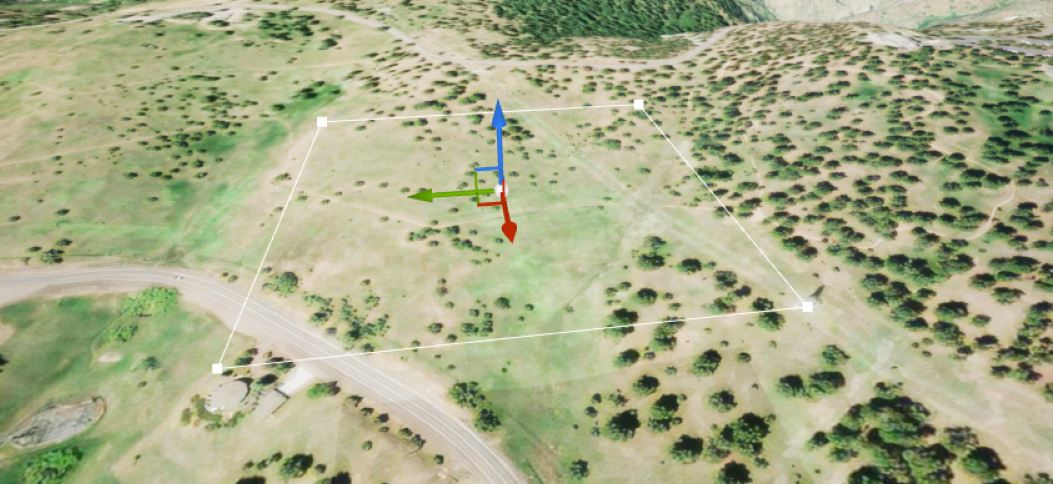
The actor looks like a square spline with four control points in a closed loop. Currently, the spline can only be linear, and does not allow for curves. This allows for faster rasterization.
2To move one of the points, select the point by clicking on it in the viewport. Use the transform gizmo to change its position.
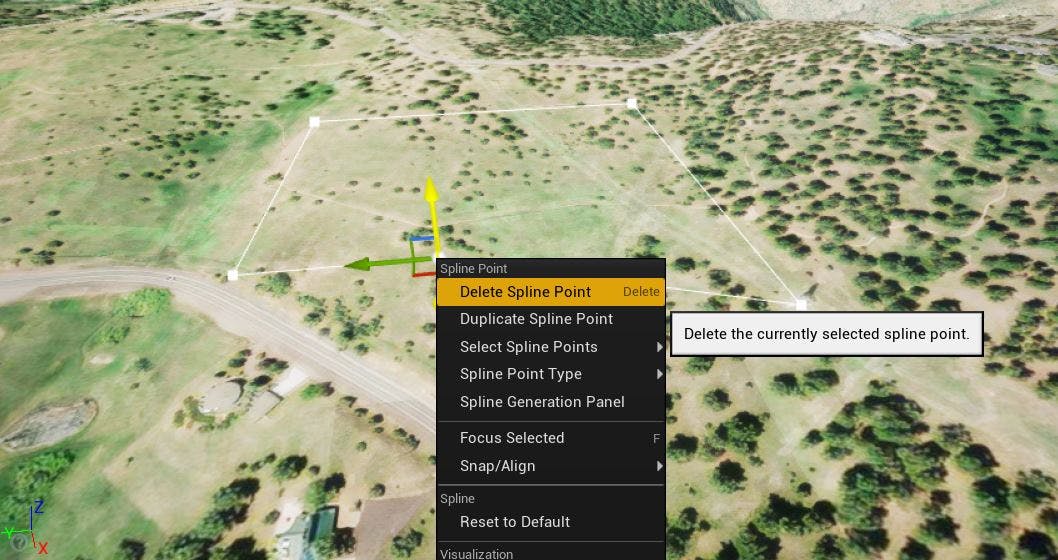
3To add a new point, hold down the alt key on your keyboard, then move a point while keeping the alt key pressed. A new point will be created. You can also right-click on the spline point and select “Duplicate Point”.
4To remove a point, right-click on the point and select “Delete Point”.
Some more tips and tricks for creating polygons:
- The Cartographic Polygon is 2.5D, so it will affect everything below and above a spline point. As such, it will not work for vertical clipping, like cutting out the windows on the side of a building. The precise Z location of a spline point does not matter, only the X and Y location.
- For the most accuracy in placing your polygon, try to keep the spline points as close as possible to the surface of the tileset.
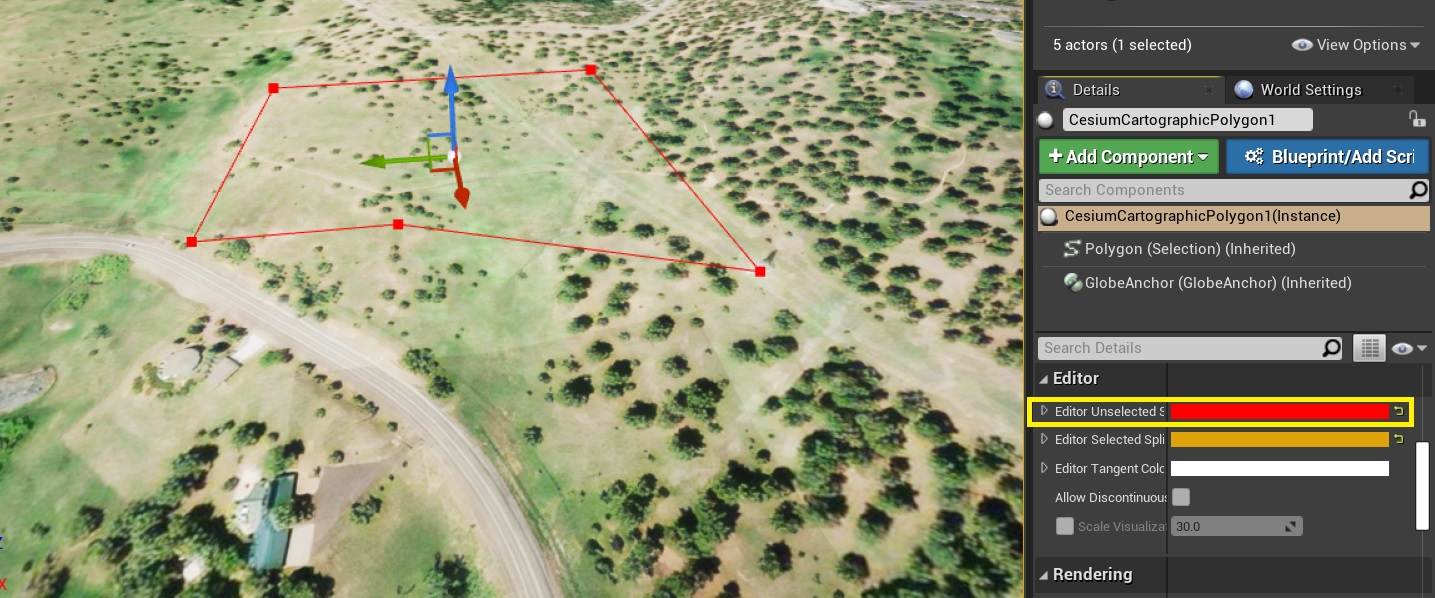
- You can change the color of the spline in the Details panel. Look for the Editor Unselected Spline Segment Color parameter.
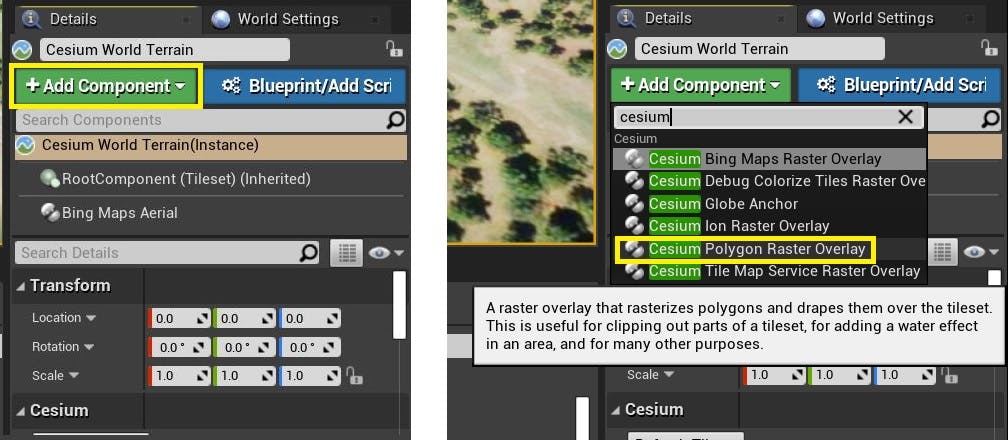
1Select the tileset that you wish to apply the polygon to. This example uses Cesium World Terrain.
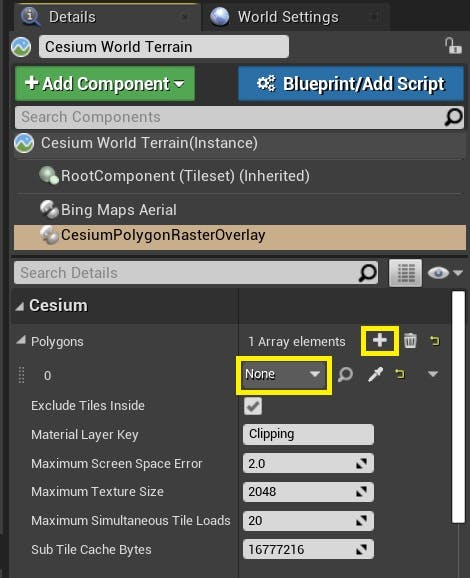
2In the Details panel, add a new CesiumPolygonRasterOverlay component.
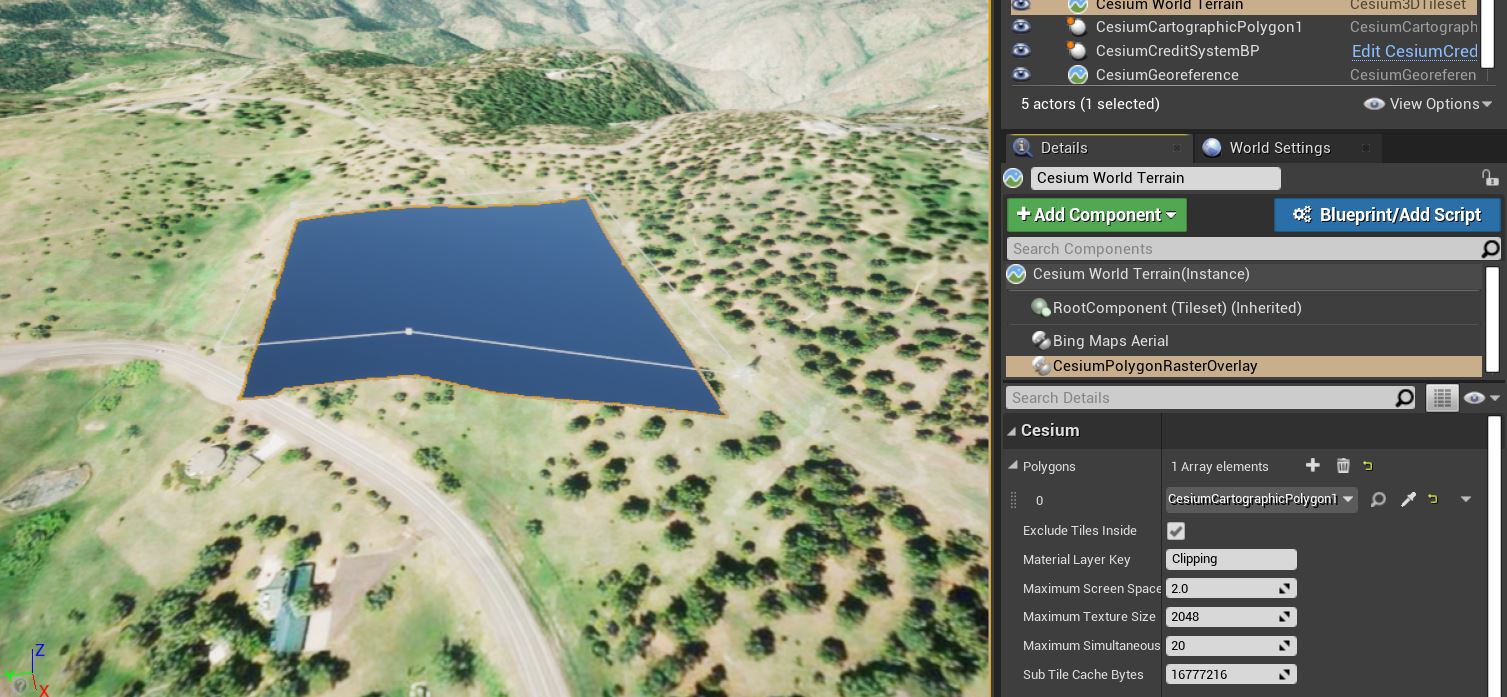
3In the settings for this component, you will see an array called Polygons. To connect a Cartographic Polygon to the tileset, click the plus button to add a new array element. Then, use the new dropdown that appears to select your polygon.
The tileset should automatically update, and hide the parts of the tileset mesh within the boundaries of the polygon you created.
If you change the shape of the polygon, or the tileset does not immediately update, you’ll need to refresh the tileset manually to see the changes. You can refresh a tileset manually by pressing the Refresh Tileset button found in the Details panel.
The same polygon can be used with multiple tilesets. Likewise, a tileset can reference multiple polygons by adding more elements to the Polygons array.
How a polygon will be used on a tileset is determined by the tileset’s Polygon Raster Overlay component.
Take a look at the available parameters on a Cesium Polygon Raster Overlay component. There are two main parameters that impact how the polygons on this overlay are used: Exclude Tiles Inside and Material Layer Key.
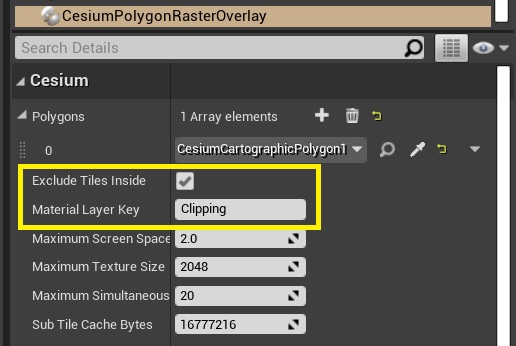
Exclude Tiles Inside is designed for use with clipping. If this setting is enabled, any tiles that are entirely inside of the polygon will not be loaded at all, which can improve performance. If you are using this overlay for something other than clipping, you’ll likely want to disable this setting. Otherwise, tiles inside the polygon will not render.
The Material Layer Key connects the overlay with a specific part of the tileset’s material. If you change this key to something else, it won’t work until you create a material that uses the new key, and apply that material to the tileset.
To learn about material editing and using Cartographic Polygons for other effects, visit the Editing Tileset Materials tutorial.
Need help, or have questions about Cartographic Polygons? Visit the Community Forum.
What are you creating with Cesium for Unreal? Share your work with us on Twitter by tweeting @CesiumJS.