Build for Quest
Packaging your project to run standalone on a Meta Quest has its challenges. More often than not, rendering compromises will be required to have an acceptable experience, and how you craft and design applications becomes a crucial part of the process. In this tutorial we will cover packaging a VR application for Meta Quest and implementing a few optimizations to improve performance.
It should be noted that not every VR application can run on Quest standalone. There are practical limits to the amount of draw calls and triangles that can be rendered in a scene, as outlined in the Oculus developer documentation, and shader complexity should be carefully monitored.

Matterhorn visualized in Cesium for Unreal.
You’ll learn how to:
- Build the application for Meta Quest 2
- Use optimization features in Cesium For Unreal
- Android Studio 4.0
- Cesium For Unreal v1.16.1 or greater
Clone or download the project files here to get a more in-depth look at the project and solutions provided. Refer to the README for more information on the blueprints and levels corresponding to this tutorial, as well as headset compatibility.
The biggest challenge when building a mobile application with 3D Tiles is that they are streamed geometry. Many rendering features in Unreal are centered around baked (precomputed) lightmaps or reflections and cannot be leveraged on 3D Tiles. For example, dynamic lights, which are more expensive, will be needed for lighting the terrain.
This VR tutorial project is particularly demanding because we are displaying Cesium World Terrain with rapid movements, thus requiring a large number of 3D Tiles and geometry to be loaded.
It is crucial to leverage as many optimizations as possible to get the most performance out of your packaged application. Several mobile applications do this by using few or no dynamic lights and unlit shaders when possible. Ultimately, achieving a higher frame rate through strategic tradeoffs will produce a better experience than high-quality visuals with subpar frame rate.
We will first perform a basic setup to ensure our application runs properly in VR.
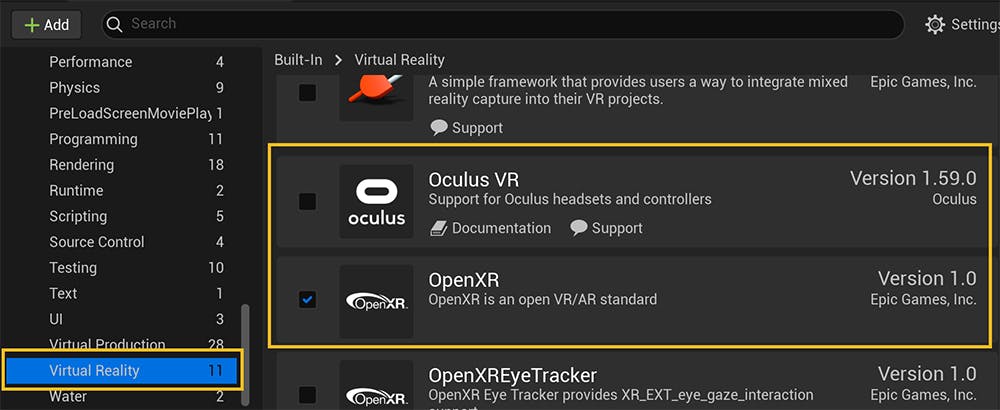
For this tutorial series we use the OpenXR plugin rather than the Oculus VR plugin. To set the plugins, open Edit > Plugins, and then in the Virtual Reality category make sure that OpenXR is checked and Oculus VR is unchecked.
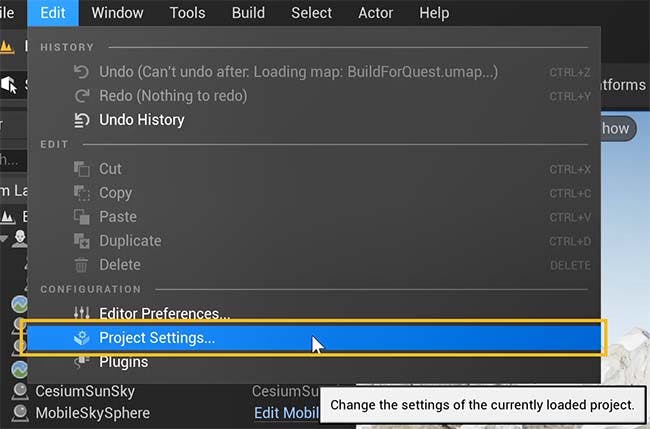
Next, open Edit > Project Settings to access all of the settings we will be changing in this tutorial.
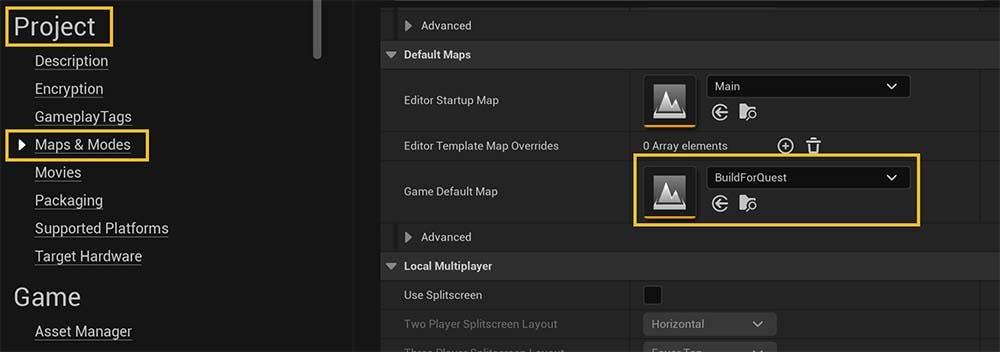
1The default map should be set to determine which level is loaded when the application starts. We set ours to the BuildForQuest level:
Edit > Project Settings > Project > Maps & Modes > Game Default Map
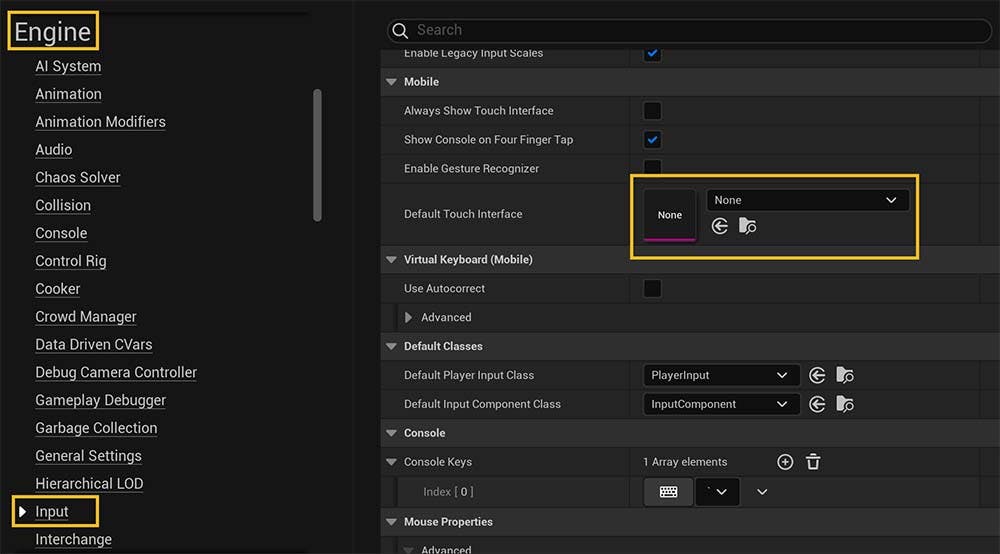
2The Default Touch Interface won’t be needed in a VR application, so we should clear its value so that it is empty.
Edit > Project Settings > Engine > Input > Mobile > Default Touch Interface
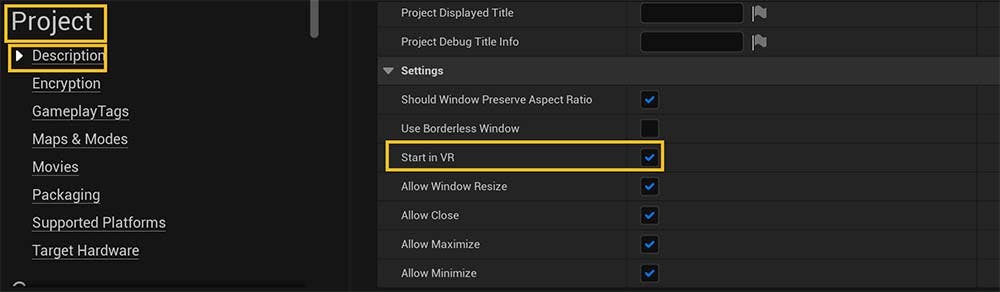
3To be sure that the application starts in VR, set Start in VR to checked.
Edit > Project Settings > Project > Description > Settings > Start in VR
Next, we set up all of the required Android support to deploy APKs (Android Packages) to the Meta Quest.
1Follow all of the steps in this guide closely to download and set up Android Studio 4.0. Ensure that all steps were completed carefully before proceeding to the next step.
2Select the Configure Now button located in the project settings at:
Edit > Project Settings > Platform > Android
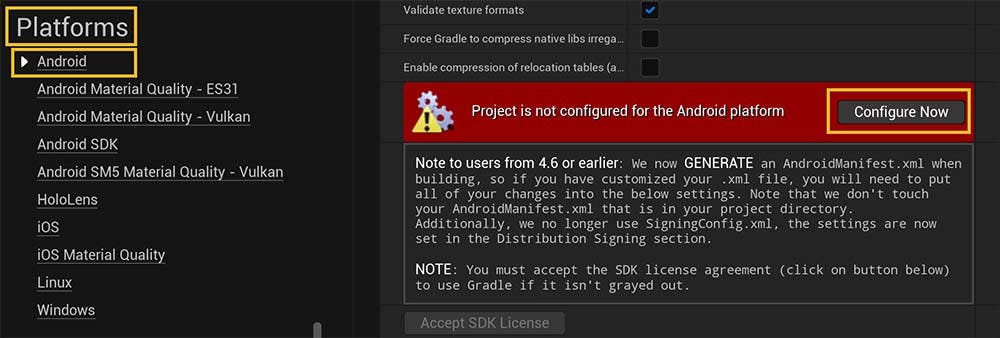
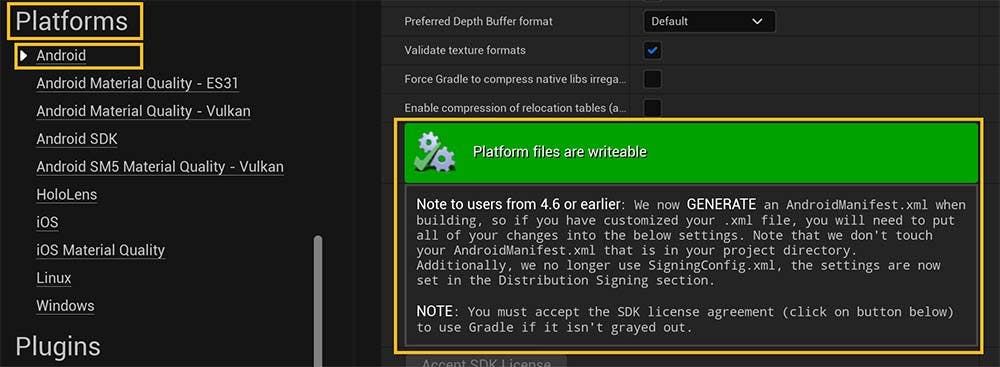
The popup then changes to:
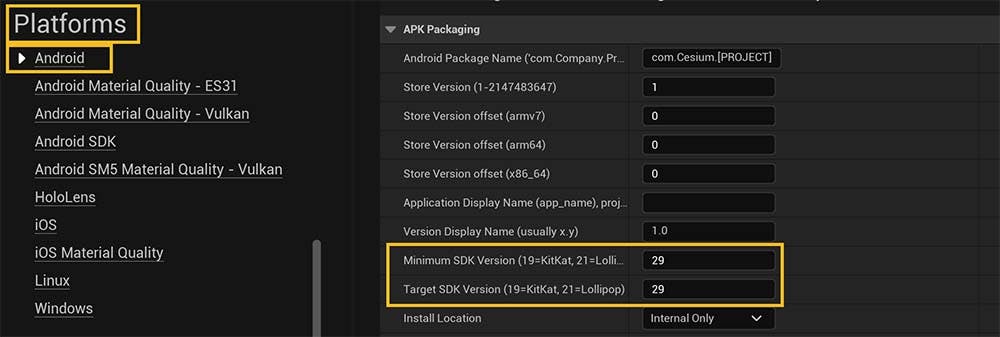
3Set the Minimum SDK Version and Target SDK Version to 29.
Edit > Project Settings > Platform > Android > APK Packaging > Minimum SDK Version
Edit > Project Settings > Platform > Android > APK Packaging > Target SDK Version
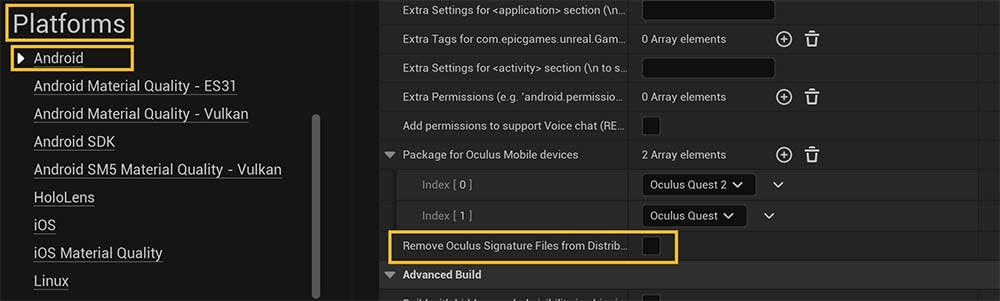
4Add “Oculus Quest” and “Oculus Quest 2” as two items into the Package for Mobile Devices array so that it looks like the image below:
Edit > Project Settings > Platform > Android > Advanced APK Packaging > Package for Oculus Mobile devices

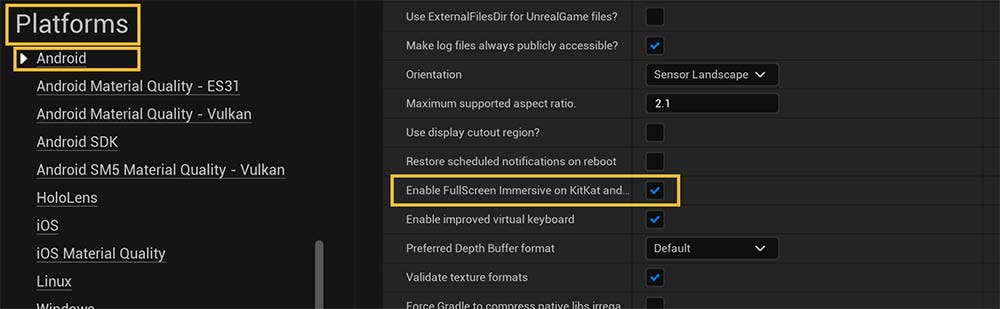
5Enable Fullscreen Immersive on KitKat by selecting the checkbox.
Edit > Project Settings > Platform > Android > Build > Enable Fullscreen Immersive on KitKat and above devices
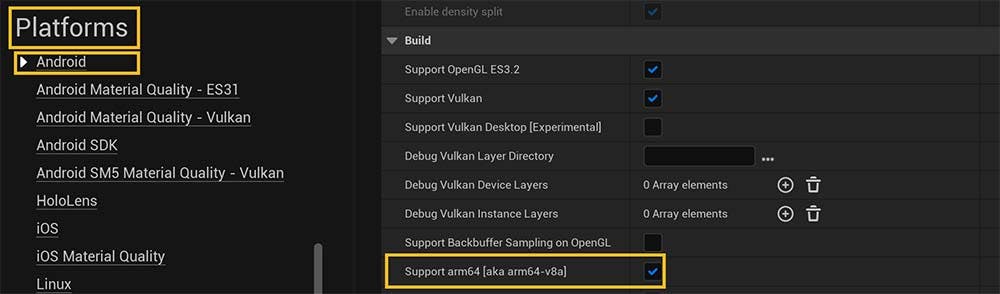
6Enable Support arm64.
Edit > Project Settings > Platform > Android > Build > Support arm64
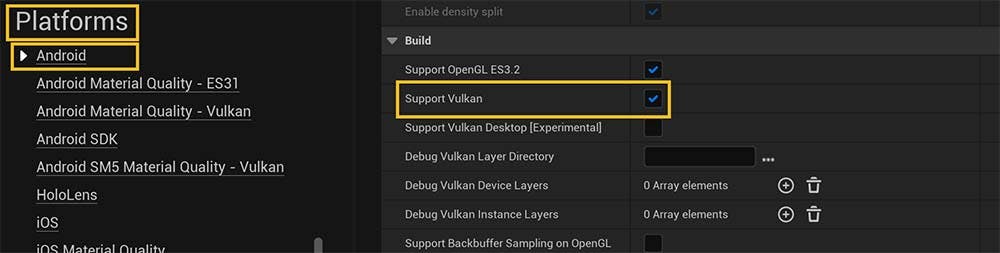
7Enable Support Vulkan.
Edit > Project Settings > Platform > Android > Build > Support Vulkan
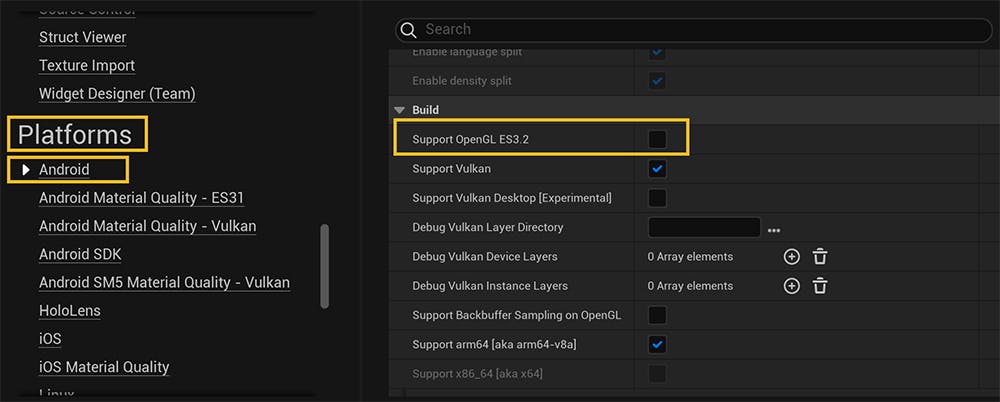
8Disable Support OpenGL ES3.2.
Vulkan RHI is the preferable graphics API as it provides more performance and memory optimizations than OpenGL.
Edit > Project Settings > Platform > Android > Build > Support OpenGL ES3.2
9Verify that Remove Oculus Signature Files from Distribution APK is unchecked.
Edit > Project Settings > Platform > Android > Advanced APK Packaging > Remove Oculus Signature Files from Distribution APK
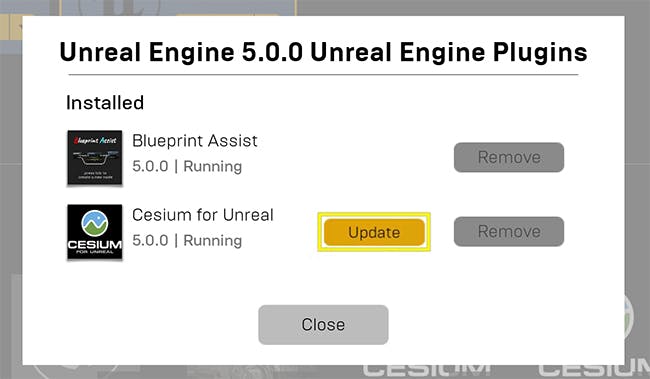
1Update the Cesium for Unreal plugin to the latest version to get the most up-to-date features.
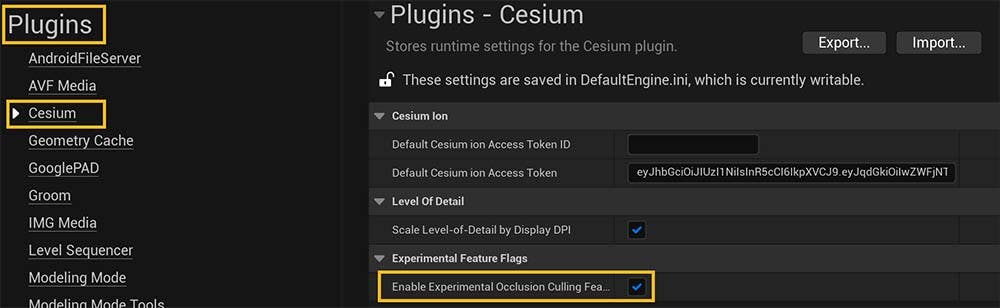
2Check Enable Experimental Occlusion Culling Feature. This feature will not render tiles when they are occluded by a large mountain or feature in front of the user. The default dynamic occlusion present with Unreal queries work on a per-actor basis making it incompatible with 3D Tiles as-is. This new experimental feature applies the results of Unreal’s occlusion checks on a more granular component level.
If you are interested in reading more about this experimental feature, see this GitHub issue. For more on Unreal Engine’s dynamic occlusion system, see the Unreal Engine documentation.
Edit > Project Settings > Plugins > Cesium > Experimental Feature Flags > Enable Experimental Occlusion Culling Feature
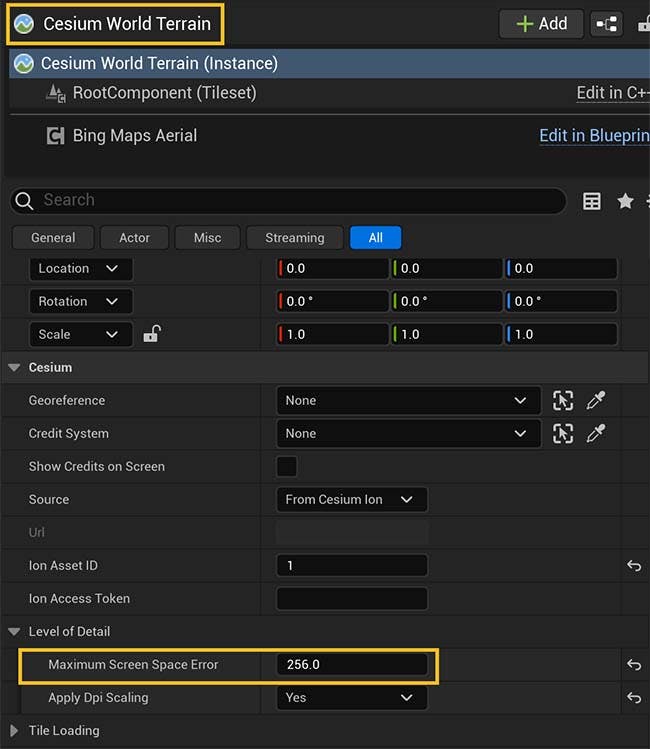
3Change the MaximumScreen Space Error on the Cesium World Terrain object on your level to a higher number, in our case 256. This number represents the maximum number of pixels of error when rendering this tileset. A low value will cause many tiles with a high level of detail to be loaded, causing a finer visualization of the tiles, while a higher value will cause a coarser but more performant environment.
Cesium World Terrain > Cesium > Level of Detail > Maximum Screen Space Error
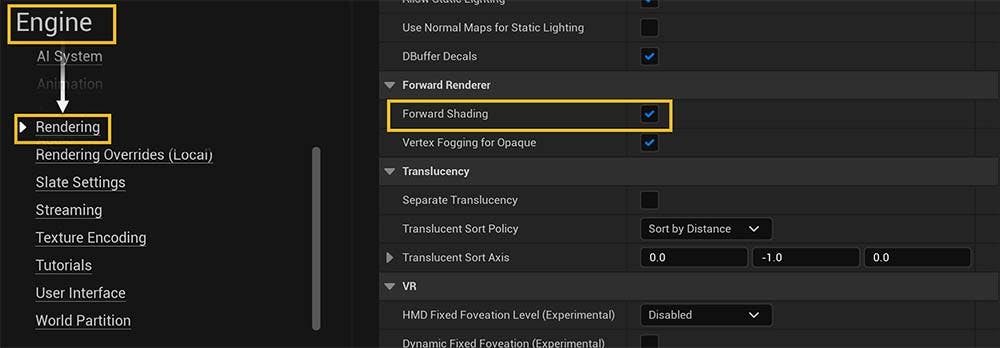
1Enable Forward Shading, which will provide a faster baseline performance and allow the use of MSAA.
If you are interested in forward shading and the forward renderer, see Unreal Engine's documentation and Meta's documentation.
Edit > Project Settings > Engine > Rendering > Forward Renderer > Forward Shading
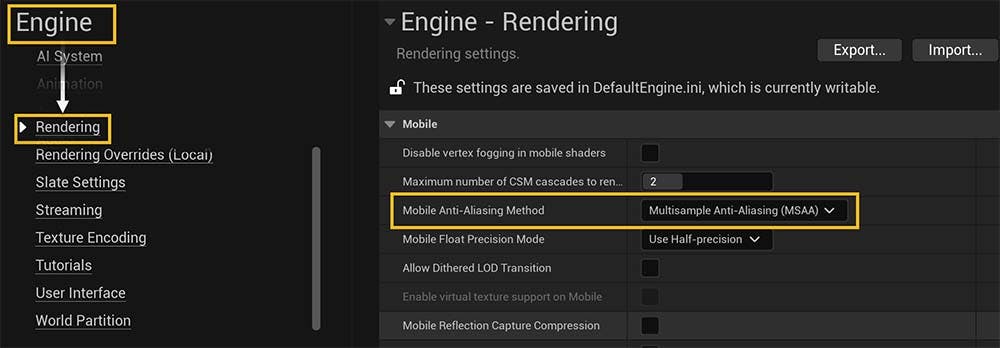
2Set the Mobile Anti-Aliasing Method to MSAA. Multisample anti-aliasing is preferred over other forms of anti-aliasing in VR applications because it mitigates blurriness from head movements.
If you are interested in multisample anti-aliasing performance on the Quest, see here for more information.
Edit > Project Settings > Engine > Rendering > Mobile > Mobile Anti-Aliasing Method
3Set the MSAA Sample Count to 4x MSAA. The sample count applies to both mobile and desktop applications.
Edit > Project Settings > Engine > Rendering > Default settings > MSAA Sample Count

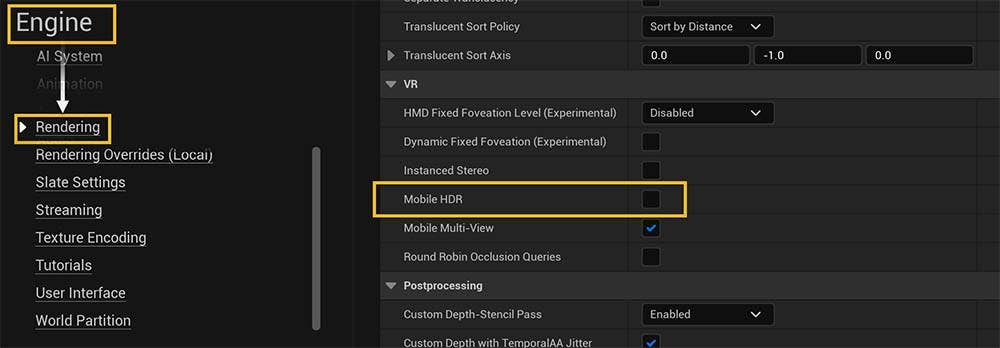
4Make sure Mobile HDR is disabled, as it interferes with MSAA and unnecessarily impacts performance.
Edit > Project Settings > Engine > Rendering > VR > Mobile HDR
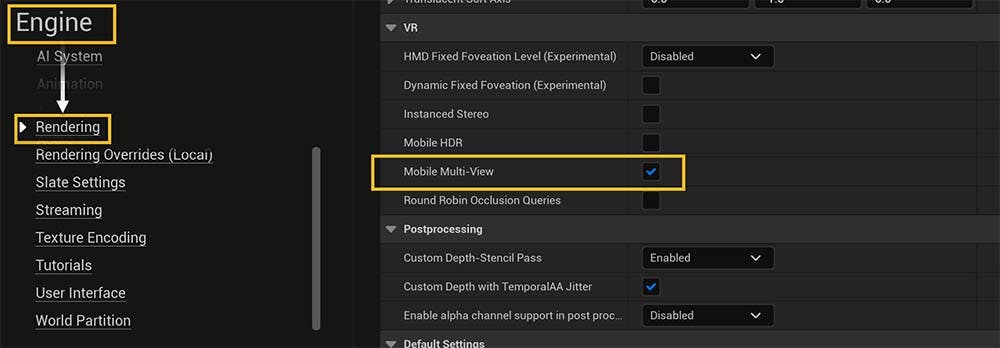
5Enable Mobile Multi-View, which allows for objects to be drawn in one eye and then copied to the other with appropriate offsets, rather than drawing each object twice (once per eye). This primarily reduces CPU usage.
If you are interested in mobile multi-view for the Quest, see here for more information.
Edit > Project Settings > Engine > Rendering > VR > Mobile Multi-View
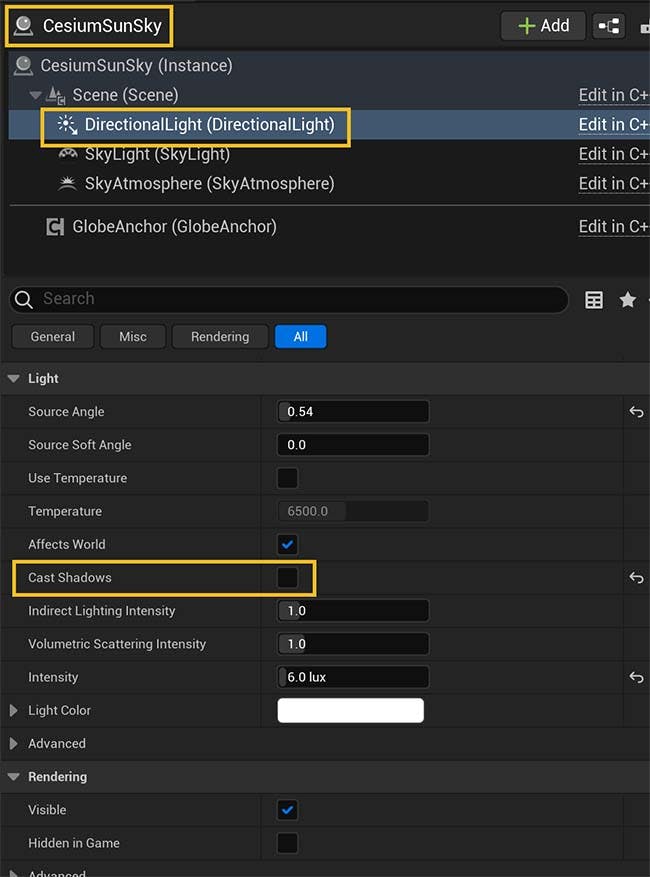
6(Optional) Disable Cast Shadows from Directional Lights in each scene. Cesium Sun Sky has a directional light component in which the setting is disabled. Depending on your lighting setup, it is an expensive operation that can be omitted.
CesiumSunSky > Details > Directional Light > Cast Shadows
Previewing the application on the Quest is a great way to quickly iterate through your changes and deploy to the device to debug.
1Enable developer mode on your Meta Quest. You may need to join an organization or create your own to do so.
2Plug in your Quest and select Allow when the popup for “Allow connected devices to access files?” appears.
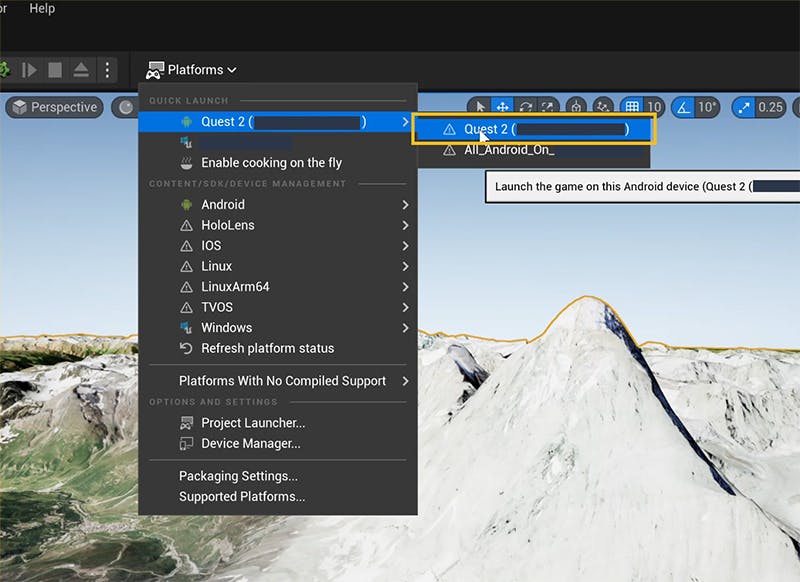
3Click on the Platforms button next to Play in editor to expand packaging settings. Then you should see your Meta Quest device available. Click on the device to build and run the application on the Quest.
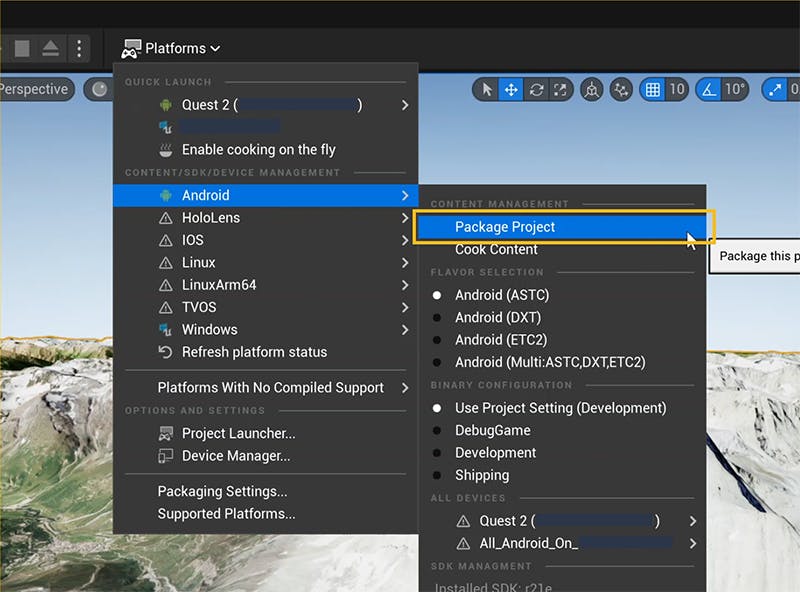
1When you are ready to package the APK and put it directly on to your Quest, package the project by clicking on Android > Package Project and select a directory to export your files.
Do not perform this step if there are any shaders compiling. Wait for all shaders to compile before continuing.
2Plug in your Quest and select Allow when the popup for “Allow connected devices to access files?” appears.
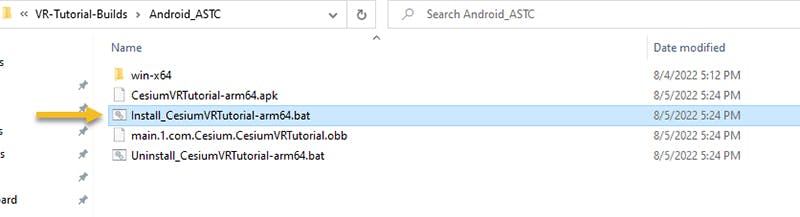
3When the project has completed packaging, navigate to the folder target and run the install.bat file. For the Cesium VR Tutorials, it is called "Install_CesiumVRTutorial-arm64.bat".
New features, techniques, and hardware are released at a rapid pace, meaning more optimizations can be made to further improve performance.
Application Space Warp is a powerful feature for Meta Quest that interpolates between frames, reducing the frame rate required for a smooth experience. It’s currently only available for Unreal 4.27. Once support is available for Unreal 5, we’ll be integrating it into this tutorial project.
Check out the next tutorial, Viewing the Globe, on how to scale the player and rotate the globe appropriately.