Placing Foliage on Cesium Tilesets
Unreal Engine’s Foliage Tool works on Cesium 3D tilesets like the Cesium World Terrain. In this tutorial, you’ll learn how to place plants and other meshes using this tool.
You’ll learn how to:
- Use the Foliage Tool with Cesium tilesets to build lush worlds
- Make sure that placed foliage stays in place, even if you change the Georeference
This is an intermediate-level project that builds on ideas from the prior Getting Started tutorials. If you haven’t read those, we recommend reviewing them before beginning this project. A good place to begin is the Cesium for Unreal Quickstart tutorial.
- Unreal Engine (at least 4.26 or later) and the Cesium for Unreal plugin are installed.
- Know how to create a level with the Cesium World Terrain and set up lighting.
- Understand how object placement with Cesium for Unreal works.
- Understand how to create and use a Sublevel.
1Start with a scene with Cesium World Terrain and a system of lighting, like CesiumSunSky. If you are using the Cesium for Unreal Samples, you can duplicate the scene 01_CesiumWorld. Alternatively, the Cesium for Unreal Quickstart outlines the process for setting up such a scene.
2Now that you have a scene, it’s time to import foliage assets. Use your own, or import premade assets from a source such as Quixel or the Unreal Engine Marketplace. This tutorial uses the Morning Glory and Sunflower from Quixel.
Want to learn more about using Quixel with Cesium for Unreal? Visit the Adding Quixel Assets tutorial.
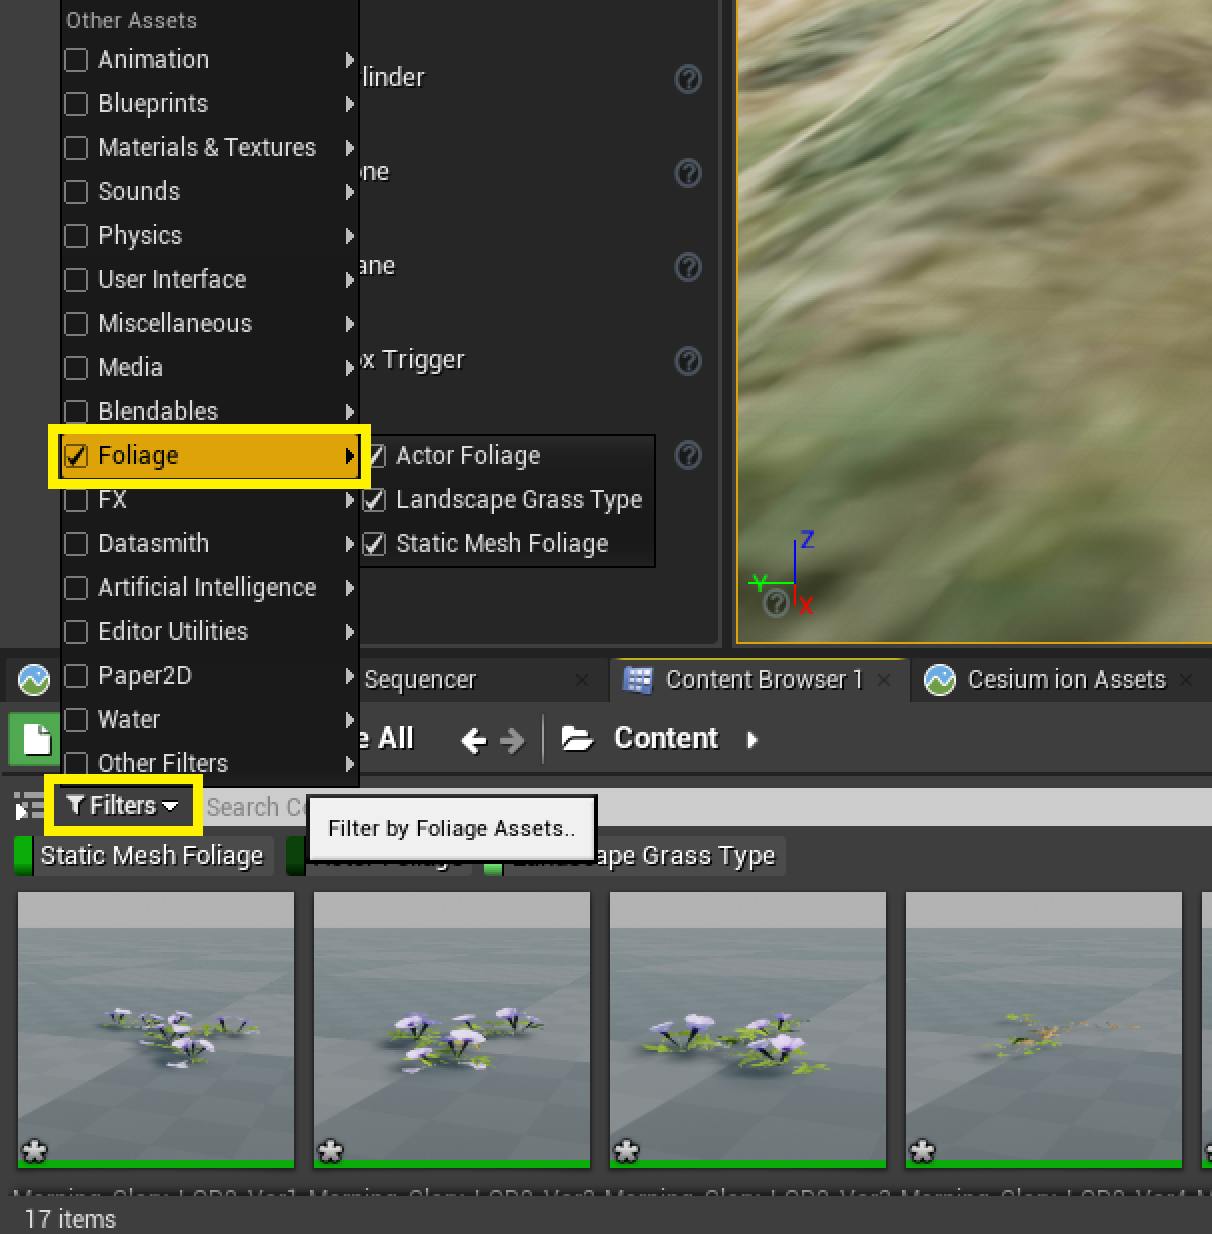
3Check to see whether your chosen foliage came with Foliage Types. In the Content Browser, find the button labeled Filters in the top left corner. Click this button and find Foliage on the menu that appears. Check this box to filter your content to show only Foliage Types.
4If there aren’t any Foliage Types, you’ll have to create your own. Take note of where your Static Meshes are located. Step 3 will detail the process for creating Foliage Types.
Free, high-quality foliage assets can be obtained via Quixel Megascans, which is free for Unreal Engine use, or found on the Unreal Engine Marketplace.
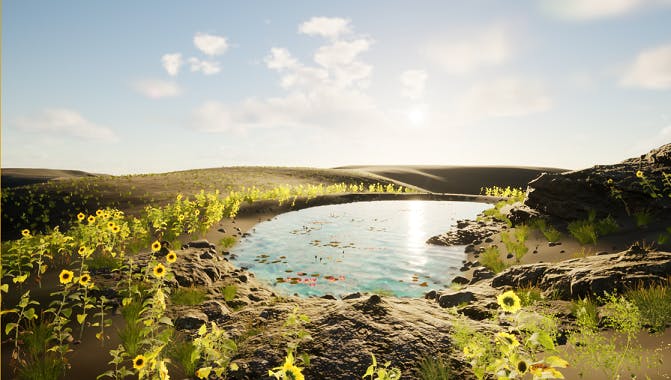
This tutorial will show how to place foliage around a small pond in California, USA. Feel free to build your scene here, or choose another location in the world.
1Set the georeference. In the World Outliner, select the CesiumGeoreference actor and find the Origin Latitude, Origin Longitude, and Origin Height parameters in the Details panel. The pond in this tutorial can be found at the following coordinates:
Origin Latitude = 38.321559
Origin Longitude = -122.999235
Origin Height = 112.99
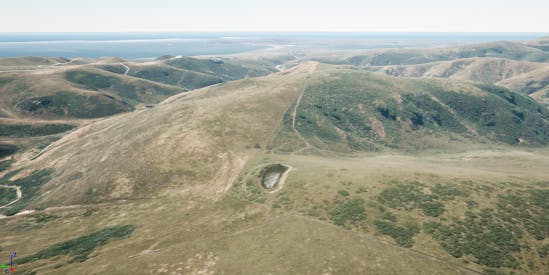
The new Georeference
2Create a sublevel for the current scene. See the Sublevels Tutorial to learn how to create sublevels.
Although this step is optional, it is highly recommended. Using sublevels ensures that if you accidentally change the Georeference, you can return the world origin to these coordinates, which is essential for keeping placed foliage in the right location. If you choose not to use sublevels, take note of the exact Origin Longitude, Origin Latitude, and Origin Height values on the CesiumGeoreference. As long as you know the coordinates that you originally set the Georeference Origin Location to, you can retype them in order to fix the Georeference. Read Placing Objects on the Globe to learn more about the limitations of placing objects in Cesium for Unreal levels.
3Now, you should have a sublevel that is correctly added to your georeference, showing a blue grid around your sublevel. You can disable this grid on the CesiumGeoreference. Under the Cesium Sublevels section of the details panel, deselect “Show Load Radii”.
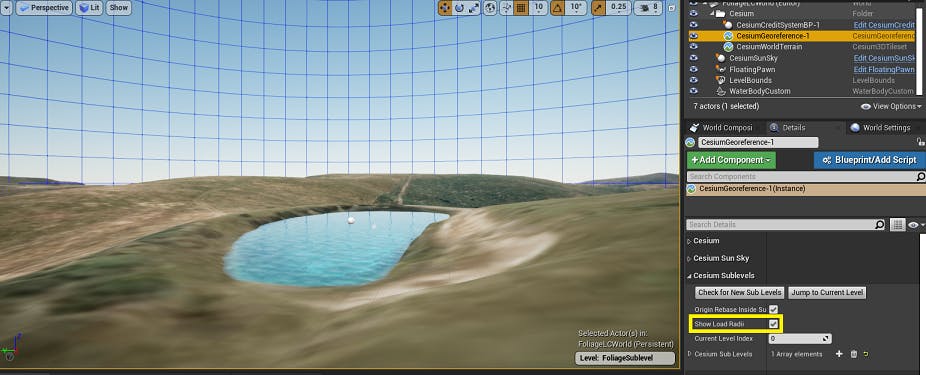
You’ll notice water in the pond in these screenshots. The example scene is using a WaterBodyCustom from the Water plugin for Unreal. Keep an eye out for a future tutorial about water surfaces with Cesium for Unreal.
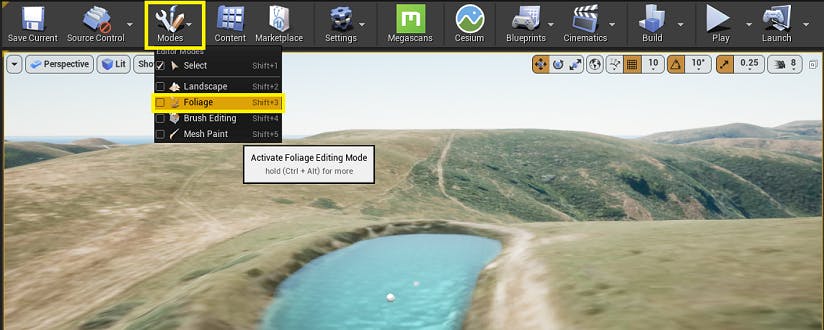
1Using the top bar dropdown, change the Editor Mode from Select to Foliage.
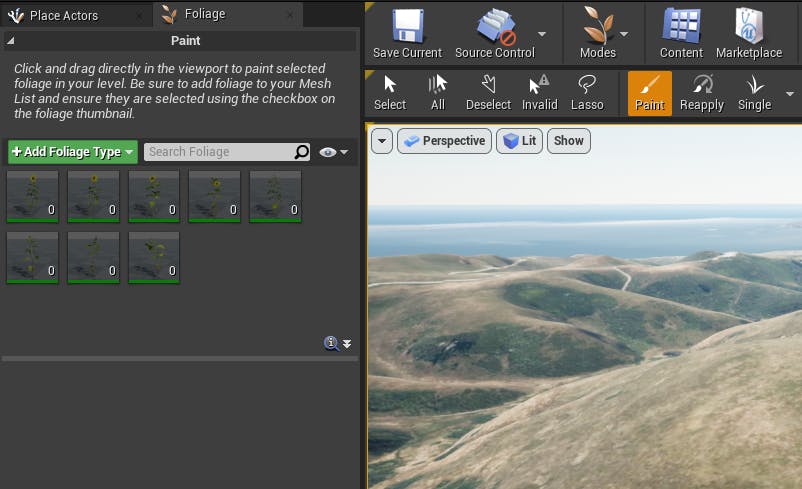
2You’ll see a new window appear where the Place Actors window was: the Foliage Window. Find your foliage. Depending on the assets that you imported, you may or may not see your foliage types listed in the foliage window.
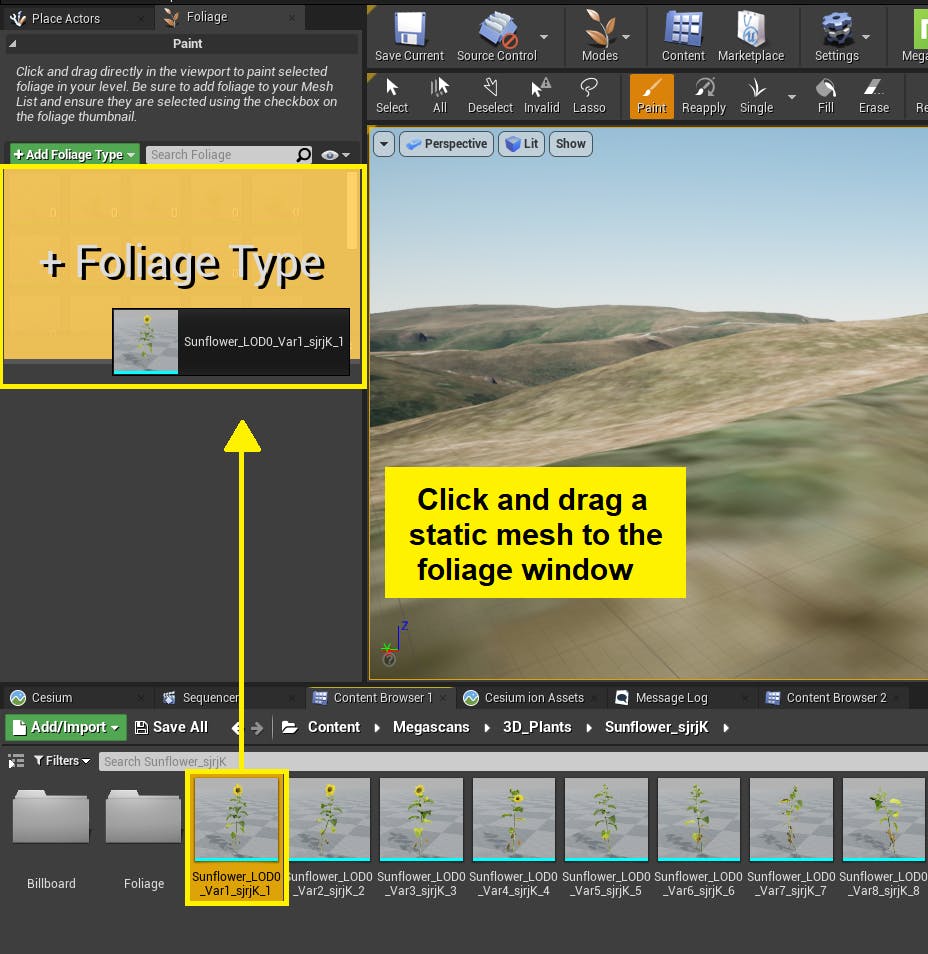
3If this window is empty, and you did not find any Foliage Types when importing your assets, you’ll have to create a Foliage Type. Select the static mesh(es) of the foliage you’d like to use in the Content Browser. Click and drag and drag it into this window.
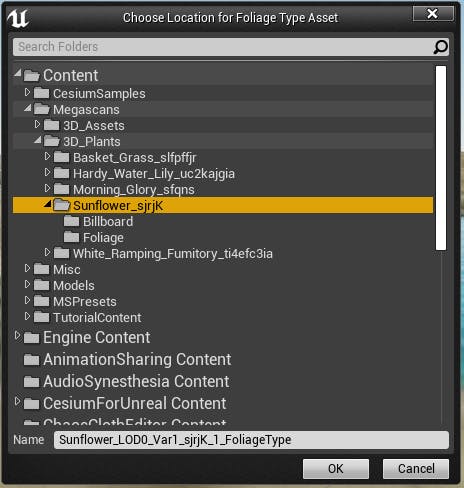
A new window will appear, prompting you to choose a location to save the new Foliage Type. Place this wherever you wish, though it may help to create a new folder where your Static Mesh is located.
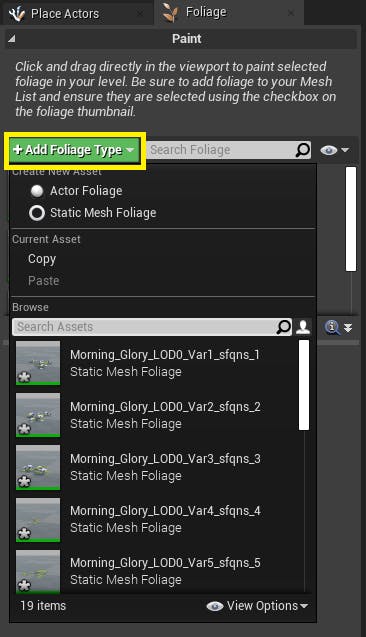
4If you did find Foliage Types when importing your assets, select the green Add Foliage Type button in the top left of the Foliage window. Find your foliage from the menu that appears.
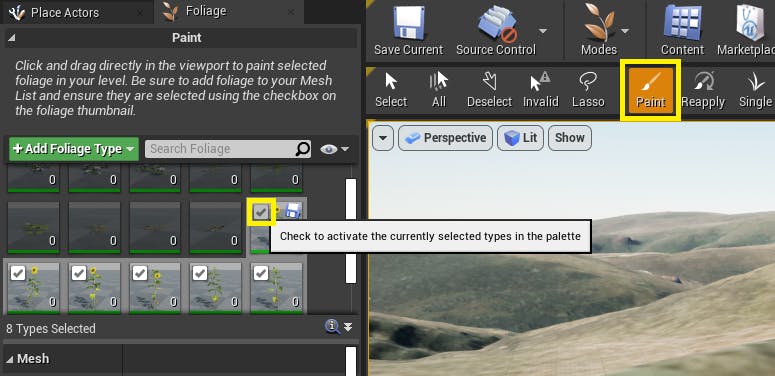
5Mouse over the Foliage Type you want to place. A checkbox will appear. Check the box to select the Foliage Type. You can select multiple Foliage Types.
6Check to make sure the Paint tool is selected. You’re ready to paint.
1Paint on the terrain using your mouse. Your foliage should begin to appear along the mesh. If you make a mistake in placing foliage, you can use ctrl+Z/command+Z to undo it.
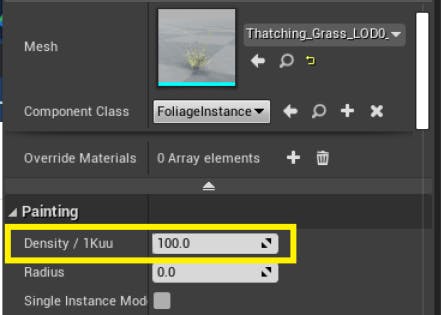
2If it’s too dense, adjust the density setting in the foliage details.
3The top bar shows different modes for selecting and editing foliage. There are many settings you can adjust to place foliage to your liking. For more information, check out Unreal’s Foliage Tool documentation.
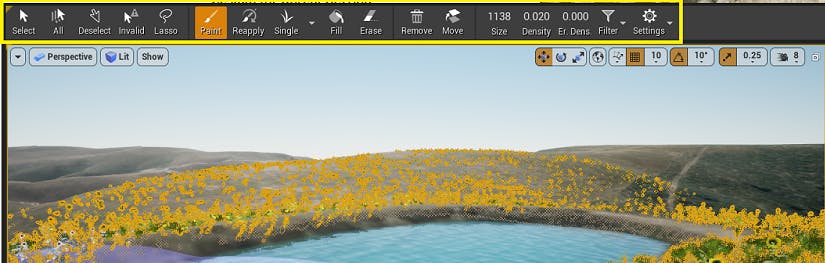
One of the buttons on the top bar of the foliage editor is a Fill button. This covers an entire static mesh with foliage. It is not recommended to use this on tilesets like Cesium World Terrain, as it will likely lead to freezing and crashing due to the size of Cesium World Terrain.
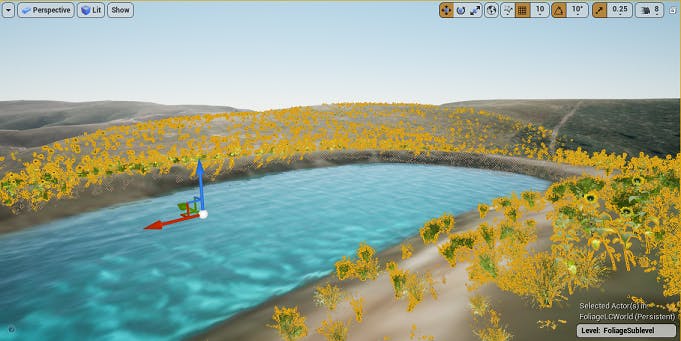
1Once you’re done placing foliage, switch back to Select mode using the Modes button on the top bar.
2Click on a placed foliage instance to select all placed foliage. You won’t see an entry for the foliage in the World Outliner, but all of the foliage will be outlined in orange.
3In the Levels window, right-click on your sublevel. Near the bottom of the menu that appears, click “Move Selected Actors to Level” in order to transfer the foliage to the sublevel.
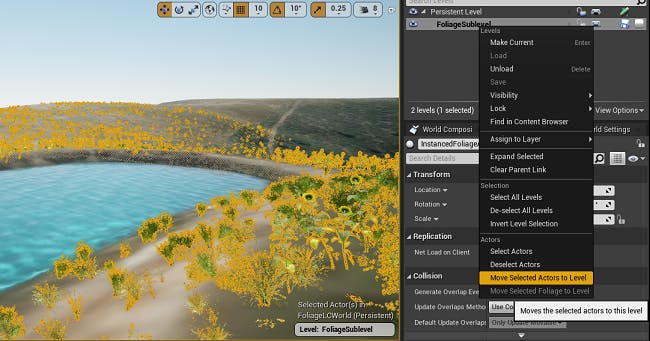
If you return to Foliage mode, you may notice that the number of each foliage instance is zero, even if you have foliage placed in the scene. Try double-clicking on the sublevel. The foliage window will only show the foliage in the active scene.
There’s much more to using the Foliage tool with Cesium tilesets. Now that you know the basics, go create.

The Foliage Tool can be used for more than just plants. Try it with rocks, or any other Static Mesh.
Check out the Lighting and Rendering Scenes tutorial to learn how to take your scenes to the next level with clouds and post-processing, or head to Using a Geospatially Accurate Sun to learn how to make your scene more geospatially accurate.
Want to do more with foliage? Visit the Procedural Foliage tutorial to learn a method for spawning foliage on Cesium World Terrain using Niagara.
Share your creations with @CesiumJS on Twitter. We love to see what the community is building!
Share your feedback on this tutorial on our community forum, and let us know what tutorials you’d like to see next.