Lighting and Rendering Scenes
In this tutorial, you will learn how to set up scenes to quickly achieve high visual fidelity for renders and screenshots. While some of these techniques work for real-time experiences, some of these settings may be too performance-heavy for most real-time experiences.
You’ll learn how to:
- Set up and adjust global post-processing volumes
- Add volumetric clouds
- Save in-editor camera views
- Take high-resolution screenshots in the editor and in play
- Know how to set up a basic Cesium for Unreal application. Check out the Cesium for Unreal Quickstart guide for instructions on starting with the Cesium for Unreal plugin.
Start with the 01_CesiumWorld level in the Cesium for Unreal Samples. Or, set up a new level with a CesiumWorldTerrain and CesiumSunSky as outlined in the Cesium for Unreal Quickstart guide.
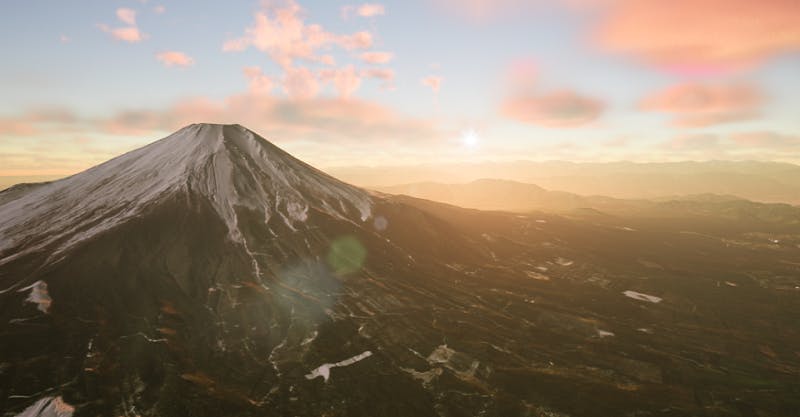
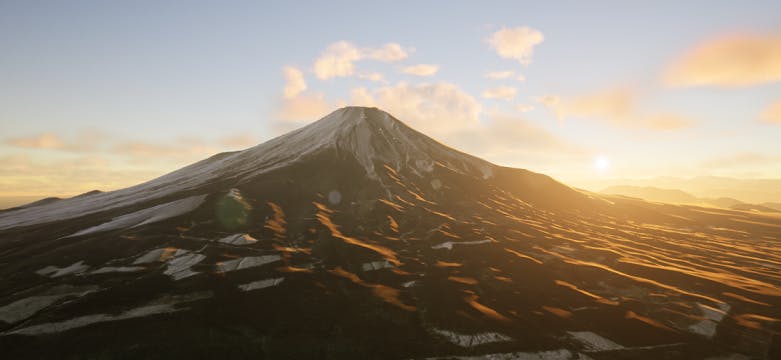
1For this example, you’ll set the georeference to Mount Fuji, Japan. Select the CesiumGeoreference actor in the World Outliner. In the Details panel, look for the Origin Latitude, Origin Longitude, and Origin Height parameters. Set them to the following coordinates:
Origin Latitude = 35.407357
Origin Longitude = 138.814268
Origin Height = 2083.092607
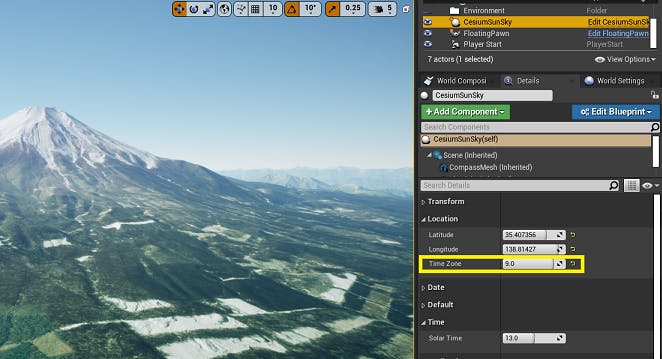
2You’ll see that the scene is pitch black. Select the CesiumSunSky actor in the World Outliner. In the Details panel, scroll down to the slider labeled Time Zone. Set the Time Zone to 9.0 for Japan Standard Time. Your scene should no longer be black.
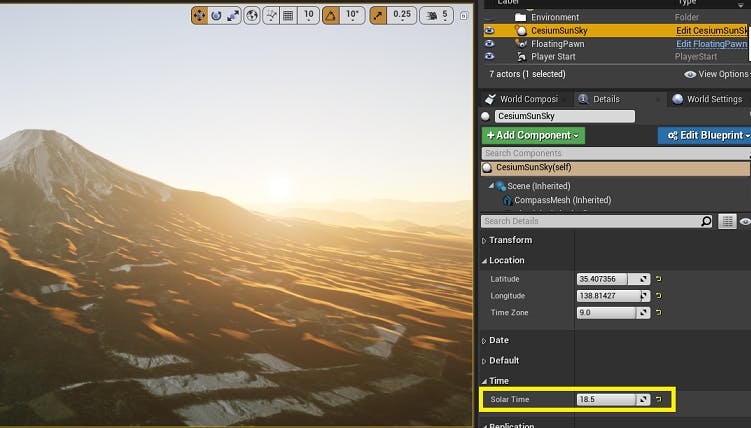
3You can set the time of day using the Solar Time slider. Try setting it to 18.5 for a sunset.
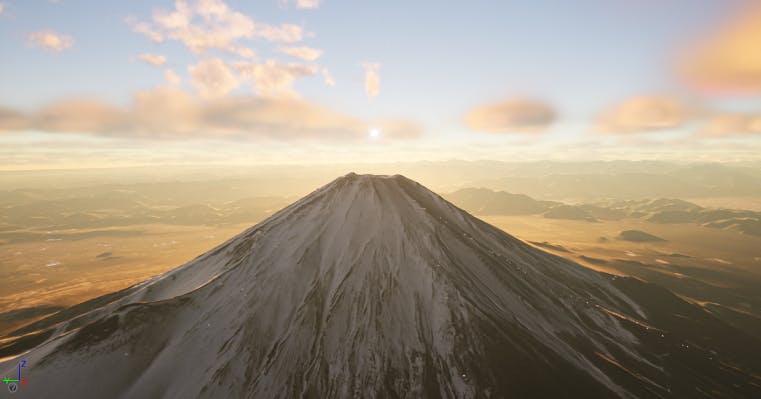
1From the Visual Effects tab in the Place Actors panel, find Volumetric Cloud and drag the actor into the scene.
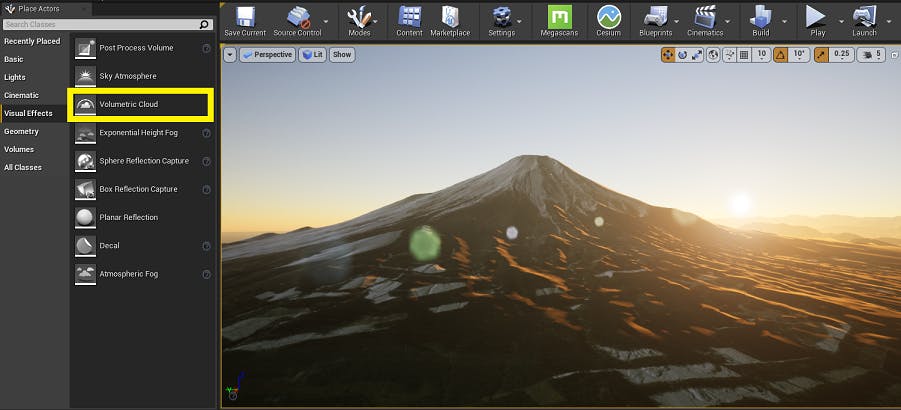
You should now see clouds in the sky. There are many parameters on the Volumetric Clouds that can be changed to alter the look of the clouds. For more information about Volumetric Clouds, visit the Unreal Engine documentation.
2The Volumetric Clouds will flicker in play if the world origin is being rebased. To ensure the clouds stay where they are, select the CesiumGeoreference. Find the setting Keep World Origin Near Camera and ensure it is off.
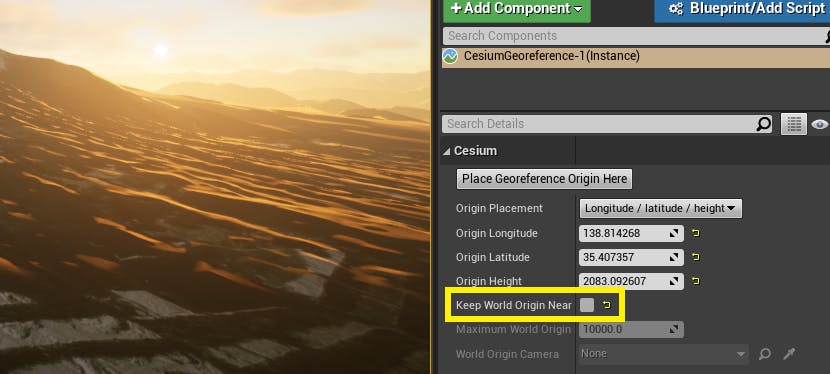
Turning off Keep World Origin Near Camera may not be a good idea for all projects. If you go far from the world origin with this setting disabled, you may encounter issues like the world appearing to turn sideways or strange visual artifacts. If you intend to remain in the same general area, it’s safe to turn off Keep World Origin Near Camera. Otherwise, it may be best to keep this setting on.
If you need to return to a particular view while in the editor, you can save a camera view.
1Press your Ctrl key and the 1 key on your keyboard at the same time. This keyboard combination will save your camera position. Now, if you move the camera, pressing 1 will return you to your saved view.
2Hold down the right mouse button. At the same time, you can use the W, A, S, and D keys to move your view. Move around until you’re viewing the scene from a new perspective that you’d like to return to.
3Press Ctrl + 2 to save a new camera view. Now, you can press the 1 and 2 keys to toggle between the two views. Up to 10 views can be saved by using the number keys, including 0. They can also be overwritten, so make note of which views you save to keys.
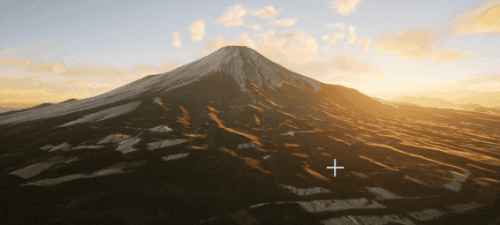
Switching between two saved camera views.
These saved views rely on the world origin staying in place. Therefore, if you change the Georeference Origin after setting a view like this, the view will change. Use Sublevels to make sure you can return to the right georeferenced location.
4These views can also be applied to other actors. Find the DynamicPawn actor in the World Outliner. Or, if there is not currently a DynamicPawn in the scene, add a new DynamicPawn to the scene using the Cesium Quick Add panel or dragging from the Content Browser.
5Press 2 to return to your new camera view. In the World Outliner, right-click on the DynamicPawn. In the menu that appears, find “Snap Object to View”. This will move the DynamicPawn to align with the current camera position.
6Likewise, if you need to move the camera view to the position of an actor, right-click on the actor and select “Snap View to Object”. This works even if the actor is not a pawn with a camera attached.
Post Process Volumes are volumes that can be added to a level to add visual effects over your scene. This tutorial will cover some simple settings to improve the look of your scene, but does not cover every option available with Post Process Volumes. To learn more about Post Process Volumes, visit the Unreal Engine documentation on post-processing.
1In the Place Actors panel, click on the Visual Effects tab.

2Click and drag a Post Process Volume into the scene.
3By default, Post Process Volumes only work when the camera is inside the volume. The volume is represented by the wireframe cube.

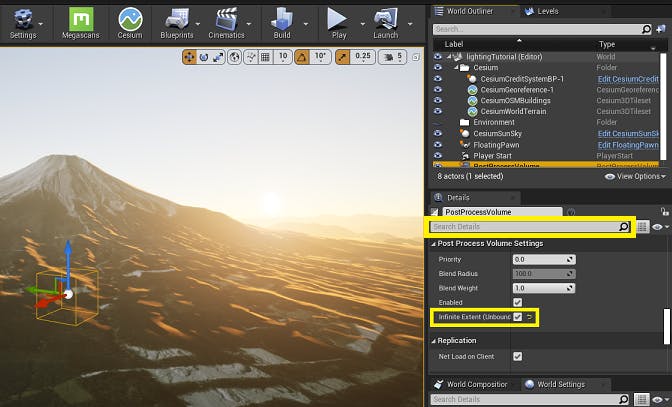
4You could scale up the cube until it encompasses the entire level, but if you are only using one Post Process Volume, you can instead give the volume an infinite extent. With the Post Process Volume selected, scroll down or use the search bar in the Details panel until you find the setting Infinite Extent (Unbound). Check this box.
5You’ll see many features on the Post Process Volume. Feel free to play around. This tutorial will show you how to set up a simple lens flare. Under the Lens section, open the “Lens Flares” dropdown and check the box labeled Intensity.
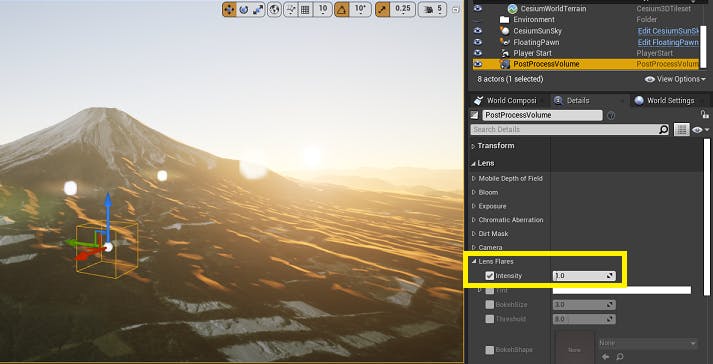
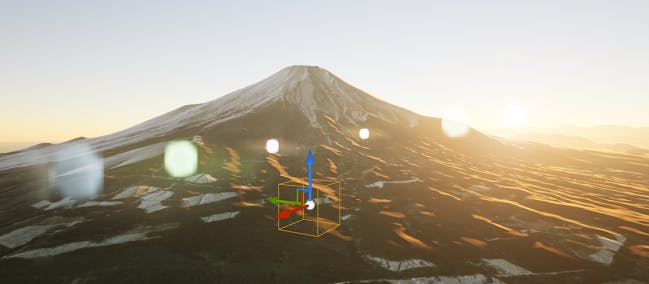
6This lens flare is quite bright. You can reduce the intensity by lowering the Intensity value until you are happy with the result.
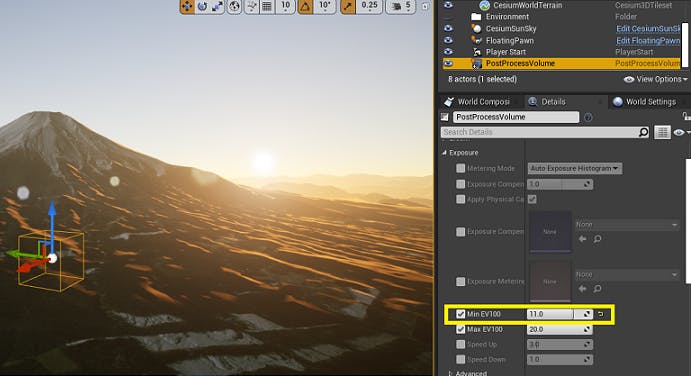
7You can also adjust the exposure to create a more dramatic scene. Scroll up in the Lens section and open the Exposure dropdown. You can adjust the minimum and maximum Auto Exposure values with the Min EV100 and Max EV100 settings. Set Min EV100 to a value of 11.
8Customize the scene to your liking and save at least one camera view.
There are no rules, but here are some ideas to get you started.
With the PostProcessVolume actor selected, try increasing the saturation of certain colors.
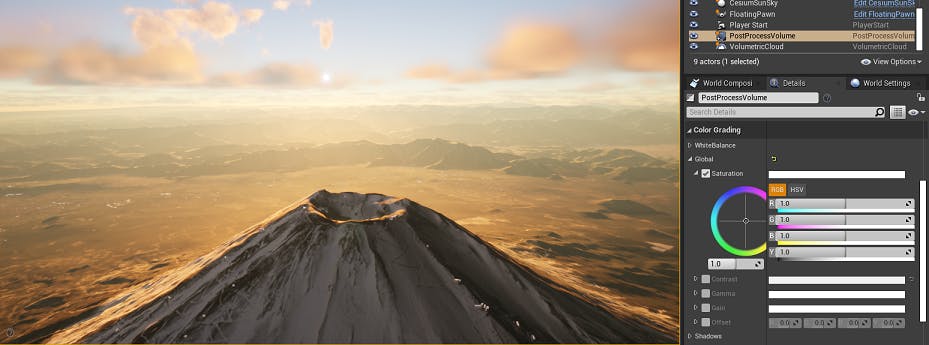
The scene with default saturation.
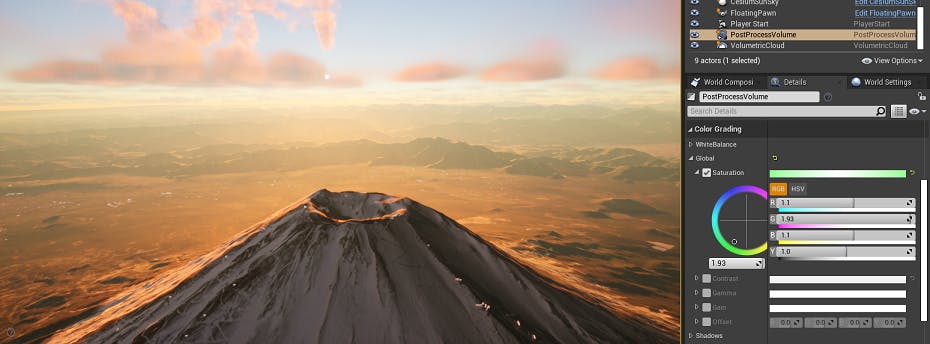
The scene with increased saturation, especially in the Green channel to make the scene pinker.
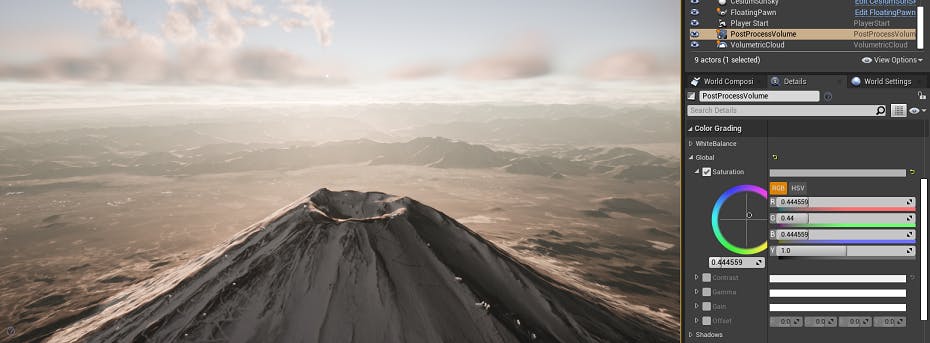
Or try lowering the saturation for a sepia effect.
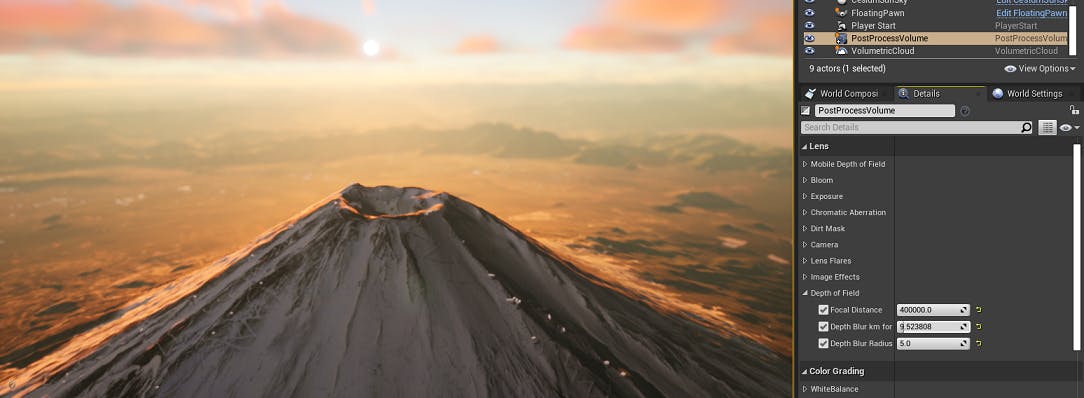
You could also add depth of field to emphasize the focus of the scene. In a large scene like this, you may have to set values far higher than usual.
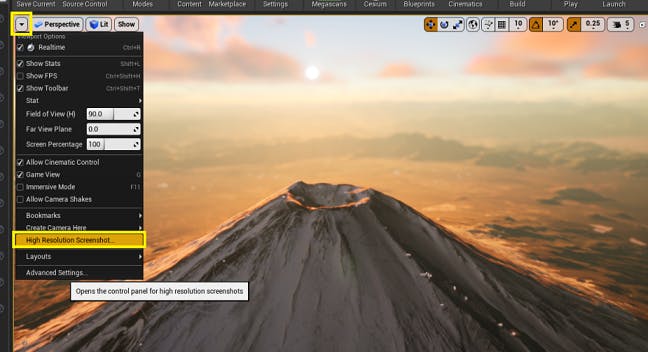
1Time to show off your work. Select the dropdown arrow in the upper left corner of the Scene View. From that menu, select “High Resolution Screenshot”.
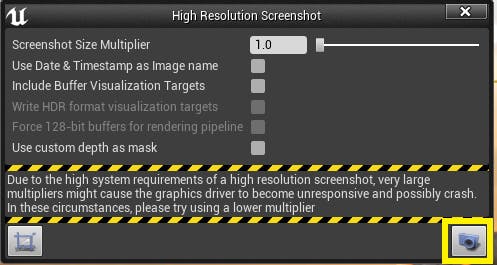
2A new window will appear with options for taking screenshots. Click the camera button in the lower right-hand corner. This will save a screenshot.
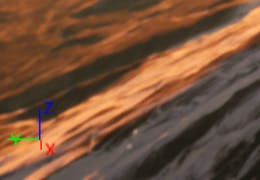
By default, screenshots are saved in the project folder for your project, under /Saved/Screenshots. Find your screenshot and take a look.
This screenshot may not be ideal for your purposes — it’s not a standard resolution, and you can see the viewport axes in the lower-left corner. You may also notice UI elements and other undesired objects in your screenshot.
3Return to the Unreal Editor.
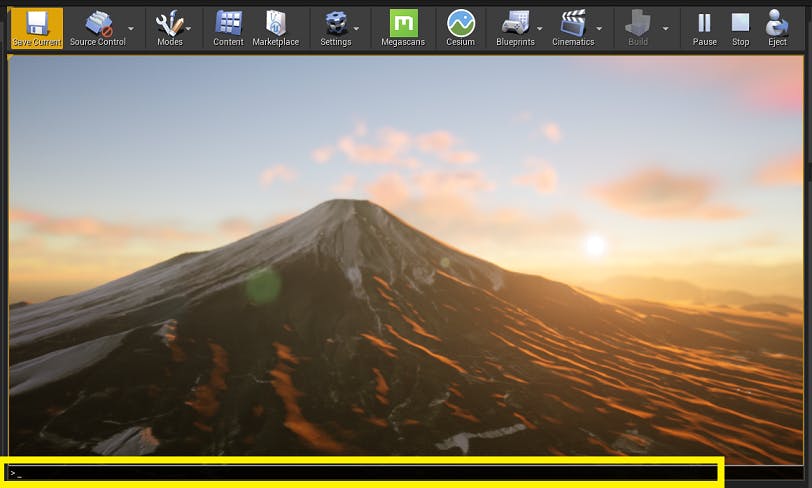
4The resolution is oddly sized because it is the same shape as the scene view window in your editor. Click inside the scene view window, then press F11 on your keyboard. This will make the scene view fullscreen.
5To hide the UI elements and the widget in the lower left corner, press the G key on your keyboard.
6Open the High Resolution Screenshot window again, and snap away.
1Taking screenshots in play is more straightforward. Press the Play button.
2With the game running, press the ~ key, which is usually under the esc key on your keyboard, to open the console.
3Type “HighResShot” in the console. You’ll see information on this command appear above.

4Press Enter.
Want more information on taking screenshots? Visit the Unreal Documentation page on taking screenshots to learn more.
Share your work with the Cesium community @CesiumJS.