Blender
Learn to use the Cesium ion Blender add-on to publish 3D Tiles from within Blender.
- Download and install Blender 2.80 or newer.
- You need a Cesium ion account to take this tutorial.
Start by clicking the below button to download the latest version of the Cesium ion Blender add-on.
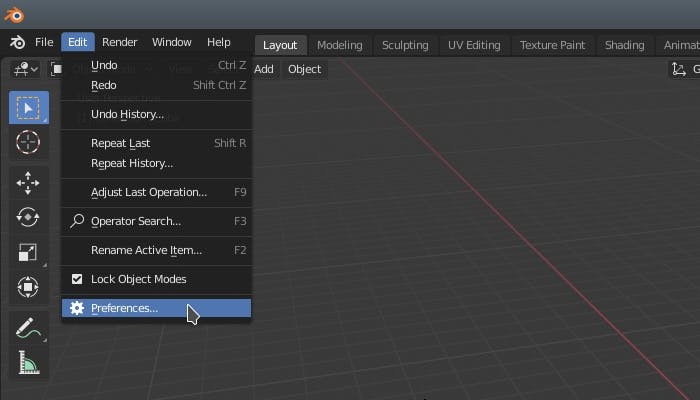
Next, start Blender and open the Preferences panel found in the main menu under Edit > Preferences.
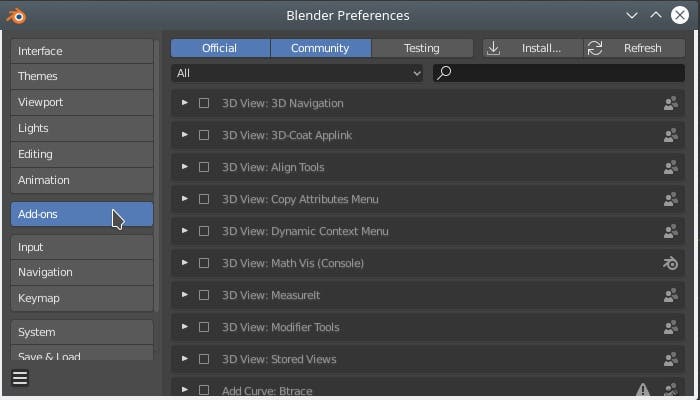
Click Add-ons on the left side of the Preferences panel and then click the Install.. button that appears on the upper right.
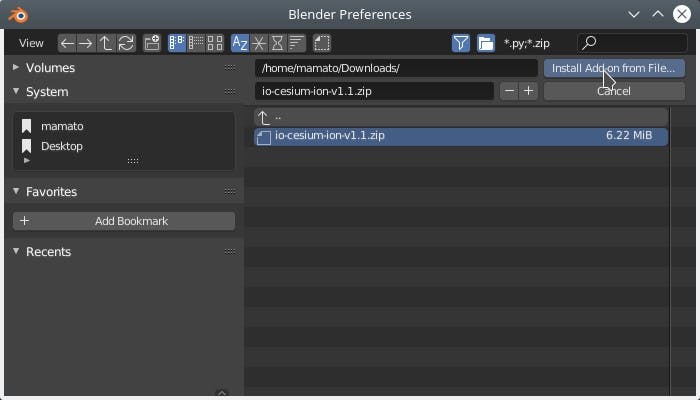
Navigate to the io-cesium-ion-v1.0.zip file you downloaded in the first step and select it.
Click the Install Add-on from file button.
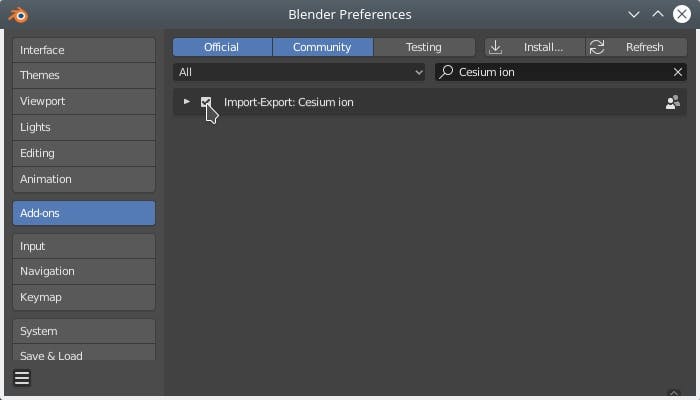
The add-on will appear as the only item in the list. Toggle the checkbox to enable the add-on.
Close the Preferences panel.
The add-on has been successfully installed! It’s time to publish your first Blender model to ion.
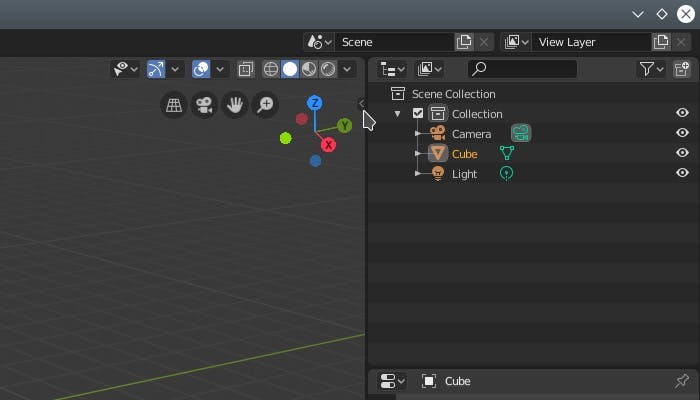
Blender starts with a simple cube model by default that we will publish to ion. You can also load your own model at this time if you would like to export one of your own works.
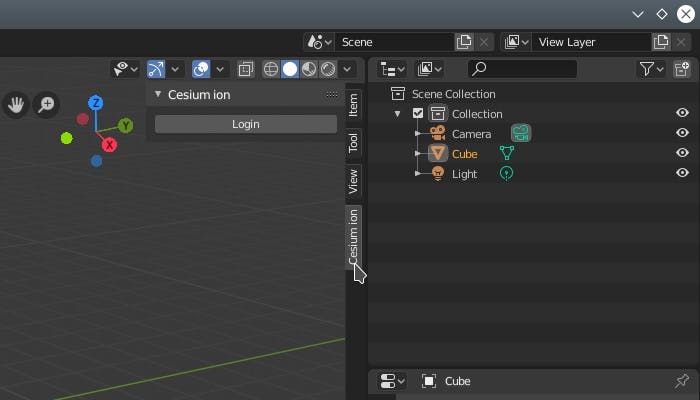
Access the add-on by clicking the small arrow in the upper right corner.
After clicking the arrow, a set of vertical tabs will appear. Click Cesium ion to switch to the new add-on.
Since this is the first time you are using the add-on, you need to allow it to access your Cesium ion account. Click the login button to open your browser and request permissions. You may be asked for your name and password. If you are already logged in, a permissions window similar to the one below will appear immediately.
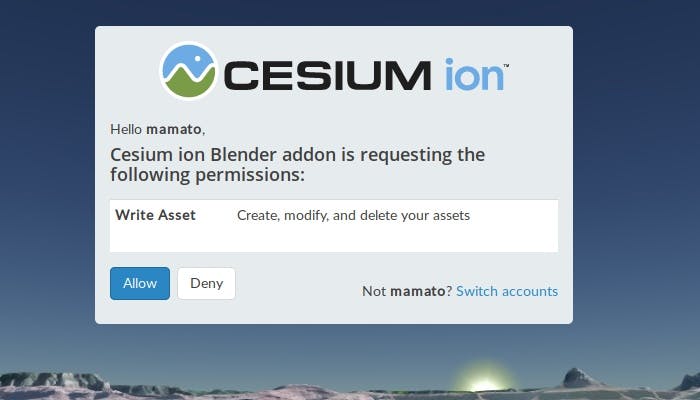
Click Allow, close your browser window, and return to Blender.
The Login button will be replaced with the Cesium ion panel.
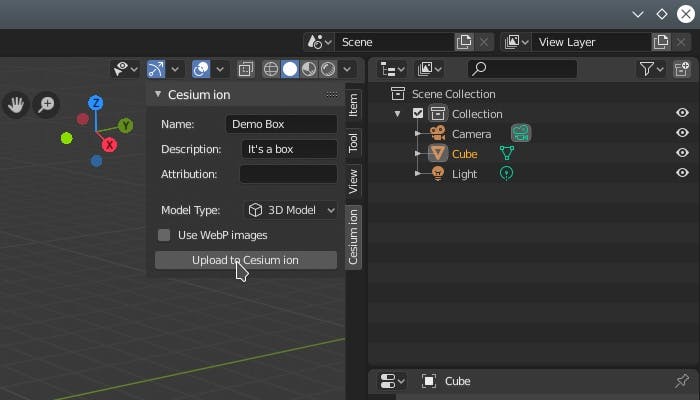
- Name (Required) A name for the ion asset you are uploading.
- Description An optional description.
- Attribution Any attribution you would like to appear when this asset is loaded into client visualization engines.
- Model Type (Required) A hint to ion about the type of model you are uploading. For most Blender models, simply select 3D Model. If you are loading a mesh that originated from a 3D scan, LIDAR, or photogrammetry processes, select 3D Capture instead.
- Use WebP images If enabled, will produce a tileset with WebP images, which are typically 25–34% smaller than equivalent JPEG images, leading to faster streaming and reduced data usage. 3D Tiles produced with this option requires a client that supports the glTF EXT_texture_webp extension, such as CesiumJS 1.54 or newer, and a browser that supports WebP, such as Chrome or Firefox 65 and newer.
For this tutorial, enter any name you want and select 3D Model as the Model Type.
Next click Upload to Cesium ion
At this point a progress bar will appear and the model will be uploaded to Cesium ion. Blender will then launch a web browser so you can view the asset in the ion dashboard.
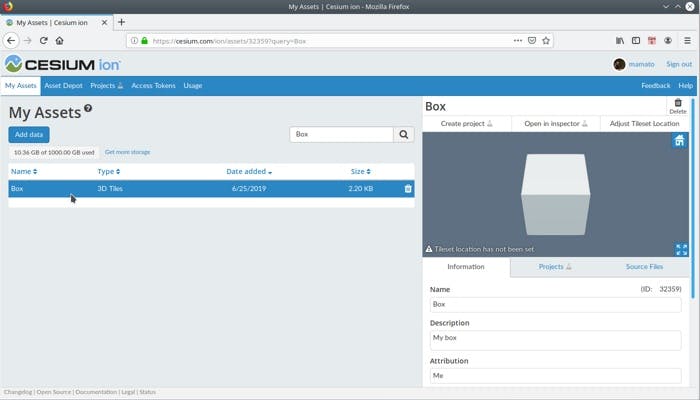
Congratulations! You have successfully published your first Blender model to Cesium ion!