Visualizing Time Dynamic Data with Cesium Stories
This tutorial will walk you through how to use Cesium Stories to visualize a drone flight scenario. You can use the same concepts you’ll learn here to visualize any animated data, whether it’s visualizing satellite orbits, house prices, or changing landscapes.
You’ll learn how to:
- Upload time-dynamic CZML (JSON) data to Cesium ion for convenient access by your app
- Follow 3D objects and use time controls to adjust playback of their movement
- Share an annotated story on the web
See a finished demo of the story you’re about to create.
Cesium Stories supports animated KML and CZML files. For this tutorial we’re going to use a CZML file that was exported from Systems Tool Kit (STK). STK is the leading software for time dynamic analysis in the aerospace and defense industry.
Download this zip file containing the CZML and a set of 3D models.
Then sign up or login to Cesium ion.
Finally, upload this zip file to your account by dragging and dropping it in your dashboard.
Choose KML, CZML, or GeoJSON as the data type:
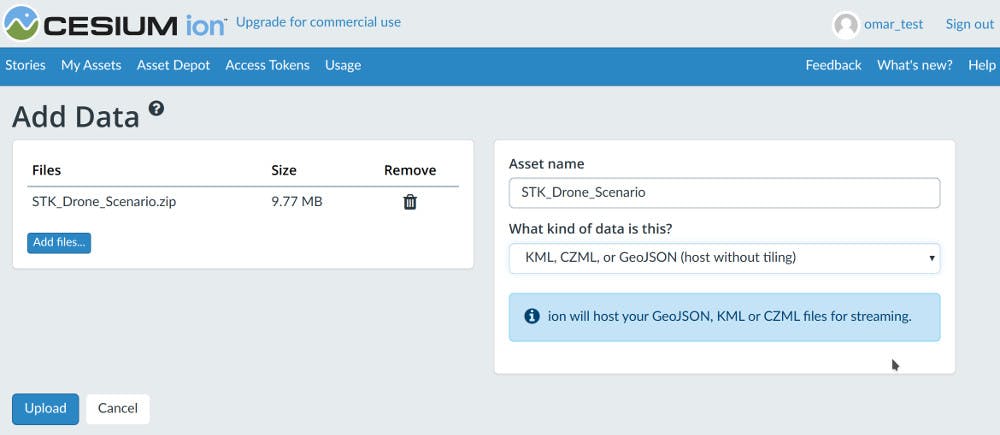
Click Upload.
Once it’s done, you’ll see a preview of this asset in your dashboard:
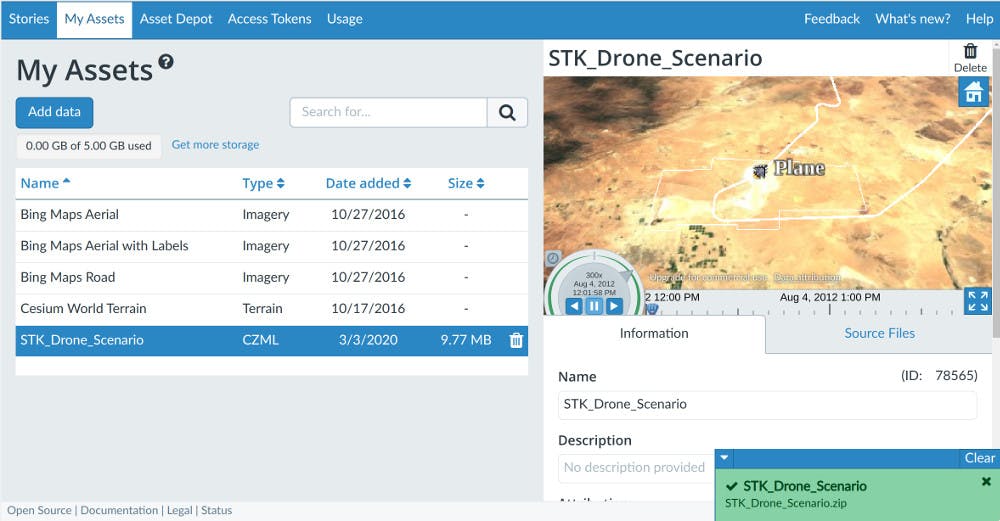
The preview window on the right has a timeline you can interact with by clicking or dragging. This is a good way to quickly inspect all the time-dynamic assets in your account.
Now that you’ve uploaded a CZML to Cesium ion, you’re ready to use this asset in a Cesium Story.
What is CZML?
CZML is a JSON format for describing a time-dynamic graphical scene, primarily for display in a web browser running Cesium. It can be used to display 3D models, lines, labels and other types of data. Learn more in the CZML guide.
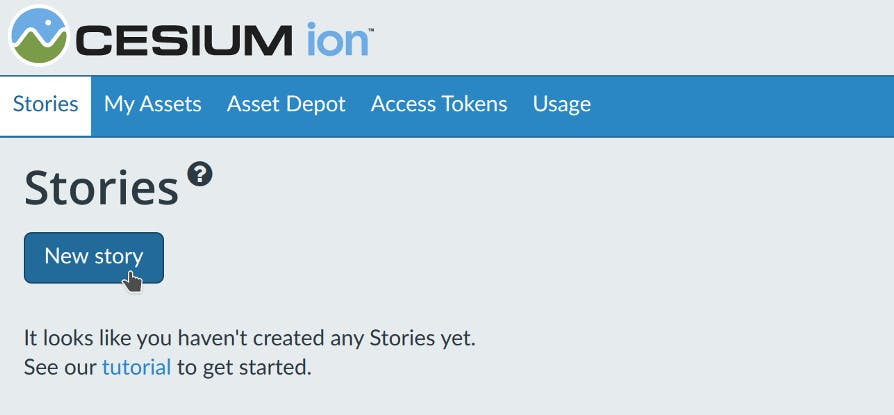
Navigate to the Stories tab and then click the New Story button:
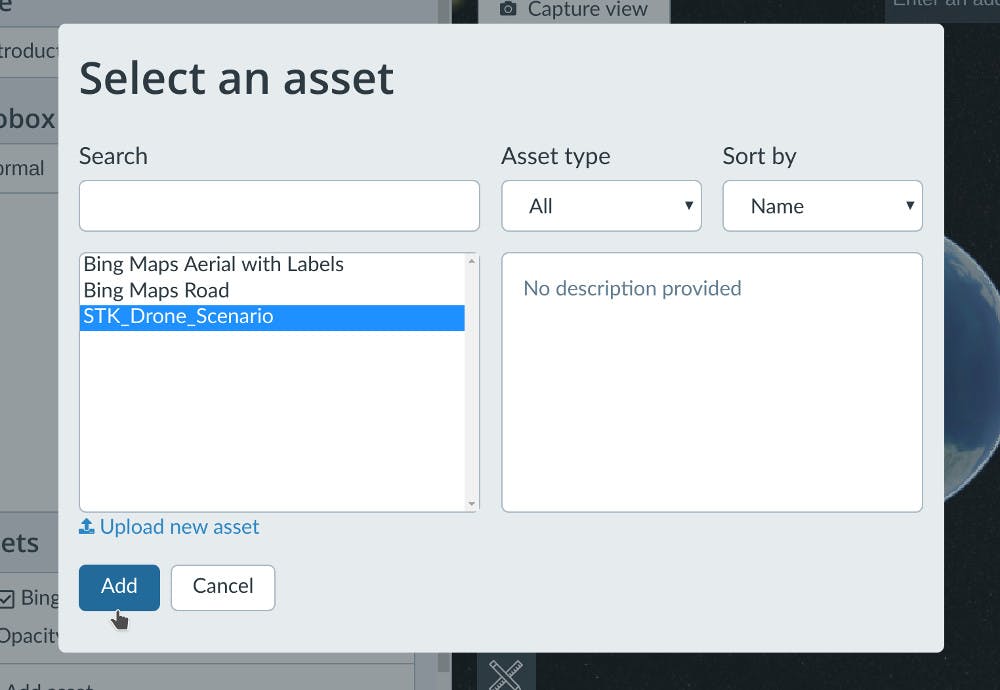
This will open the Stories editor. Click Add asset in your assets list on the left:
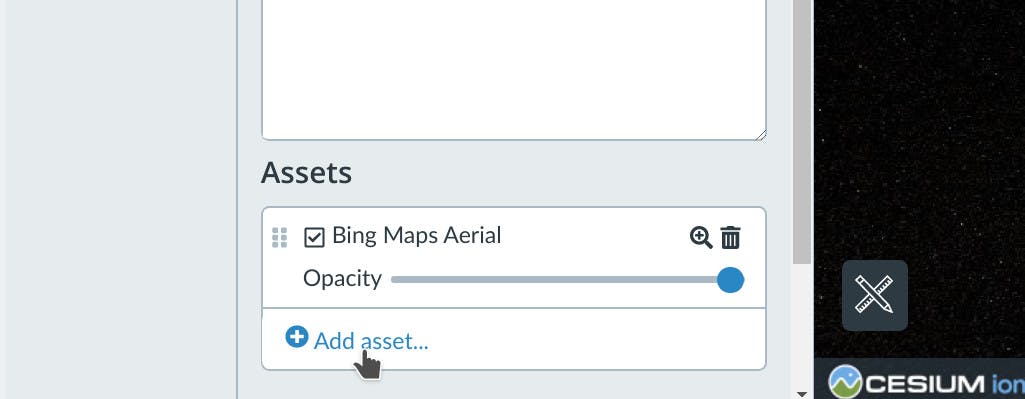
Select the STK_Drone_Scenario asset, and then click Add.
To actually see your asset, click on the magnifying glass icon next to the asset’s name to fly the camera to it.
Adjust the camera so that the entire path is in view:
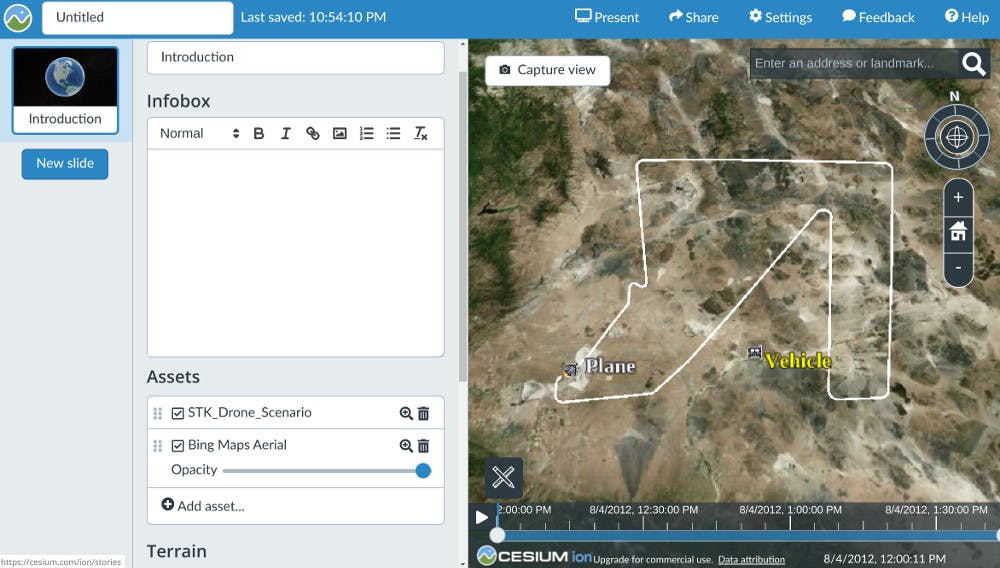
Once you’re happy with it, click Capture View to save this slide.
We’re going to set the camera to follow one of the moving objects.
Click the New Slide button in the top left to create a new Map slide. Then click on the plane and choose Follow plane from the menu:
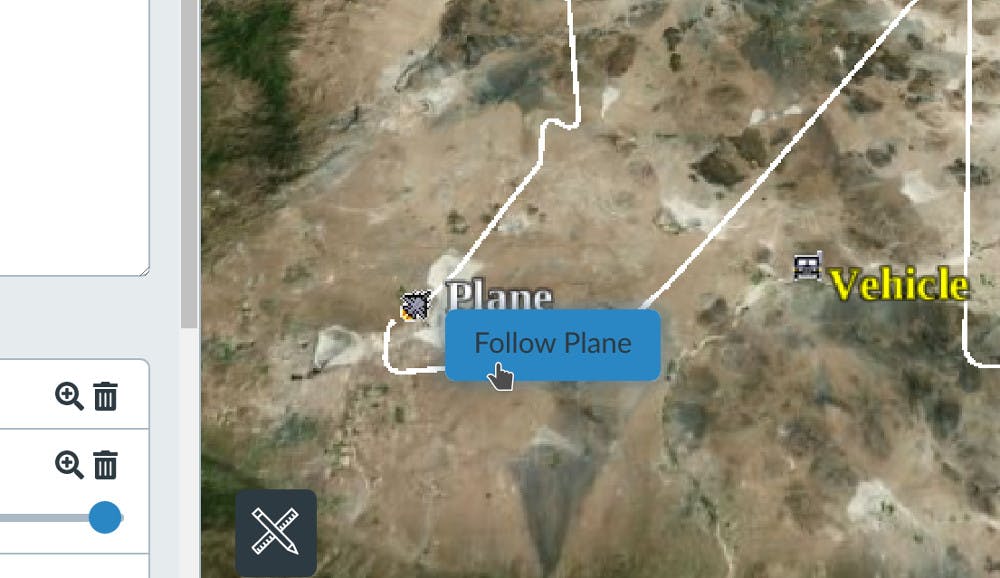
This will lock the camera to that object. Notice that clicking and dragging in the scene now rotates the camera around the object instead of panning.
You can exit this mode by clicking the Stop Following button in the top left, under the Capture View button.
Click Capture View to save this camera state. This is now a good time to click Present to see how these two slides look so far.
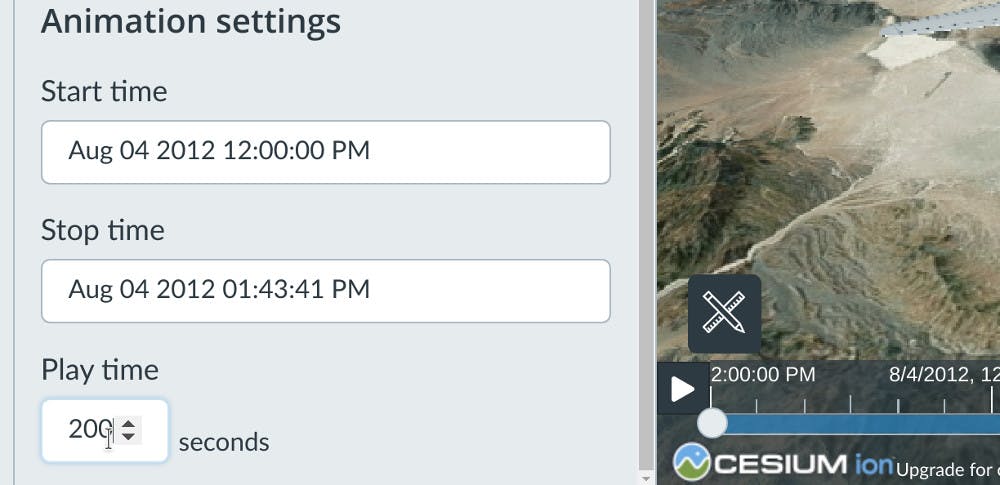
So far we’ve set the camera to follow the plane as it moves, but its current speed makes it hard to see what’s going on. We can adjust this speed by editing the Play time at the bottom of the animation settings. Try setting it to a higher value like 200:
This allows you to control how long it takes for each slide to play its content.
You can see how this new speed feels either by going into present mode again, or by clicking the play button in the timeline.
Instead of playing the entire path, we can focus on specific moments of interest by adjusting the start and stop time of each slide.
Create a new map slide. Then drag the white start and end markers on the timeline so that it starts right around the moment when the plane is in range of the vehicle:
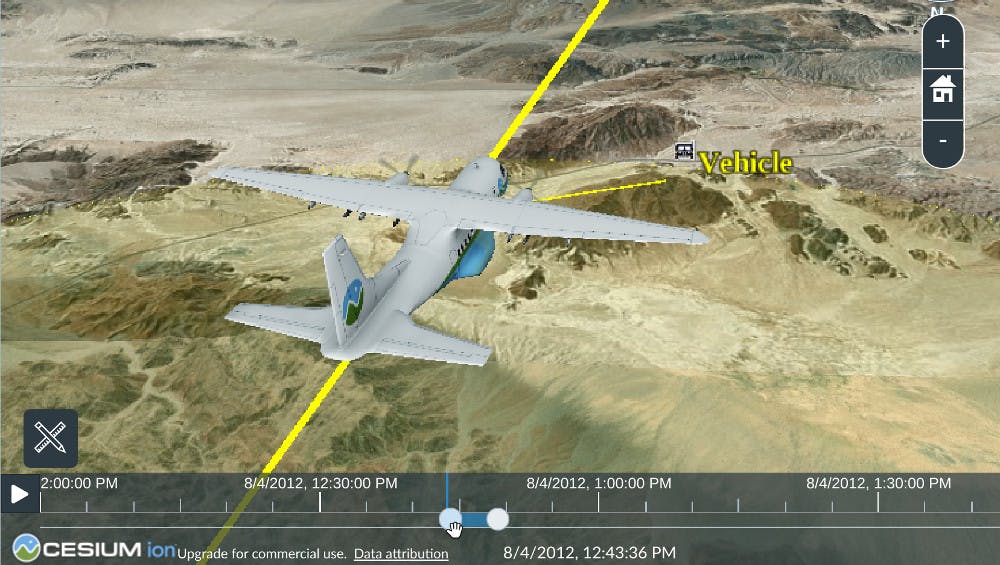
You can adjust the start and time visually in the timeline like this, or if you know the exact moment you want to show, you can type in the time by clicking on the start or stop time and using the date-time picker:
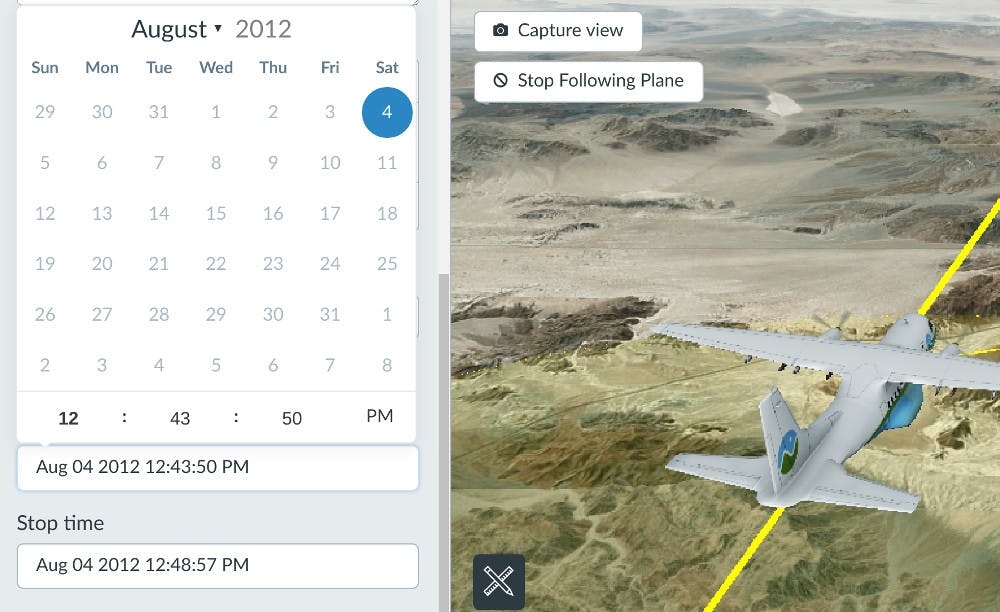
Set the play time to 10 seconds for this slide. Click Capture view.
Test out how this looks either in present mode or by clicking the play button in the editor.
When following an object, the camera is automatically positioned, but you still have control over the camera’s angle. So if you click Capture View with the camera pointing straight down at the object, it’ll stay pointing straight down as it follows it. This way you can be following the plane while keeping the vehicle in sight.
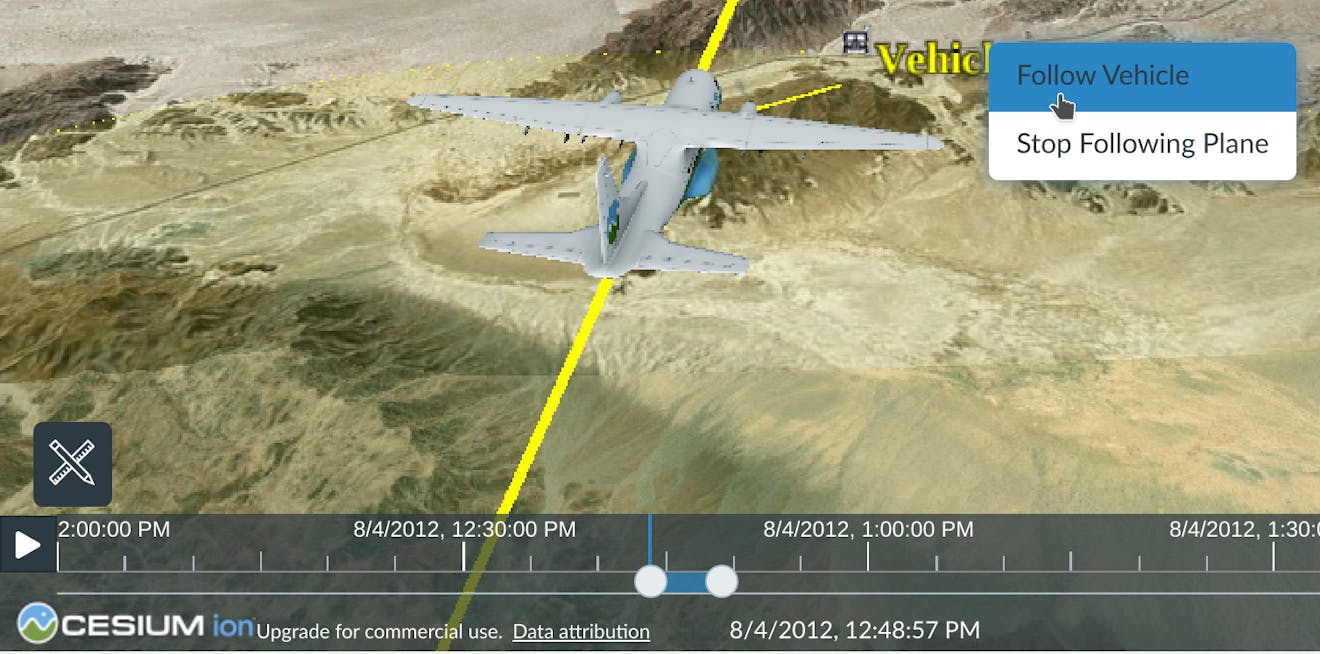
For our last slide, we’re going to follow the vehicle on the ground instead of the plane. This way we can see exactly what was happening during that moment when the plane was overhead from a different perspective.
Create a new map slide. Click on the vehicle and select Follow Vehicle:
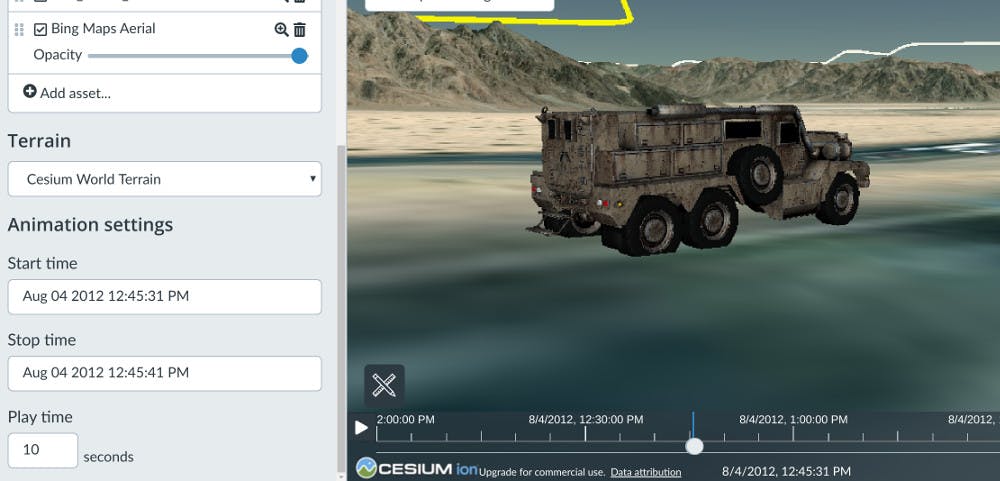
For this slide, we’d like to see how fast this vehicle was moving in real time. You can do this by making sure that your play time matches the difference between the start and stop times. Below, the stop time is set to 10 seconds after the start time. The play time is also set to 10 seconds:
Once you’re done, click Capture view.
To wrap this up, we’re going to great a title slide. This is a great way to introduce the audience to your story or add your information as the author.
To create a title slide, click New slide and then select Fullscreen slide:
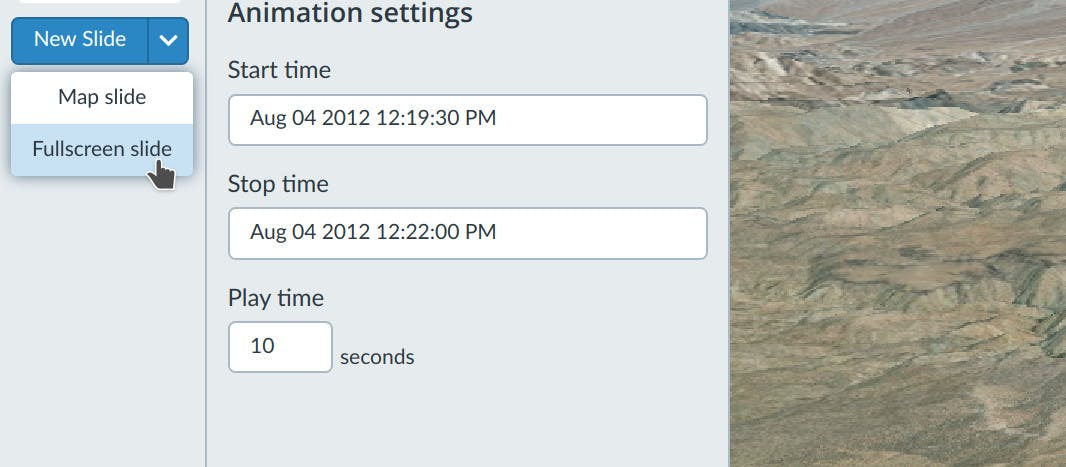
Give your new fullscreen slide a title like: Visualizing time dynamic data in Cesium.
Give it a description like:
This is a Cesium Story following this tutorial: https://cesium.com/learn/ion/stories-time-dynamic/
Made by: (insert your name here)
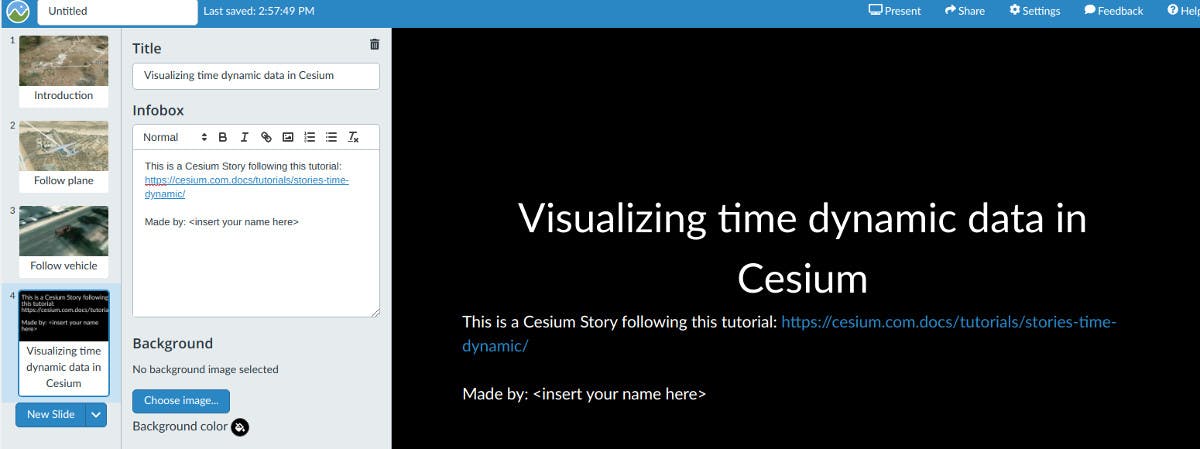
You can optionally change the background color, or upload a background image here to customize your title slide.
Once you’re happy with it, re-order the slides so that your story starts with this title slide by dragging it to the top:

Next steps
You now know how to upload time-dynamic data to Cesium Stories, set up camera views to follow different objects, and control the playback. Try this out with your own time-dynamic data.
If you need help getting your time dynamic data into Cesium Stories, reach out to us.
See what else you can do with Stories.