Using Cesium ion Self-Hosted
This tutorial shows how to use a Cesium ion Self-Hosted server in Cesium for Unity.
The same steps can be used to add a second connection to the standard Cesium ion SaaS server used in previous tutorials. This is useful if you frequently switch between multiple Cesium ion accounts or teams.
- Know how to set up a basic Cesium for Unity application. Check out our Cesium for Unity Quickstart guide for instructions on starting with the Cesium for Unity plugin.
If this is the first time anyone has connected to the Cesium ion Self-Hosted server using Cesium for Unity, you must first add an OAuth application on the server.
If your Self Hosted environment does not implement authentication, you can skip to Step 2.
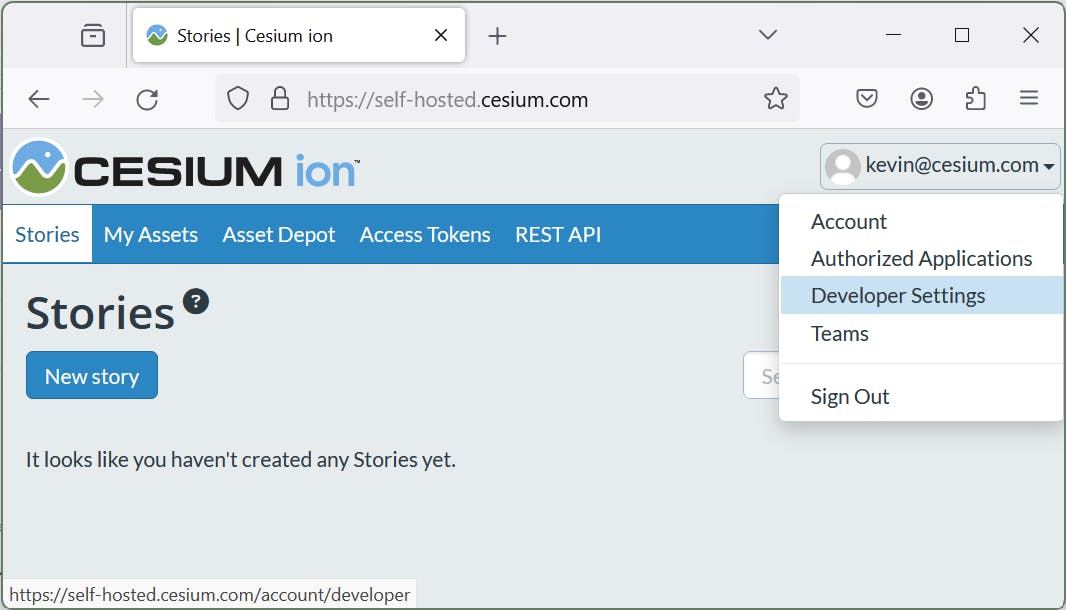
1Sign in to the Cesium ion Self-Hosted server using the normal web interface.
2Click your username in the top-right corner, and choose Developer Settings.
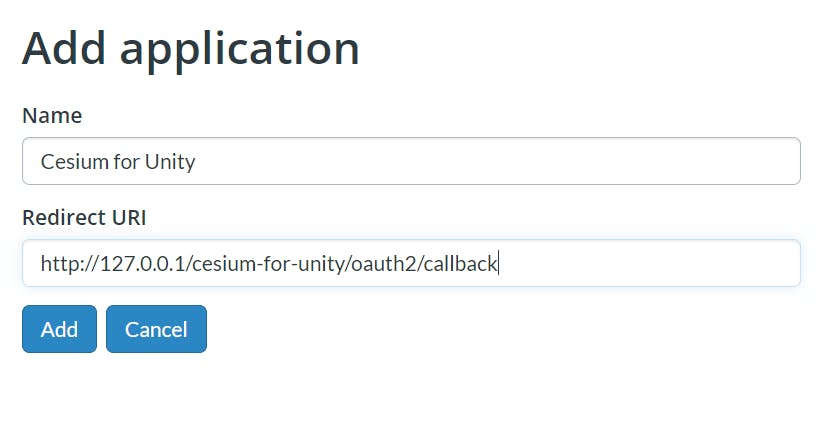
3Click Add Application.
4Enter the following settings for the new application. Do not adjust the URI even if you're accessing your self-hosted server with a different hostname or IP address.
5Note the number in the Client ID column next to the new application you just created. You will need this later!
If someone has previously configured this self-hosted server for use with Cesium for Unity, the steps above are unnecessary. You just need to know the Client ID. It won't hurt to do the above steps multiple times on a single server, however.
Now you will configure Cesium for Unity to access the Cesium ion Self-Hosted server by creating a CesiumIonServer asset in your project.
Support for multiple Cesium ion servers was added in Cesium for Unity v1.7.0. The steps below will not work in prior versions.
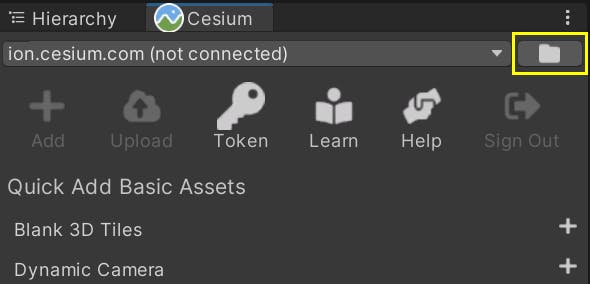
1If the Cesium panel is not already open in the Unity Editor, open it by clicking Cesium-> Cesium.
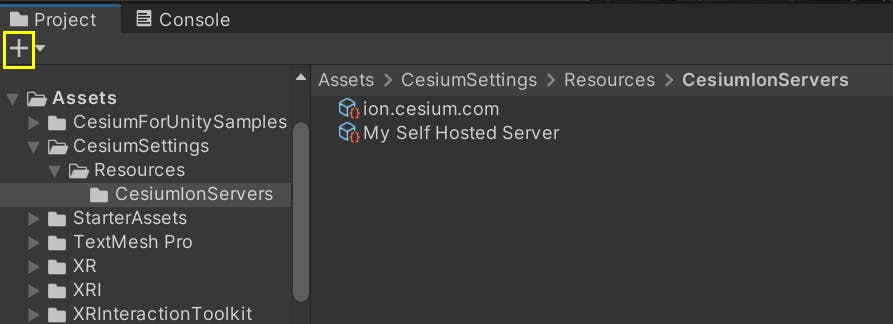
2Click the icon at the top of the Cesium panel to open the CesiumIonServers folder in the Project Browser.
3Click the Add button in the Project Browser panel to add a new asset.
4Choose Cesium and then Cesium ion Server from the menu.

5Give the new asset a name, such as My Self Hosted Server.
6Click the new asset to edit it in the Inspector. The default settings will work with the Cesium ion SaaS server.
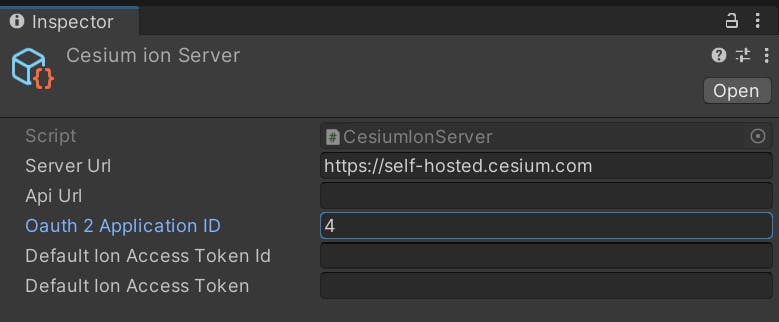
7Configure the new asset with the appropriate values for your self-hosted server.
- Server URL: The URL of the server's main web interface.
- API URL: The URL of the server's API endpoint. This can usually be left blank, and it will be inferred from the Server URL.
- OAuth Application ID: The Client ID of the application that you created earlier in this tutorial.
- Default Cesium ion Access Token (ID): Leave these fields blank; Cesium for Unity will give you the opportunity to select or create a suitable token later.
8Select the new server from the drop-down list on the Cesium panel.
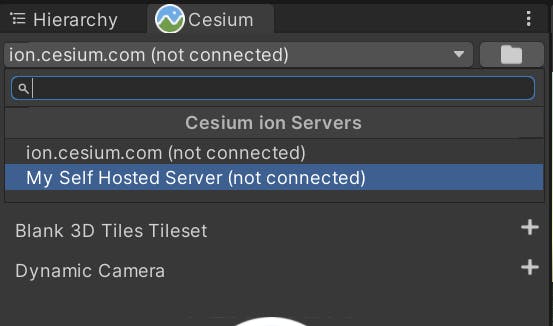
9Click Connect to sign in to the self-hosted server. From here, you can add assets from the self-hosted server in exactly the same way you would from the main Cesium ion server.
Did something go wrong in the sign-in process? Double-check that the OAuth application was created in the Cesium ion UI on the self-hosted server exactly as described above. In particular, verify that Redirect URI is exactly:
http://127.0.0.1/cesium-for-unity/oauth2/callback
Also verify that the OAuth Application ID in the CesiumIonServer asset matches the Client ID of the application you created in the Cesium ion UI on the self-hosted server.
If your environment does not implement TLS, double check that the Server URL and API URL use the http protocol.