Cesium for Omniverse Quickstart
This is a quickstart guide to loading Cesium ion content into NVIDIA Isaac Sim using the Cesium for Omniverse extension.

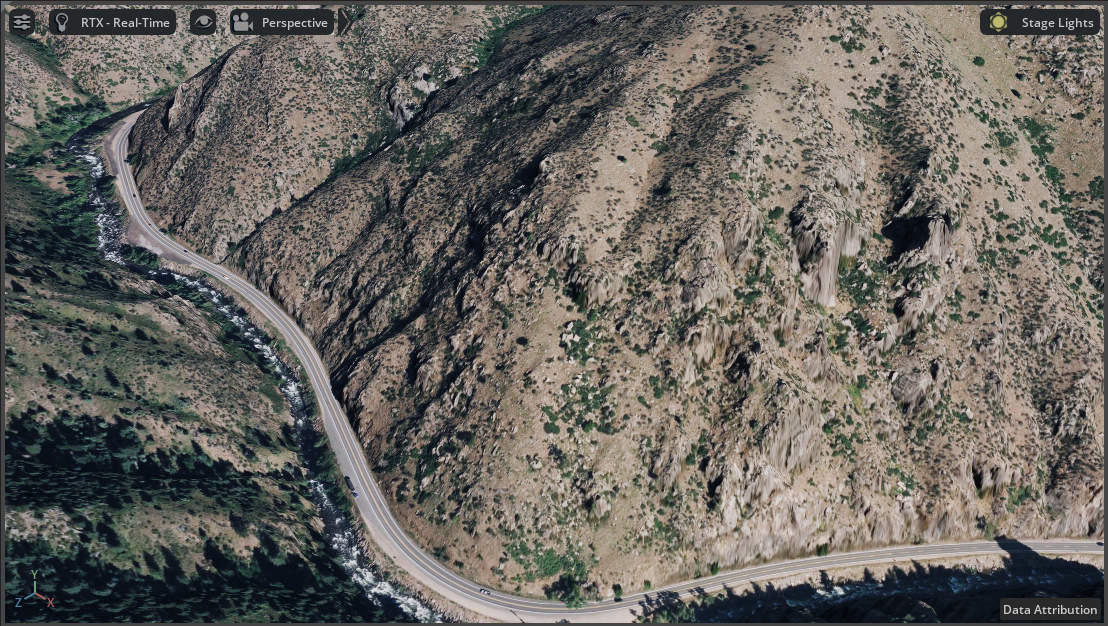
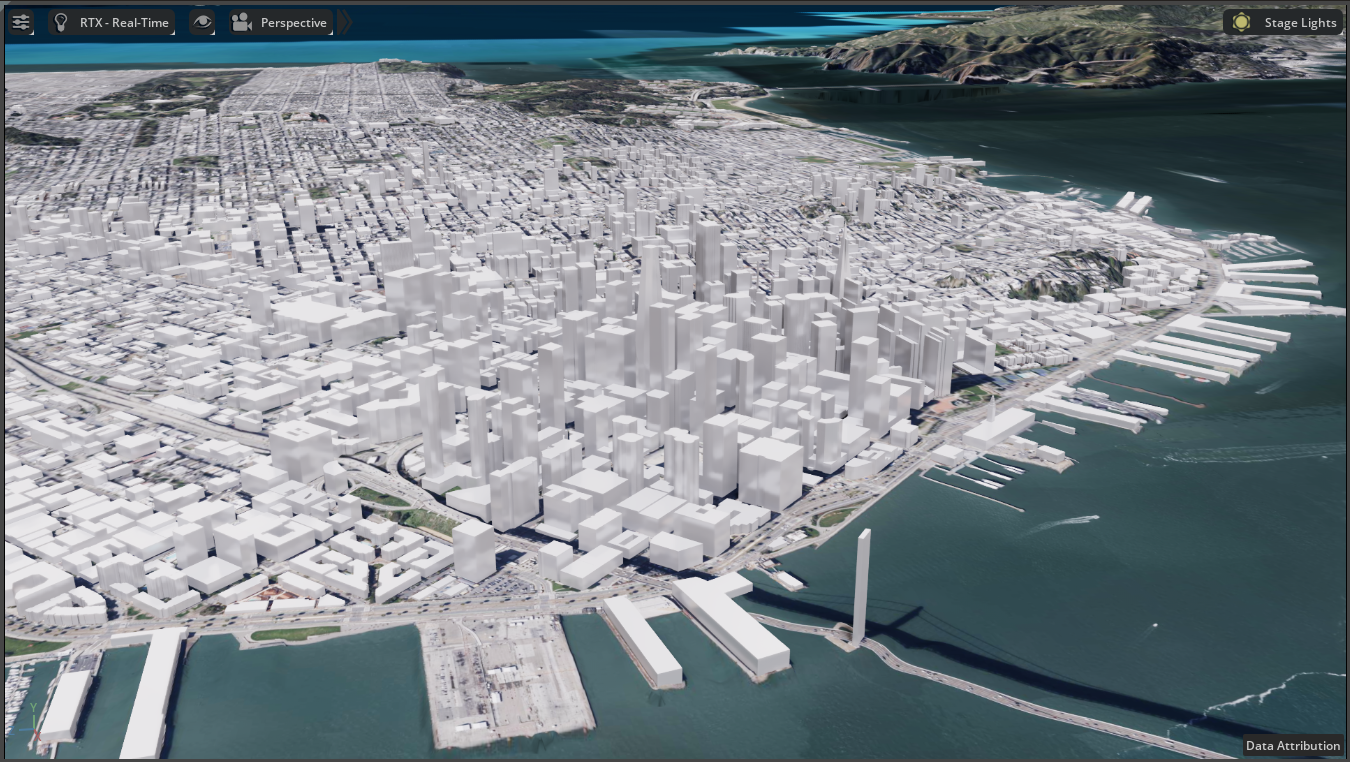
Cesium for Omniverse scene set in San Francisco, California, USA. Data courtesy Aerometrex.
You’ll learn how to:
- Add the Cesium for Omniverse extension into Isaac Sim.
- Create a new stage and import assets from Cesium ion.
- Set your project's default ion asset token.
- Save your stage to a USD.
- An installed version of NVIDIA Isaac Sim 6.0.0. For instructions on installing Isaac Sim, visit the Isaac Sim documentation.
- A Cesium ion account to stream terrain, building, and photogrammetry assets into Omniverse. Sign up for a free Cesium ion account if you don’t already have one.
Cesium ion is an open platform for streaming and hosting 3D content, and includes global, curated data that you can use to create your own real-world applications.
1Launch Isaac Sim 6.0.0.
2Once Omniverse Isaac Sim has opened, open the Extensions Manager by clicking on Window > Extensions in the menu.
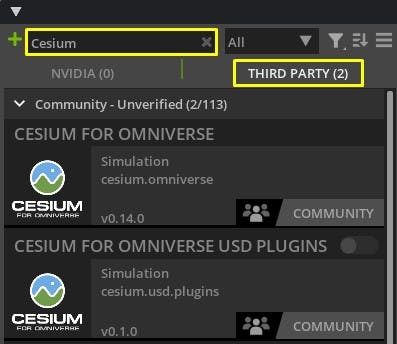
3Type Cesium in the search box and select the Third Party tab in the extensions list. Two Cesium for Omniverse entries should be found.
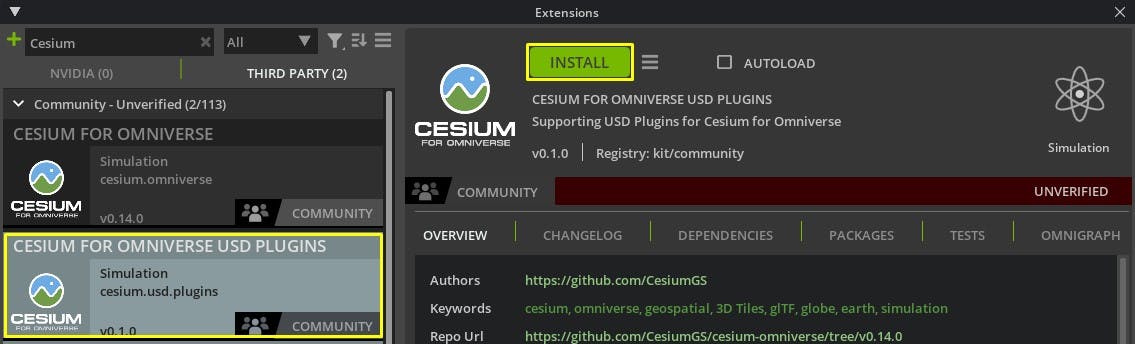
4Select the Cesium for Omniverse USD Plugins extension and click the Install button. The extension will be downloaded from the community extension register and installed to this version of Isaac Sim.
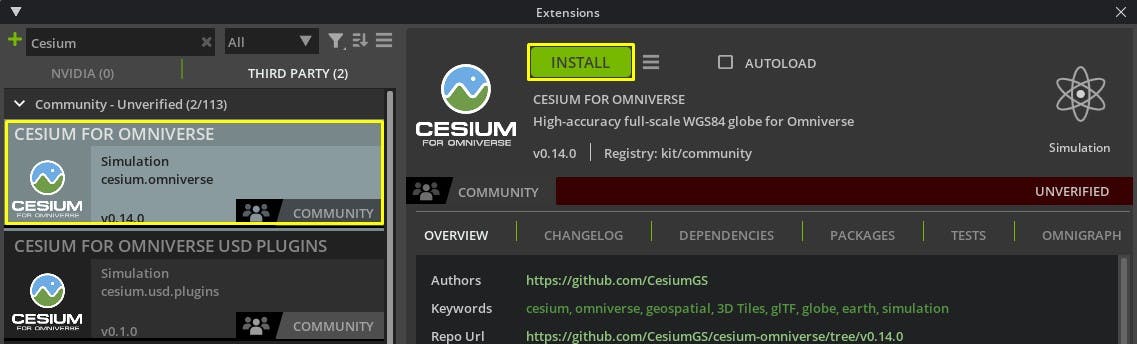
5Select the Cesium for Omniverse extension and click the Install button.
6Tick the autoload checkbox for Cesium for Omniverse; then close and relaunch Isaac Sim. You do not need to enable autoload for Cesium for Omniverse USD Plugin.
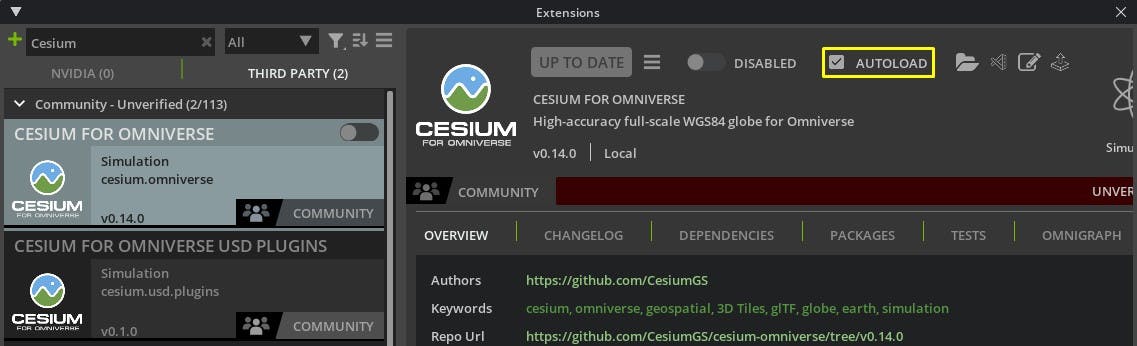
Cesium for Omniverse requires autoload to be checked in order to function correctly. If you disable and re-enable the extension in the future, always be sure to check autoload and restart Isaac Sim before use.
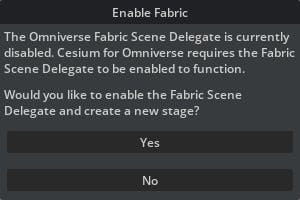
7Once Isaac Sim launches, you will be prompted to enable the Omniverse Fabric Scene Delegate. Fabric enables high-performance creation and modification of scene data and is a fundamental part of the tile-streaming engine in Cesium for Omniverse. Click Yes to enable Fabric.
8Verify the Cesium for Omniverse extension has loaded correctly by confirming a Cesium tab is now present in the right sidebar.

Because of the rapid evolution of the Omniverse ecosystem, previous versions of Omniverse applications such as Isaac Sim and USD Composer may be compatible only with older versions of Cesium for Omniverse. This process demonstrates how to install an older version of Cesium for Omniverse to Isaac Sim 5.1.0.
1Download your preferred release of the Cesium for Omniverse extension. The version you choose will depend on which version of Kit is used by your Omniverse application. An indicative version compatibility table is shown below.
| Omniverse Kit Version | Cesium for Omniverse |
|---|---|
| 109.0 | 0.28.0 |
| 107.3 | 0.27.0 |
| 106.5 | 0.25.0 |
| 105.1 | 0.11.0 to 0.24.0 |
| 105.0 | 0.8.0 to 0.10.0 |
| 104.2 | 0.1.0 to 0.7.0 |
We’re using Isaac Sim 5.1.0, which uses Omniverse Kit 107.3, so Cesium for Omniverse 0.27.0 will be used.
2Extract the contents of the zip file into the following location within your computer’s user documents folder: /Kit/Shared/exts.
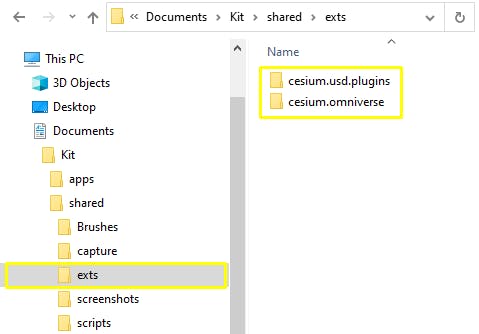
Installing to the Kit shared extension folder will make this version of Cesium for Omniverse available to all Omniverse applications on your system. To install to only a specific version of an Omniverse application, add a custom Extension Search Path using the Extensions Manager and extract Cesium for Omniverse to that location.
To add Cesium for Omniverse to applications that don’t use the Extensions Manager, see Adding Cesium for Omniverse to Omniverse Applications.
3The extension will now appear in the Extension Manager. Complete the extension activation steps in Step 1.
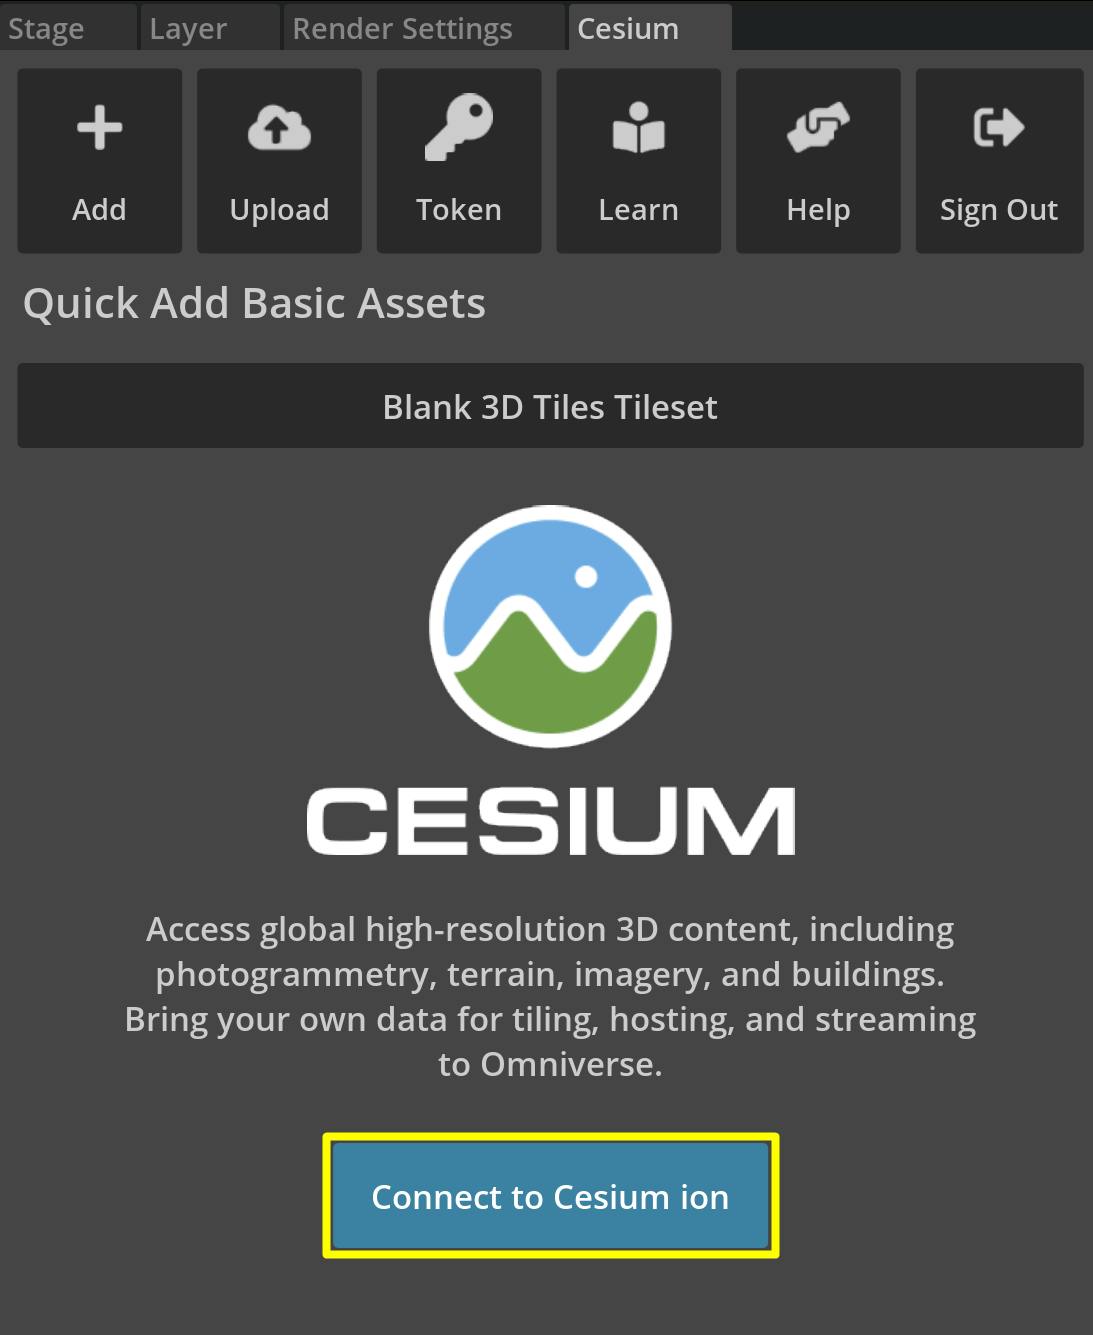
1Open the Cesium window by selecting the Cesium tab on the right sidebar.
2Click the Connect to Cesium ion button.
3A pop-up browser window will open. If you are not logged in, log in to your Cesium ion account. You can also sign in with your Epic Games, Github, or Google account.
4Once you are logged in, you'll see a prompt asking you to allow Cesium for Omniverse to access your assets. Select Allow, then return to your Omniverse application to continue.

5Now you'll create a default access token for your project. Every asset that you stream from Cesium ion requires an access token. In this tutorial, you'll set a project-wide access token that all your assets will use.
Click on the Token button at the top of the Cesium window.

6A new window will appear to configure the token. Select the Use an existing token checkbox, and choose Default Token from the drop-down menu. Then, press the Use as Project Default Token button.
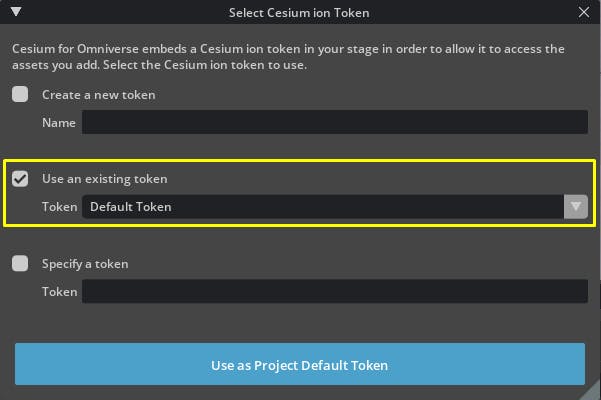
Alternatively, If you already have a token in your Cesium ion account that you would like to use, you can select it from the Use an existing token drop-down. You can also specify a token by selecting Specify a token and entering a Cesium ion token into the corresponding text field.
The Create a new token option will automatically create a new token within your Cesium ion account; however, you will need to manage that token's permissions manually via Cesium ion.
The default token in your Cesium ion account has read access to all individual assets associated with your account. Using the default token is a convenient choice for development but should not be used in production apps. For more information on token management within Cesium ion, visit the Cesium ion Access Tokens guide.
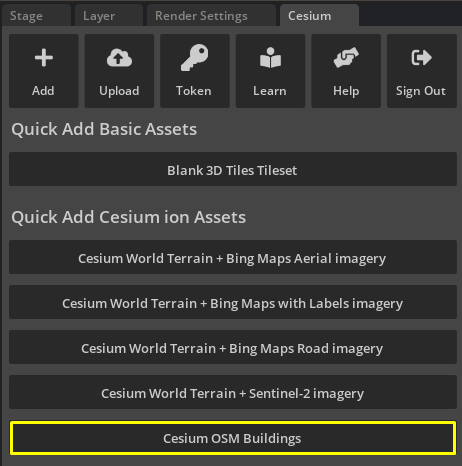
1Omniverse Isaac Sim opens with a default empty Stage on launch. From the Cesium window, add Cesium World Terrain + Bing Maps Aerial imagery by clicking the corresponding button.
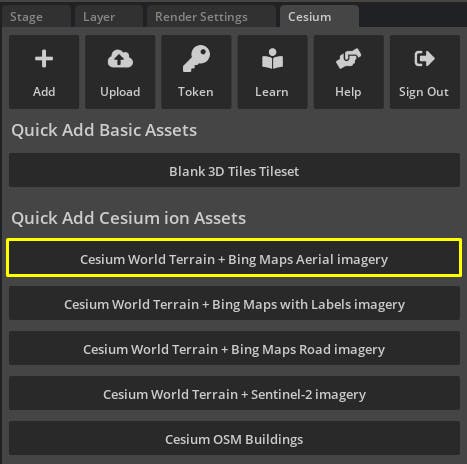
Terrain will start to appear in the scene.
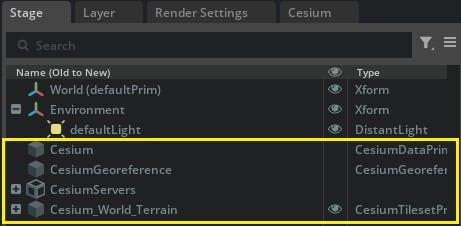
2Take a look at the Stage window. You should see four Cesium-related objects. One of them, Cesium_World_Terrain, is the tileset you just created. The other three—Cesium, CesiumGeoreference, and CesiumServers—are created automatically by Cesium for Omniverse and contain shared scene information such as georeferencing coordinates.
3If Cesium World Terrain is not already selected, select it now. In the Property window, you'll see more information about this object. Scroll down to Cesium Tileset Settings to see properties specific to Cesium tilesets.
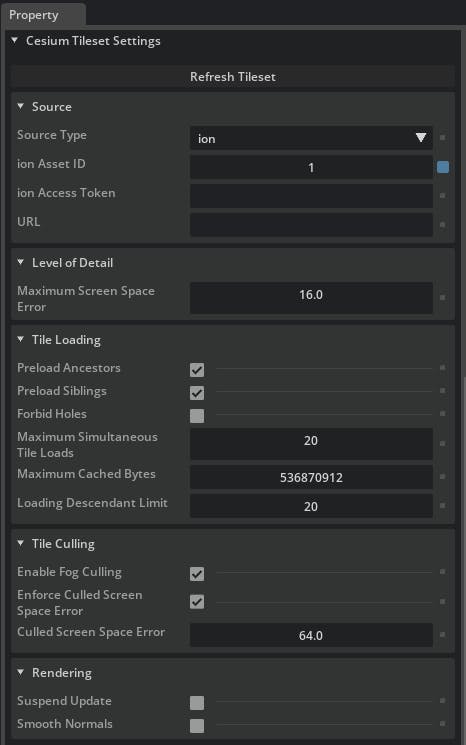
This is a Cesium Tileset prim. It streams 3D Tiles data into Omniverse and provides ways to configure that tileset.
You'll learn about many of the available settings in future tutorials. For now, feel free to explore and try out the different settings yourself. Hover over any setting with your mouse to learn more about what it does.
Once you're ready, continue to the next section.
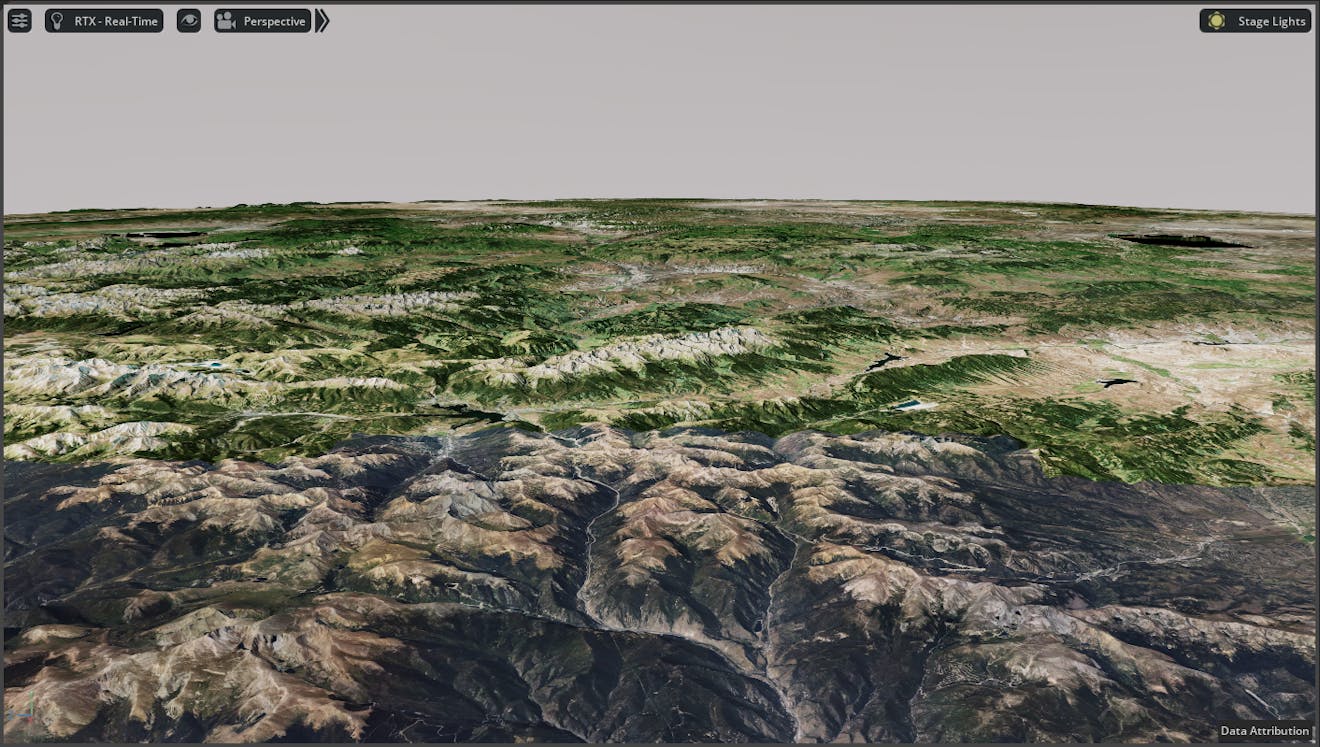
In your stage, you should be using the default Perspective view. As you navigate the stage in this view, particularly if you move high above the terrain or try to zoom to extents on the globe, you may notice the terrain on the horizon is abruptly cut off or the globe disappears completely.
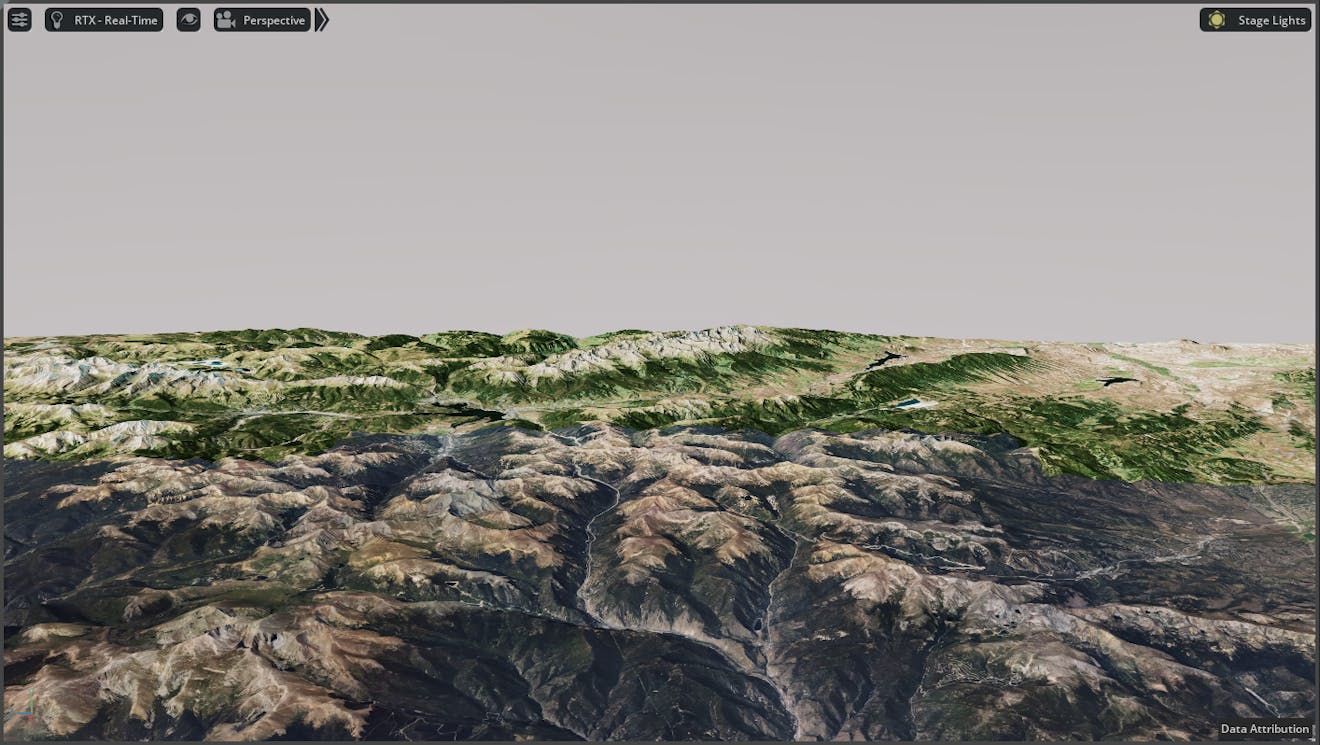
This happens because the perspective view in Omniverse is configured to see a limited range in front, specifically 10 kilometers by default.
Cesium World Terrain is a full-scale globe, which is almost 8,000 thousand miles in diameter! Fortunately, you can manually adjust Omniverse’s perspective camera so that it can render much farther into the distance, including visualizing the entire globe from far off in space if required.
1Click the properties button next to the Perspective entry in the camera drop-down menu on the viewport.

The perspective camera properties will appear in the Property Panel. Scroll down to the Clipping section, and adjust the Y value to a larger value. The number in this box is the distance in centimeters; increase it to 10000000000.0 (10,000 km). This will ensure your globe is visible from far in space.
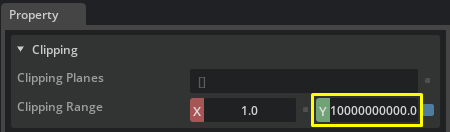
The Near clipping plane (X value) is the minimum distance from the camera where objects start to appear. If this is a large value, objects close to the camera will not show up. On the other hand, the Far clipping plane (Y value) is the maximum distance from the camera that objects will appear. Anything farther than the Far plane will not appear.
Far clipping can be used to improve rendering performance by limiting the amount of data the graphics card needs to render. Although it may be tempting to increase this value to the maximum, we recommend choosing the smallest value that best suits your specific use case.
Now that your camera can see more of the stage, feel free to position the camera to get the best view of the terrain. For more information on navigating within the Omniverse viewport, visit the Viewport Navigation guide.
Now that you’ve adjusted your camera to render more of the Omniverse stage, let’s return to adding content. Cesium for Omniverse can visualize more than just terrain, which we can demonstrate by adding a global dataset of city buildings.
1Select the CesiumGeoreference object in the Stage window. This object determines where in the world your Omniverse scene is set. The scene's current latitude, longitude, and height can be changed with this object’s properties.
2In the Property window, look for the Latitude, Longitude, and Height variables under theGeoreference Origin Point Coordinates header.
.png?auto=compress%2Cformat&w=413)
These coordinates currently point to the hills outside Denver, Colorado, USA.
3Change these variables to the coordinates below. This will locate the stage around San Francisco, California, USA.
- Latitude: 37.7749
- Longitude: -122.4194
- Height: 0.0
After entering these coordinates, the scene will have shifted to the new location. This is how it appears at the Omniverse origin. You may need to zoom out to see the city.
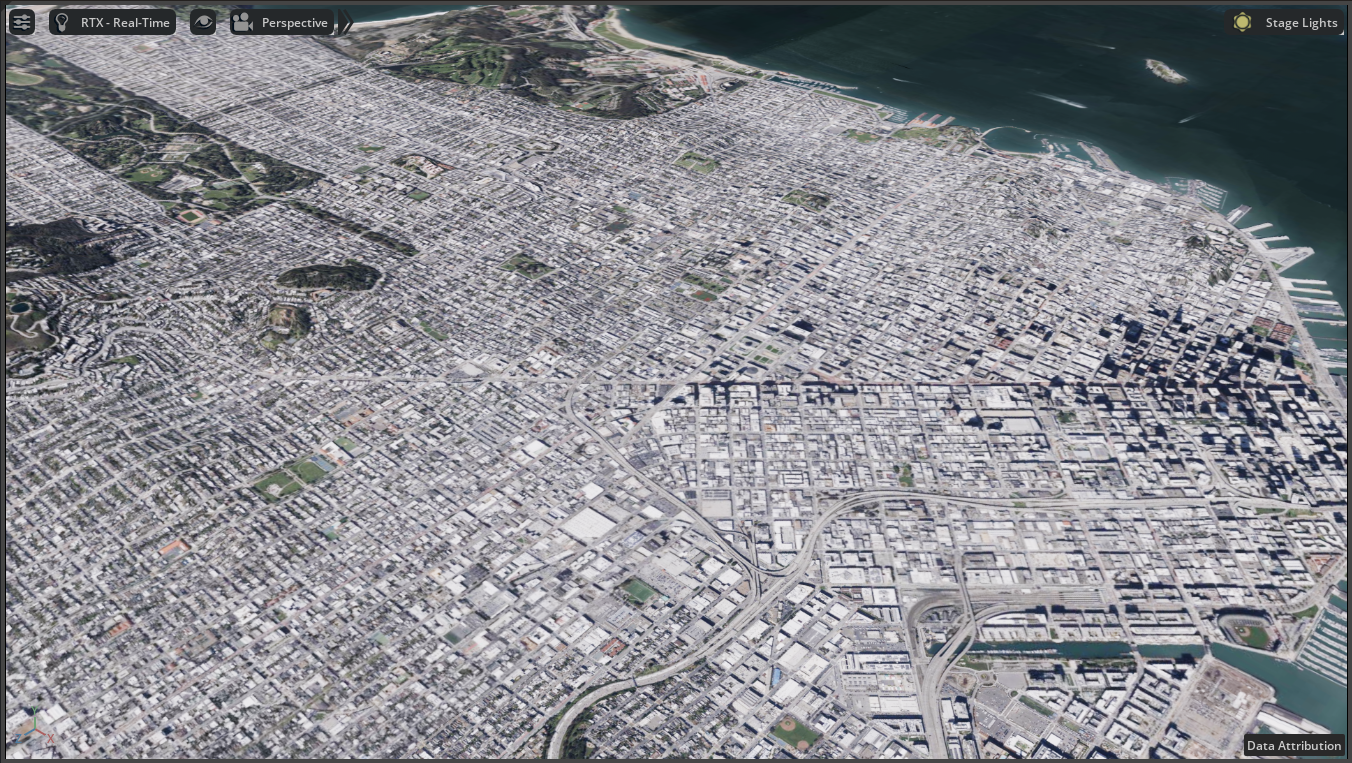
4The city looks very flat because Cesium World Terrain doesn't include building details. Fortunately, the Cesium OSM Buildings dataset can be added to fill the empty space.
In the Cesium window, locate the Cesium OSM Buildings option underneath Quick Add Cesium ion Assets. Click to add the data to the scene.
The buildings should now appear on top of the terrain. You may be able to recognize some of the buildings that make up the San Francisco skyline!
Congratulations—you've created your first scene with Cesium for Omniverse. Feel free to explore and check out the world!
Now you are ready to add your own assets to the scene. Be sure to save your scene using File > Save, as we’ll continue working with this scene in future tutorials. You can then continue on to Adding Datasets.