Capturing Images and Video
This tutorial shows you how to capture images and video of content loaded with Cesium for Omniverse. You’ll continue to use the San Francisco project created during previous tutorials.
.png?auto=compress%2Cformat&w=1320)
San Francisco in Cesium for Omniverse. Follow the tutorial to learn to capture scenes like this.
You’ll learn how to:
- Capture high-resolution images.
- Capture high-resolution video.
- Adjust settings that ensure the best possible captures of Cesium for Omniverse content.
Prerequisites
- Know how to set up a basic Cesium for Omniverse stage in NVIDIA Omniverse USD Composer (formerly Create). Check out our Cesium for Omniverse Quickstart guide for instructions on starting with the Cesium for Omniverse extension.
- The Cesium for Omniverse samples downloaded.
- A copy of the USD created during the Lighting the Stage tutorial. A completed USD can be found within the Cesium for Omniverse samples.
- USD Composer 2023.2.2.
This tutorial assumes that you have already installed the Cesium for Omniverse extension and opened NVIDIA Omniverse USD Composer (formerly Create) with the Fabric Scene Delegate settings enabled. If you have not yet done this, see the Quickstart for detailed instructions.
1Open your USD from the Lighting the Stage tutorial, or open /tutorials/02_lighting_the_stage/02_lighting_the_stage.usda from the Cesium for Omniverse samples. You should see Cesium World Terrain along with Aerometrex San Francisco Photogrammetry.
.png?auto=compress%2Cformat&w=1105)
2You can simply capture the viewport as it is by clicking Edit > Capture Screenshot or pressing F10 on your keyboard.
This will capture a clean image of the viewport, without any user interface, gizmos, or other editor-specific content.
3You can use the console to find the location of your screen captures. By default, this is in the users documents folder under /Kit/shared/screenshots/.

4You can capture higher resolutions by configuring your viewport to render at a specific resolution, by clicking on the Viewport menu button and choosing Viewport > Render Resolution. From there you can choose a predefined resolution or enter a custom one.
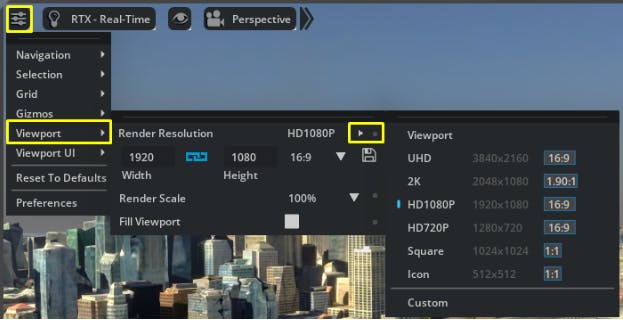
Switching to higher resolutions will likely trigger Cesium for Omniverse to load higher detail levels of tileset data. This, along with running the viewport at higher resolutions, may reduce frame rate or use excessive resources leading to instability. You may need to experiment with different resolutions and detail levels to find the optimum setting for your use case.
5Alternatively, the Movie Capture tool can be used to capture single frames. This tool can temporarily increase resolution, capture an image, then return to normal resolution. See the video section below for more information on how to use the Movie Capture tool.
In this part of the tutorial, you will reference a USD that contains some camera animation paths used to create shots for Cesium for Omniverse’s launch video. You will be working with a camera shot that starts with the whole globe in view and zooms down to fly above San Francisco.
1Add the Zoom to San Francisco camera animation to the Stage by clicking File > Add Reference and selecting /tutorials/03_capturing_image_and_video/camera_anims/zoom_to_sf.usda from the Cesium for Omniverse samples.
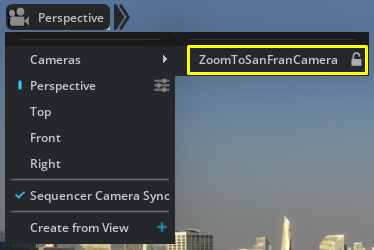
2Enter the new camera by clicking Perspective > Cameras and choosing ZoomToSanFranCamera.
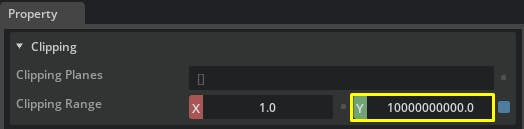
3You’ll probably see a blank screen; this is because the referenced camera’s clipping plane is too small. Click the Settings button next to ZoomToSanFramCamera to open its properties.

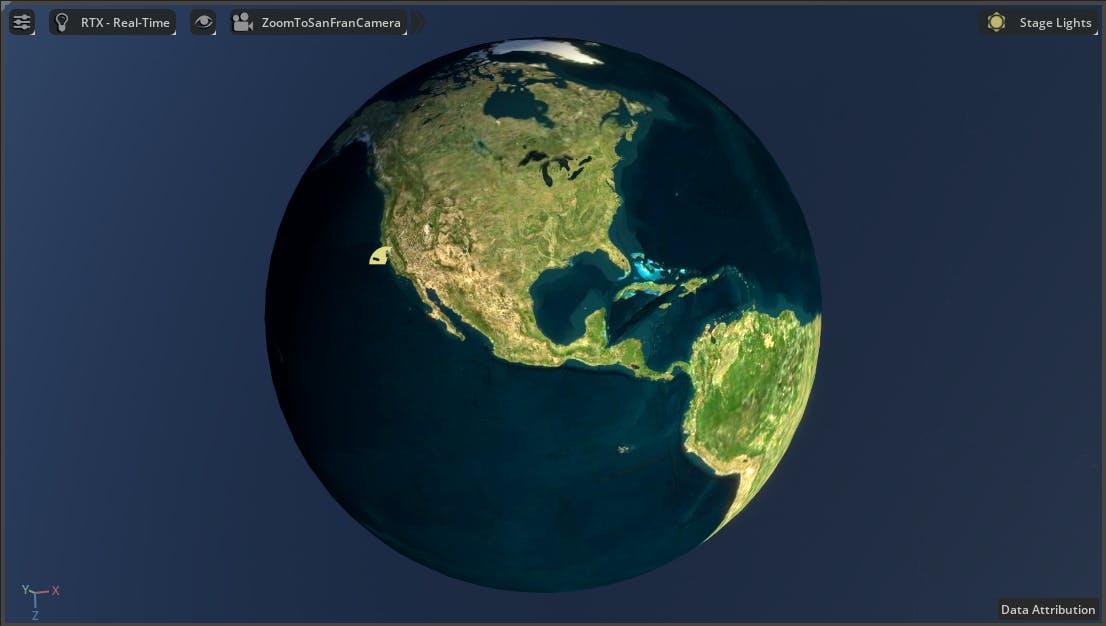
4Find the Clipping Range property and change the Y value to be 10000000000.0. The globe should now appear, but it will be gray.
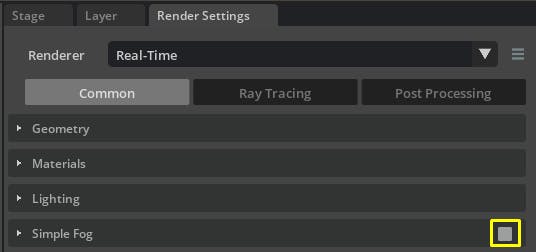
5The Simple Fog we configured in the previous tutorial is causing the globe to render gray. Go to Render Settings > Common and disable Simple Fog.
6The globe will now render as black. Go to Render Settings > Ray Tracing > NVIDIA DLSS and turn on the Ray Reconstruction.
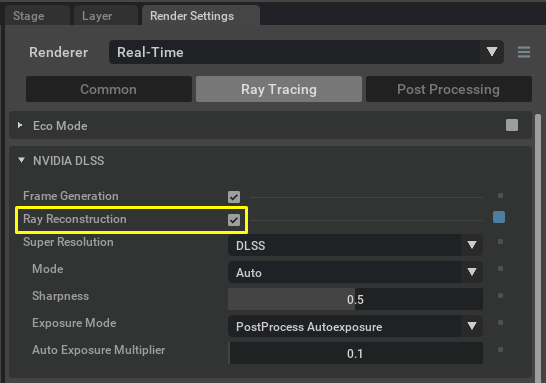
The globe should now appear in the viewport.
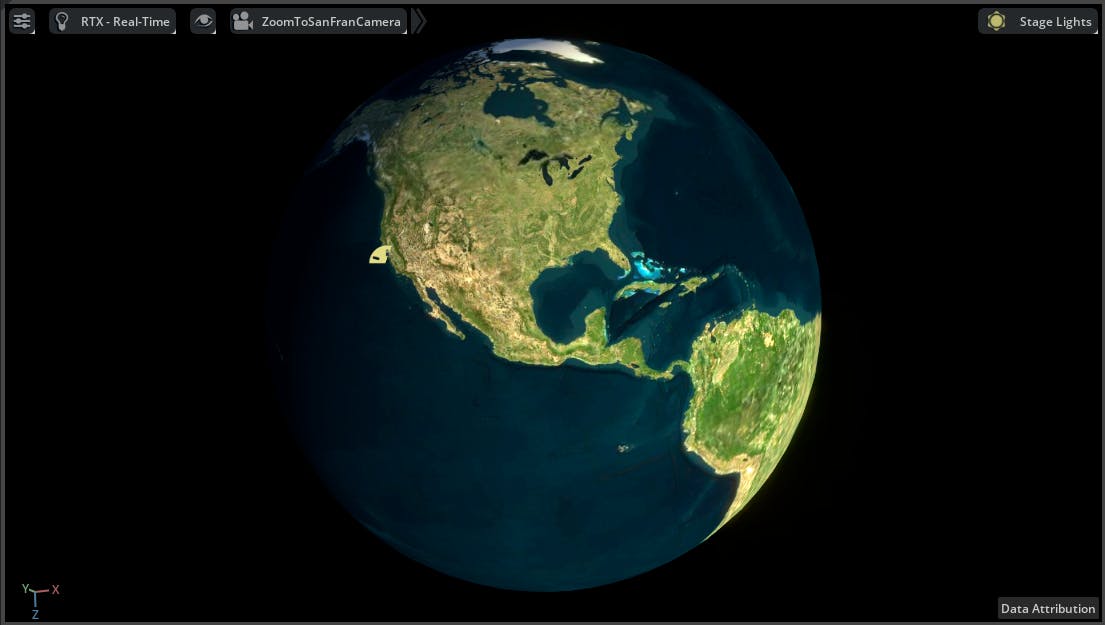
7Lastly, let’s turn off the background sky. Omniverse automatically renders the HDR image from your Dome Light as your background, but this can be disabled. Select the Dome Light in the Stage to view its properties. Find the Visible In Primary Ray property and disable it.
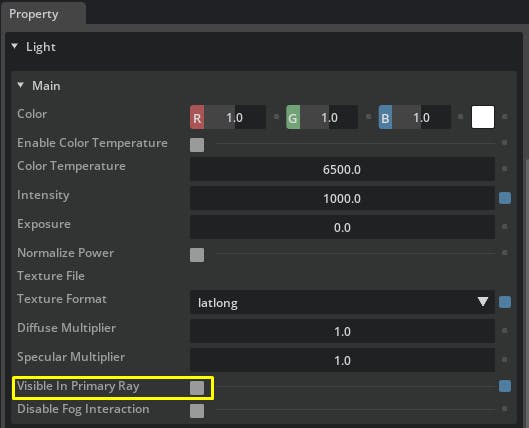
The sky should disappear and the globe should be surrounded by the darkness of space. Your stage will still be lit by the Dome Light and its HDR image.
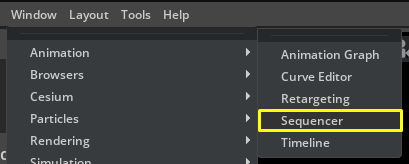
8You’re almost ready to play back the camera animation—but first we need to increase the length of the default Omniverse playback timeline. Open the Sequencer by clicking Window > Animation > Sequencer.
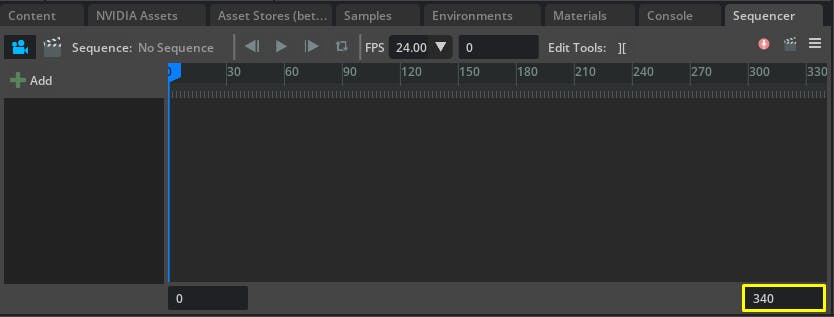
9The Sequencer should appear at the bottom of the screen. Change the Scene End time at the bottom right of the screen to 340 frames. This is the length of our animation.
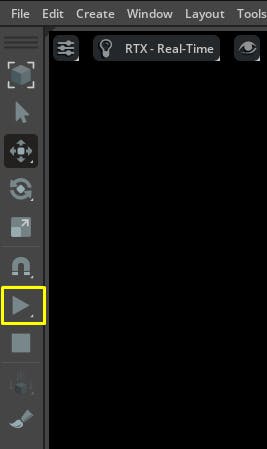
10Finally, click the Play button to the left of the viewport. The camera should begin flying toward the globe and zoom down to fly above San Francisco. Don’t be alarmed if the streaming of the Cesium World Terrain or San Francisco Photogrammetry datasets does not keep up with the camera animation; we’ll go over methods of managing this in the next part of the tutorial.
Now that we have loaded a camera animation, we’ll use the Movie Capture tool to produce a high-resolution video.
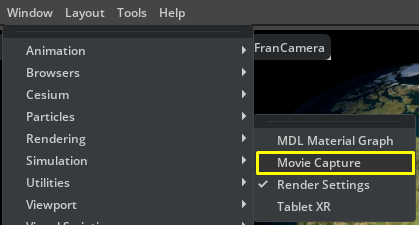
1Click Window > Rendering > Movie Capture to open the Movie Capture tool.
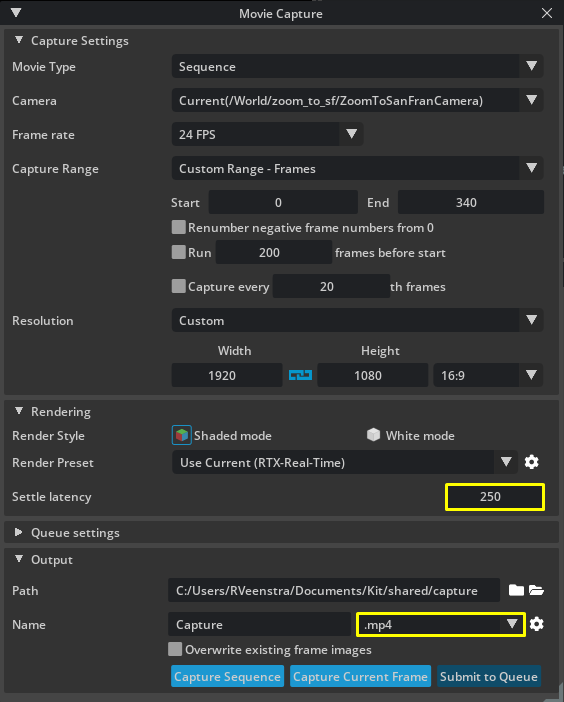
2You should be able to capture a video using the default settings, however double check the settings align with the image below. Note two settings that have been changed specifically for this tutorial:
- Settle latency: At this time, the Movie Capture tool does not know how to “wait” until Cesium for Omniverse has finished streaming data to the appropriate detail level. This can cause videos to be captured that have data insufficiently loaded, resulting in popping or even missing data entirely.
Settle latency tells the Movie Capture tool to render a set number of idle frames before capturing the next frame, giving Cesium for Omniverse time to stream in data for the next frame. You may need to experiment with finding a suitable setting, given computer power, internet connection, detail levels, and other factors that may affect load time. - Format: Capturing to an MP4 makes it easy to quickly view an output, but it is recommended to capture individual frames into lossless formats such as PNG, TGA, or EXR if a professional video editing package is being used to assemble the video.
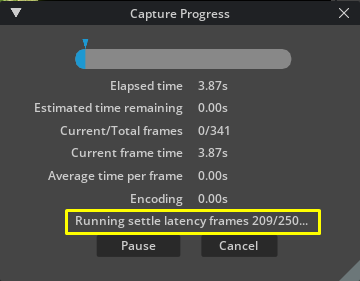
3Click Capture Sequence to begin capturing. You can watch the progress of the capture in your viewport. Ensure settle latency frames are being rendered.
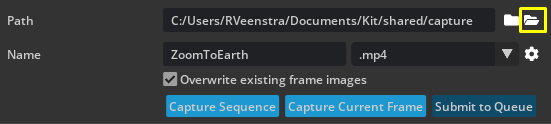
4Once the capture is complete, you can open your capture path by clicking the folder icon in the Movie Capture tool.
You may notice flickers, missing data, or slow data loading in your video. This is an indication that your settle latency is too low and not enough time is being given between captures for data to finish loading. Experiment with increasing settle latency, reducing capture resolution, or reducing tileset level of detail to find your optimal capture settings.
5An additional camera animation showing the waterfront of San Francisco is included within the Cesium for Omniverse samples. It is located at /tutorials/03_capturing_image_and_video/camera_anims/waterfront_sf.usda. Try capturing some footage using the same process as above.
Experiment with Dynamic Skies and Environment Sun Studies in this tutorial.