Adding Datasets
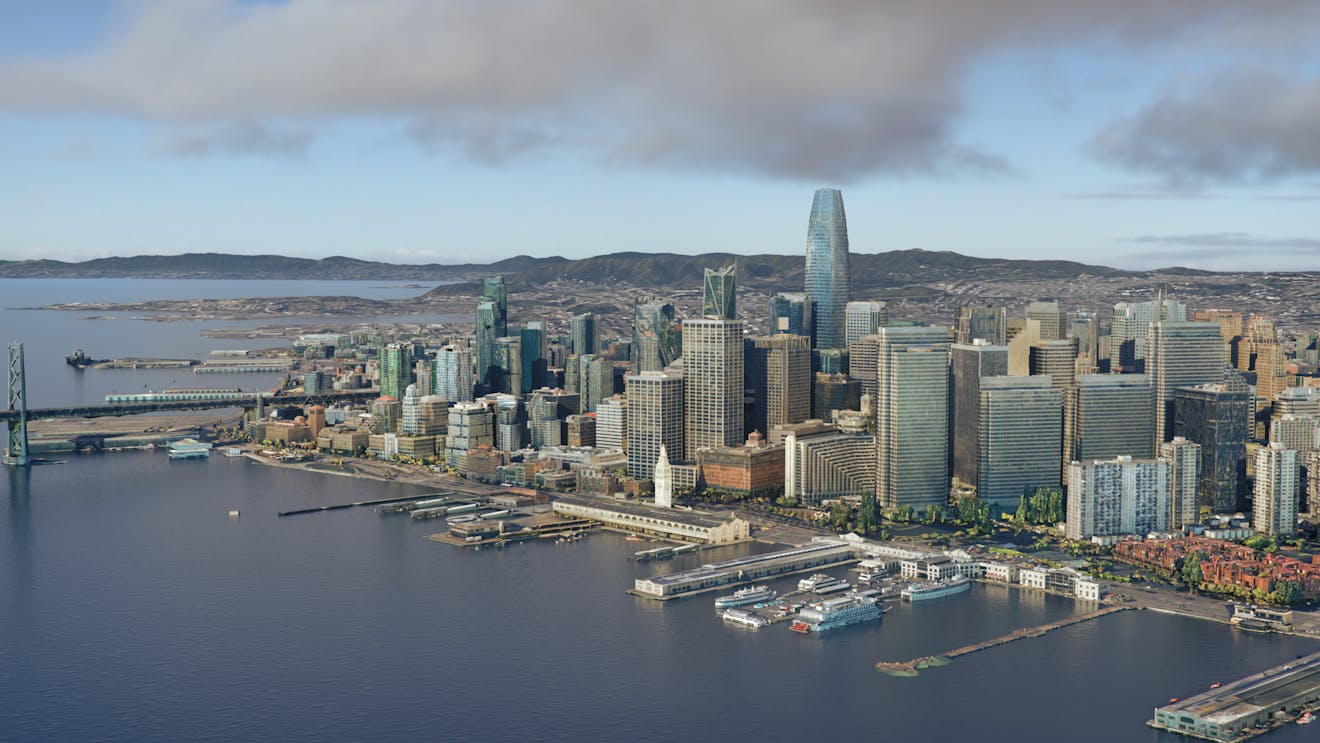
This tutorial shows you how to use Cesium for Omniverse to bring real-world datasets into your projects. You’ll use a 5 cm resolution photogrammetry model of San Francisco from our friends at Aerometrex and integrate it with Cesium World Terrain and some reflective water for the bay area.
You’ll learn how to:
- Add a city-scale 3D Tiles photogrammetry model from Cesium ion to your stage.
- Adjust Cesium World Terrain to ensure it interfaces well with the photogrammetry model.
- Add reflective water by adding a reference to a separate USD file containing water surfaces.
- Know how to set up a basic Cesium for Omniverse stage in NVIDIA Omniverse USD Composer (formerly Create). Check out our Cesium for Omniverse Quickstart guide for instructions on starting with the Cesium for Omniverse extension.
- The Cesium for Omniverse samples downloaded to your computer.
- A copy of the USD created during the Quickstart tutorial. If you don’t have this, a completed Quickstart USD can be found within the Cesium for Omniverse samples.
- A Cesium ion account to stream the San Francisco tileset into Omniverse.
This tutorial assumes that you have already installed the Cesium for Omniverse extension and opened NVIDIA Omniverse USD Composer (formerly Create) with the Fabric Scene Delegate settings enabled. If you have not yet done this, see the Quickstart for detailed instructions.
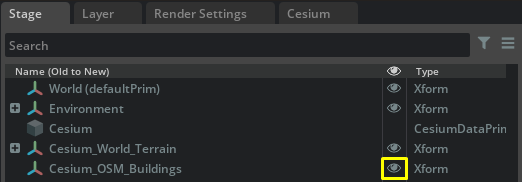
1. Open your USD from the Quickstart tutorial, or open /tutorials/00_quickstart/00_quickstart.usda from the Cesium for Omniverse samples. You should see Cesium World Terrain along with Cesium OSM Buildings, located in the San Francisco area.
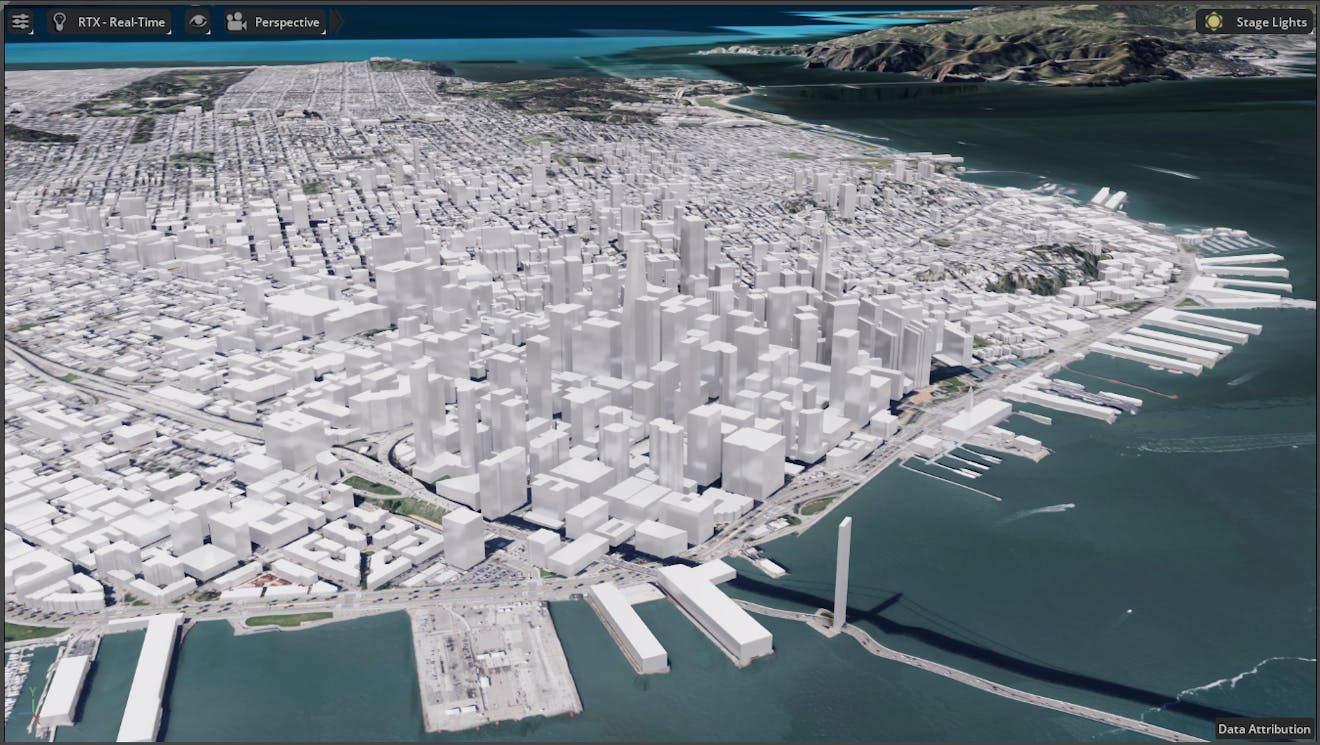
2. Hide Cesium OSM Buildings by finding the corresponding entry in the Stage window and clicking the eye button next to it. You should now be left with only Cesium World Terrain in the viewport.
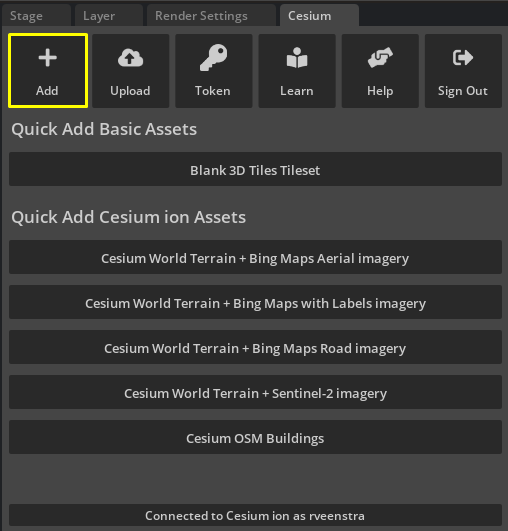
3. Open the Cesium panel in the right sidebar.
If the Cesium panel isn’t visible in your user interface, click on Window > Cesium > Cesium to make it visible.
4. Connect to Cesium ion if you haven’t already.
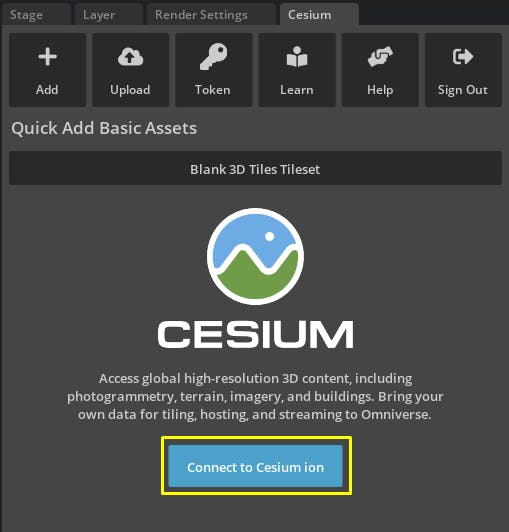
5. Click the Add button to open the Cesium ion Assets panel.
6. Find Aerometrex San Francisco High Resolution 3D Model in the asset list. Click on it, and then click the Add to Stage button in the panel to the right. If you can’t see the button, you may need to use the horizontal scrollbar in the panel to move across to the right.
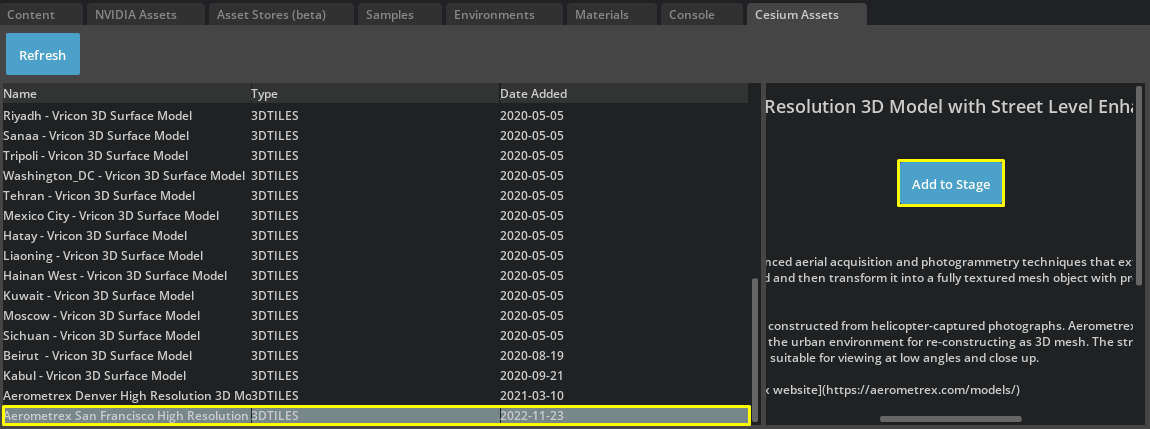
Is the Aerometrex dataset missing from the asset list? Visit the San Francisco Photogrammetry Asset Depot page and click Add to My Assets. Then return to Omniverse USD Composer and refresh the asset list using the button in the upper left corner of the Cesium ion Assets window.
You may be prompted to select a Cesium ion Token. You can use the existing Default Token for development purposes or choose an alternative token based on your project needs. See the Quickstart tutorial for more information on token selection.
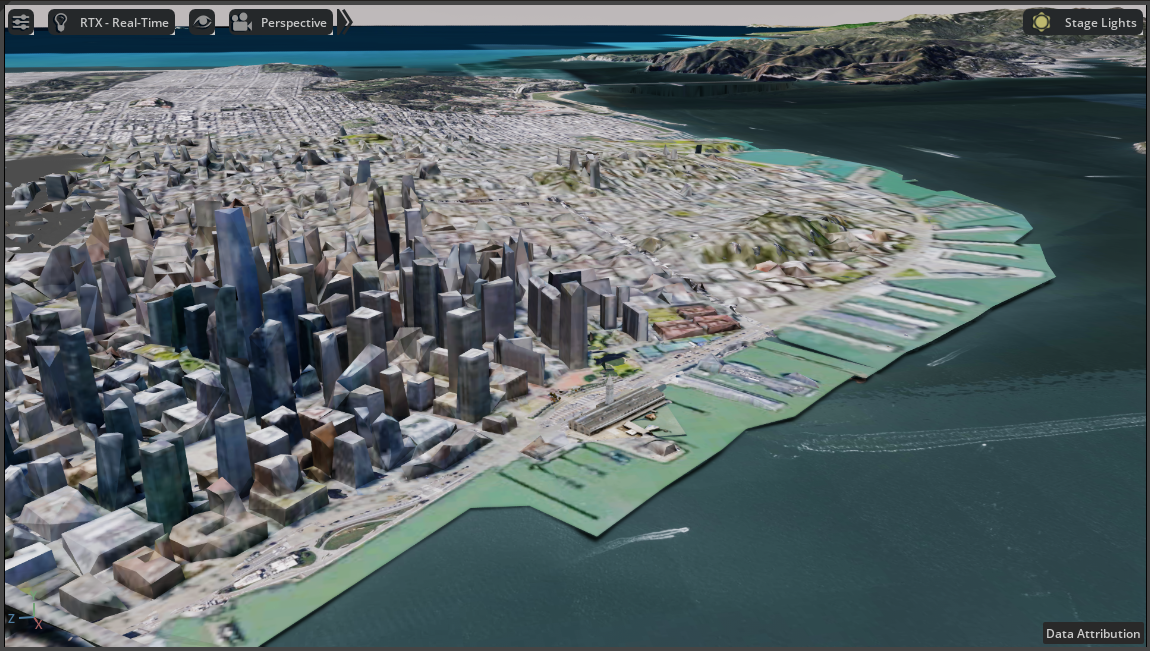
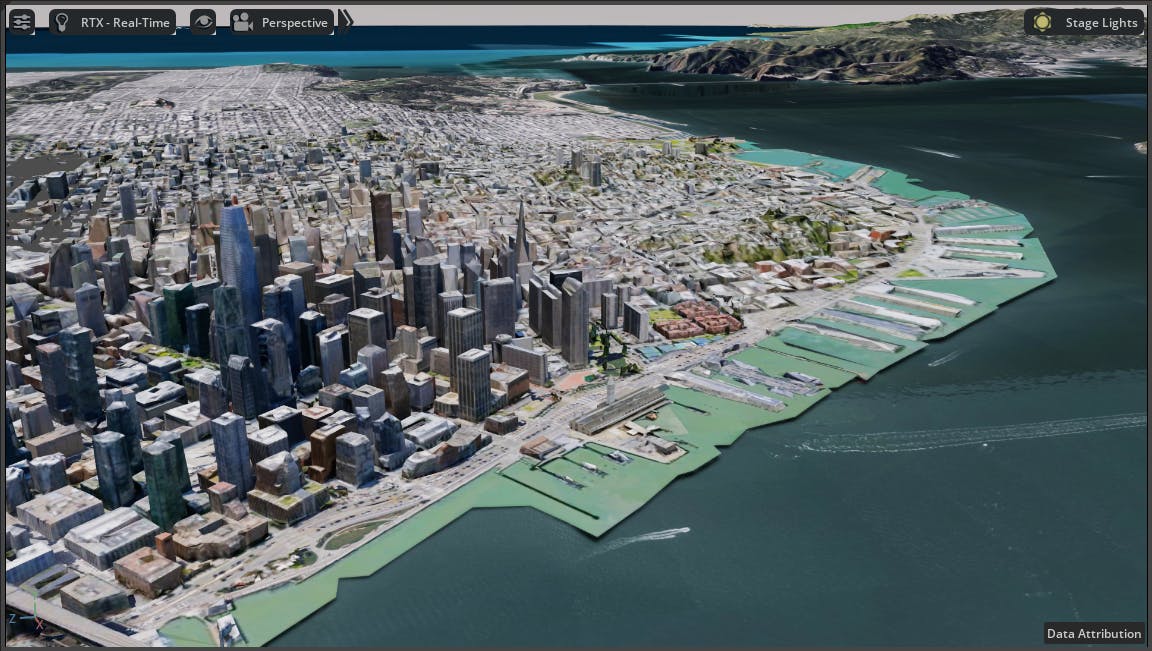
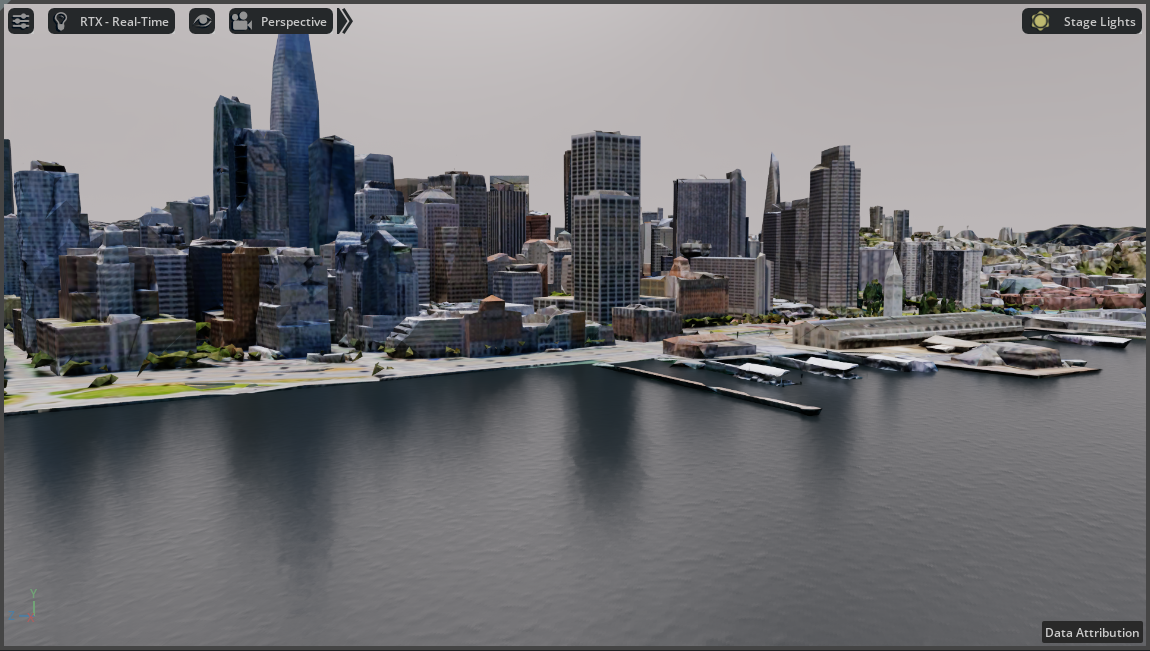
7. Photogrammetry data of San Francisco should now begin streaming into the viewport.
You should see a new object in the Stage window named Aerometrex_San_Francisco_High_Resolution_3D_Model.
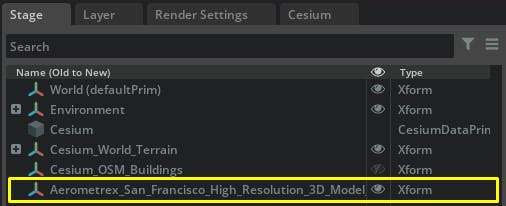
8. Click on Aerometrex_San_Francisco_High_Resolution_3D_Model in the Stage window, and take a look at the details in the Property panel.
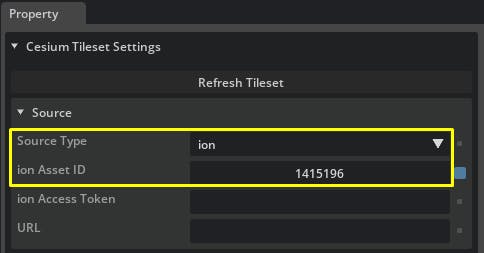
The ion Asset ID is prefilled with the Asset ID of the San Francisco Photogrammetry dataset.
The ion Access Token is blank. This means that the asset is using the project's default token to access the data. There's no need to change either of these settings right now.
You can set a tileset's ion Access Token on a per-tileset basis by copying and pasting an access token from Cesium ion. Then, the tileset will use that token instead of the project's default token.
Configure your project's tokens using the Token button in the Cesium panel.
Want to learn more about access tokens? Check out the Cesium ion Access Tokens tutorial.
9. You may have noticed the photogrammetry model has loaded at quite a low resolution. To increase the level of detail, scroll down to the Level of Detail section in the Property window. Reducing the Maximum Screen Space Error will increase the level of detail. Try reducing it to 4. This should increase the level of detail of the photogrammetry in your viewport, while still maintaining reasonable load times and resource usage.
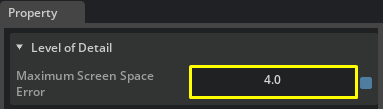
Note that increasing detail levels will likely result in slower load times, slower frame rates, and more resource usage. There is no correct value, as use cases vary. You can experiment with different Maximum Screen Space Error values to find the right level of detail for your needs.
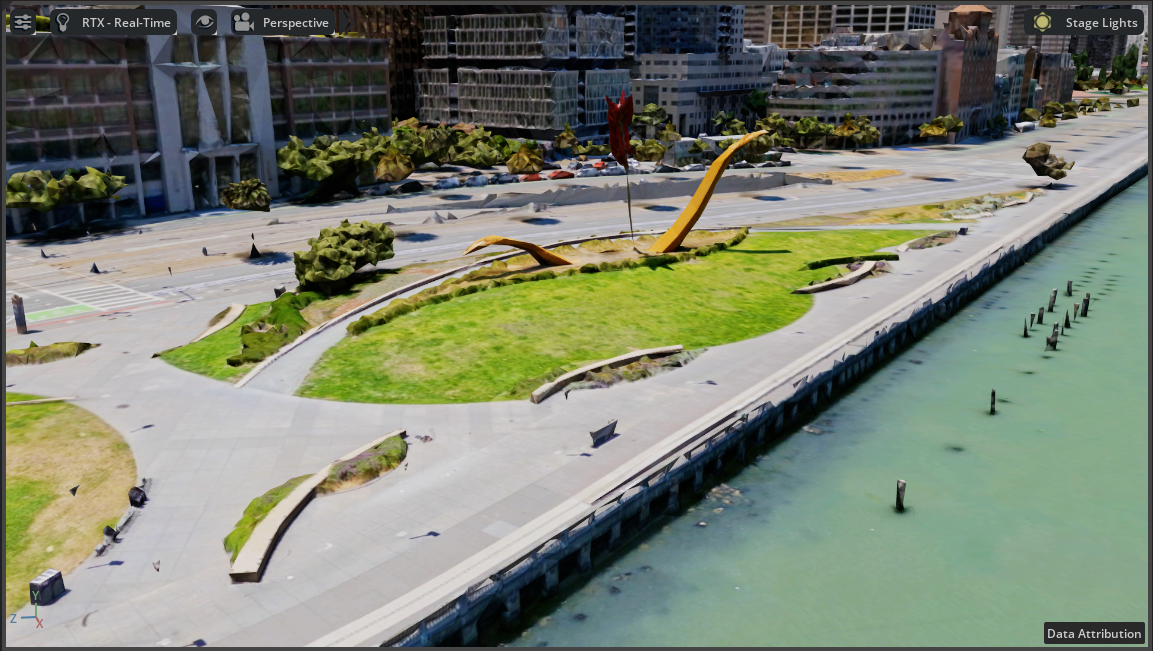
You may notice the scene looks good from a distance, but when you zoom in you may see some places where Cesium World Terrain clashes with the photogrammetry model.
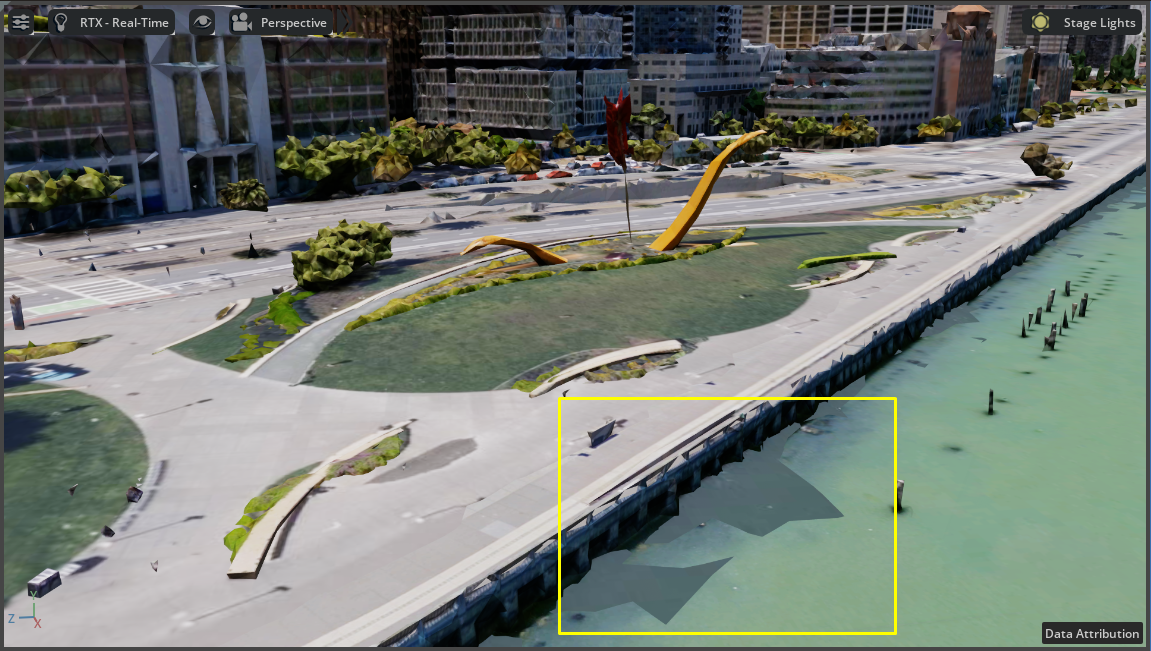
This happens because Cesium World Terrain and San Francisco photogrammetry are both high-resolution datasets and overlap in the same areas. You can avoid this by moving the Cesium World Terrain tileset lower in the stage so that it no longer overlaps.
In this tutorial we recommend moving Cesium World Terrain and keeping the photogrammetry in its original geospatially accurate location. For this use case, maintaining accuracy for the higher resolution dataset is of more importance; however, your use case may vary. Always approach moving tilesets with caution when building applications where data accuracy is of a high importance.
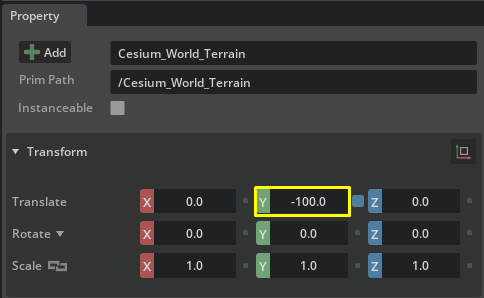
1. Select the Cesium_World_Terrain object and move it lower in the Y-direction. You can change the Y-coordinate of the Position under the Transform property by typing in the desired value. If the object does not have a transform, click Add Transforms to create one. Try moving it 100 units (100 cm) lower.
You can also do this by selecting the Move Tool next to the viewport and dragging the green transform arrow downward.
You should now see reduced clipping between the photogrammetry and world terrain.
Let’s add some water into the bay and test out the ray-traced reflections Omniverse is capable of. A USD containing reflective water has already been made and can be referenced directly into the stage. By using references, any changes made to the original USD can automatically propagate to any other USD referencing them. This is a powerful feature of the USD workflow within Omniverse, and it can be used to minimize repetitive work and create consistency across your projects.
1. Click File > Add Reference, and find /shared_resources/water/default_water.usda within the Cesium for Omniverse samples. Select it and click Add Reference. Water should appear within the stage.
This USD has been pre-prepared to snap perfectly in place with the San Francisco dataset. Other USDs may not be in the correct location or even the correct scale. In this case, you can select your referenced USD within the stage and add a transform to it, enabling you to move, rotate, and scale the referenced USD, without affecting the original USD file.
Read on to the next tutorial, Lighting the Stage, to learn more about preparing your project for capturing amazing visuals of your tilesets.