Visualize Travel Time in CesiumJS with Photorealistic 3D Tiles from Google Maps Platform and Esri ArcGIS Location Services
By combining Esri’s geospatial analysis capabilities through ArcGIS location services, interactive capabilities of CesiumJS, and the lifelike realism of Google Maps Platform’s Photorealistic 3D Tiles, developers can easily and quickly create powerful 3D geospatial visualizations with immersive environments.
In this tutorial, we’ll build a Cesium app highlighting areas accessible via five-, ten-, and fifteen-minute drives from a selected location. You’ll learn how to:
- Stream Photorealistic 3D Tiles in CesiumJS.
- Query ArcGIS location services via a REST API for geospatial analysis.
- Classify 3D Tiles with polygons and add styling.
- Add interactivity with picking.
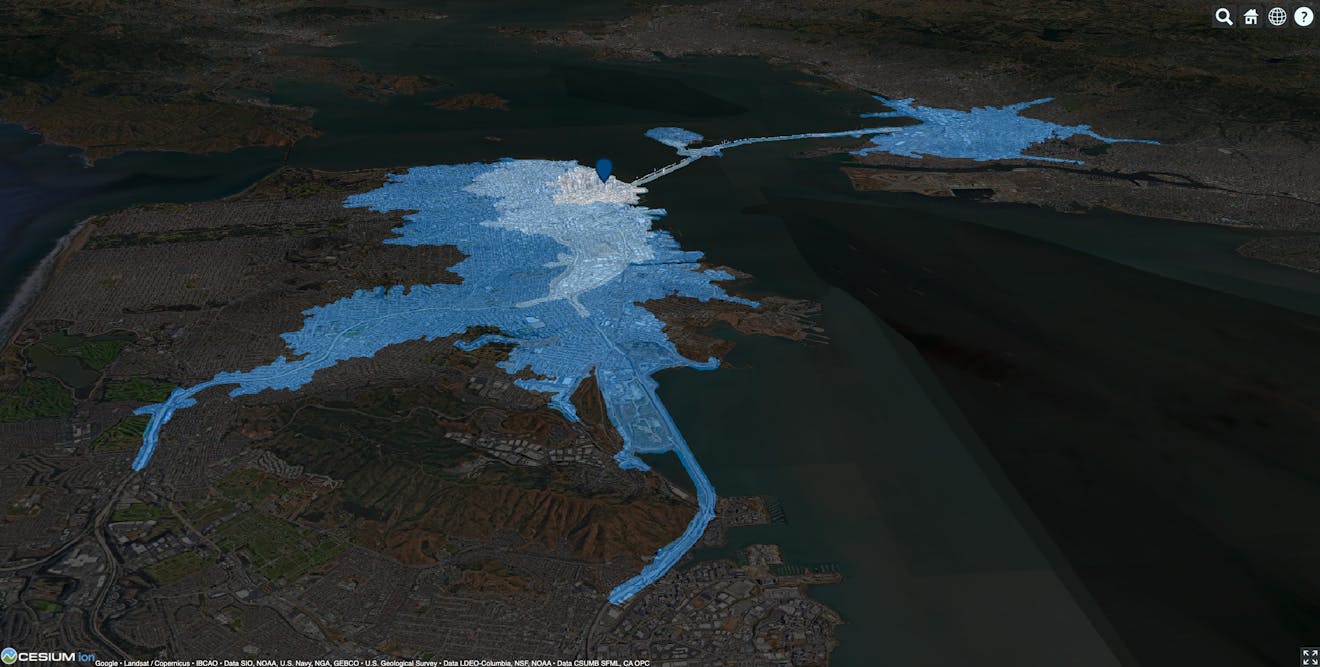
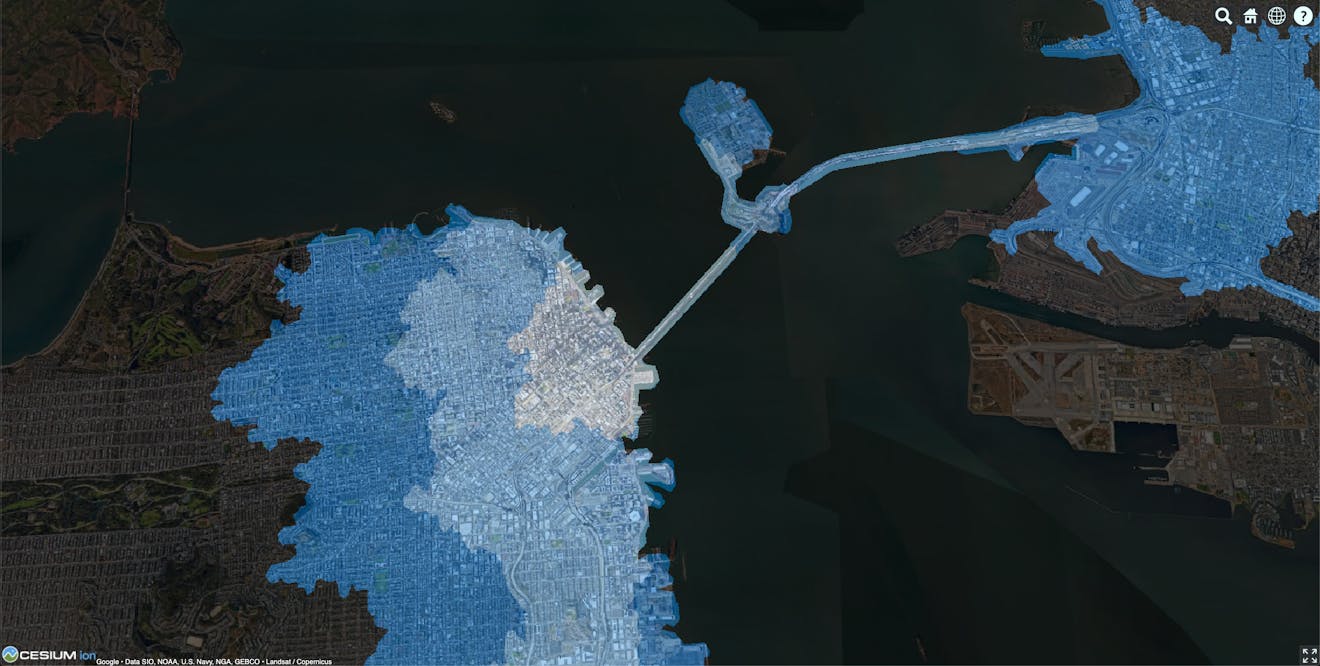
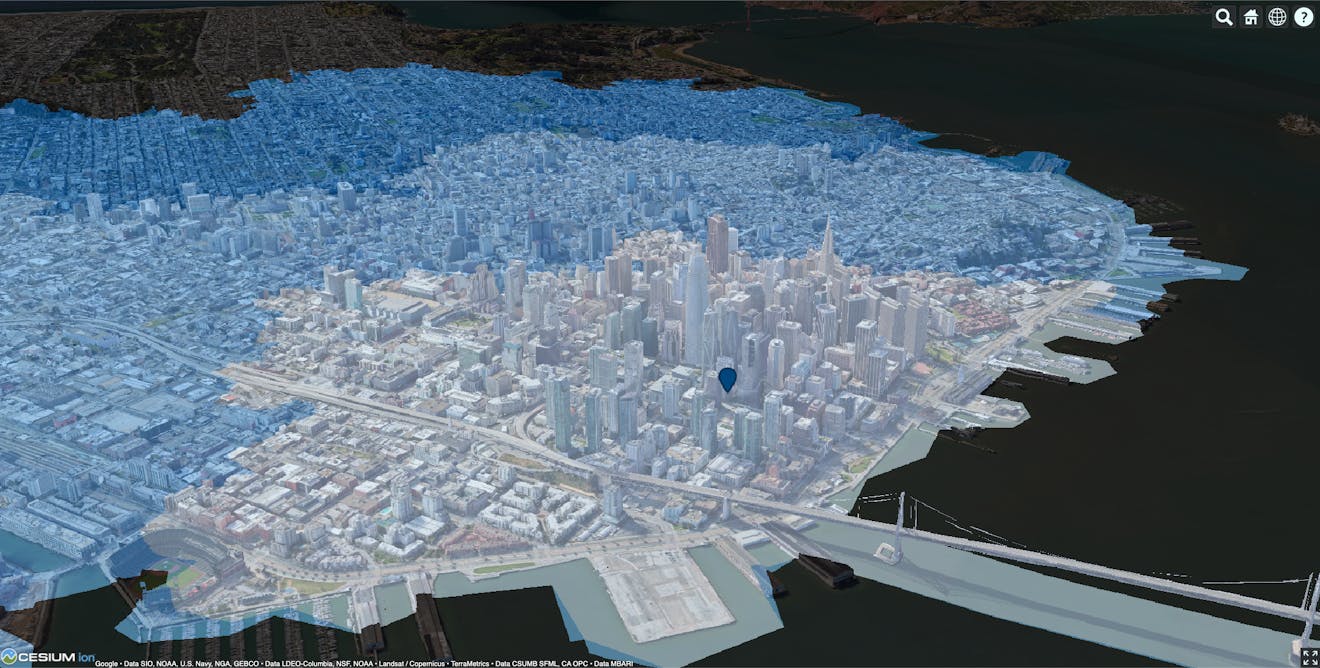
Travel time in San Francisco, CA, USA, queried from ArcGIS location services and visualized with Photorealistic 3D Tiles in CesiumJS.
Google provides a worldwide dataset with high-resolution coverage spanning numerous countries and thousands of cities. The Google Maps Platform Map Tiles API streams 3D Tiles, an open standard for streaming 3D geospatial data, which allows developers to easily integrate Google's extensive dataset into a CesiumJS app, providing users the necessary context and realism required to make our travel time data come to life.
To begin, we’ll use the CesiumJS Quickstart as our base. Add the following script tags to an HTML document to load CesiumJS and the ArcGIS REST API library.
<script src="https://cesium.com/downloads/cesiumjs/releases/1.110/Build/Cesium/Cesium.js"></script>
<link
  href="https://cesium.com/downloads/cesiumjs/releases/1.110/Build/Cesium/Widgets/widgets.css"
  rel="stylesheet"
/>
<script src="https://unpkg.com/@esri/arcgis-rest-request@4.0.0/dist/bundled/request.umd.js"></script>
<script src="https://unpkg.com/@esri/arcgis-rest-routing@4.0.0/dist/bundled/routing.umd.js"></script>
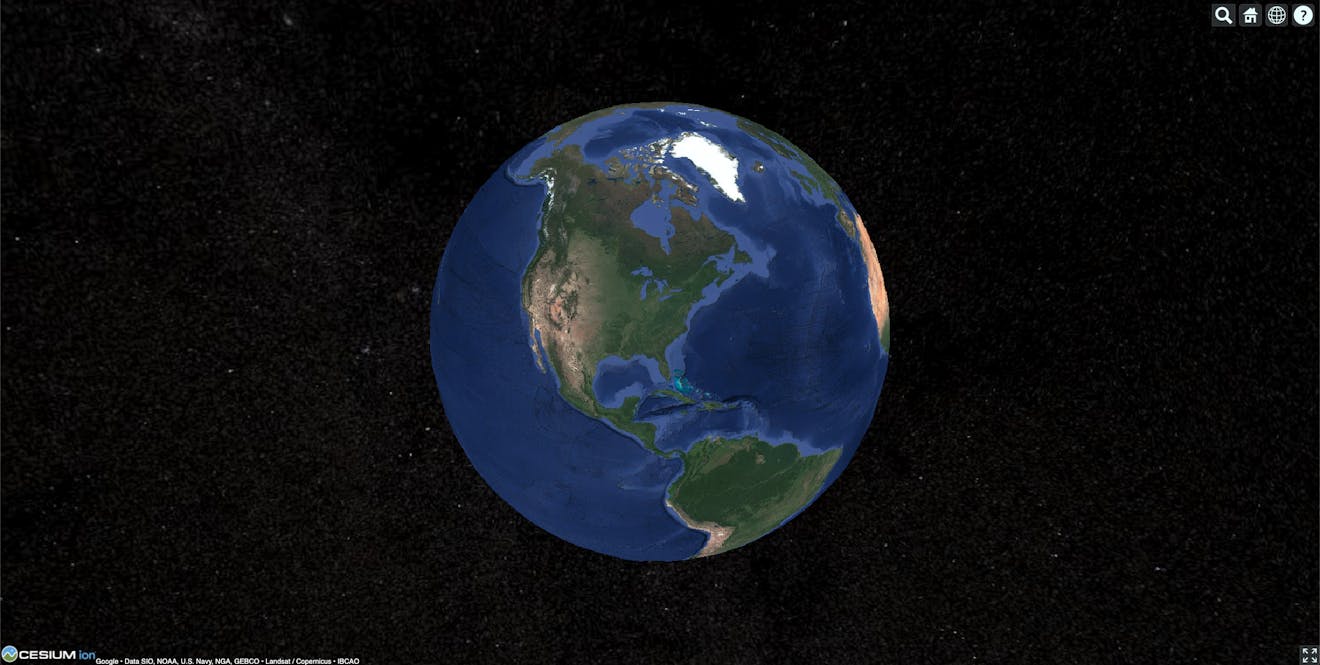
After setting our Cesium ion access token, create a minimal Cesium viewer. To do so, add the following JavaScript code to a script tag, replacing YOUR_CESIUM_ACCESS_TOKEN with your Cesium ion access token.
  Cesium.Ion.defaultAccessToken = "YOUR_CESIUM_ACCESS_TOKEN";

  const viewer = new Cesium.Viewer("cesiumContainer", {
    timeline: false,
    animation: false,
    globe: false,
  });
Now, add a global base layer using the Google Maps Platform Map Tiles API as a 3D tileset:
  try {
    const tileset = await Cesium.createGooglePhotorealistic3DTileset();
    viewer.scene.primitives.add(tileset);
  } catch (error) {
    console.log(`Failed to load tileset: ${error}`);
  }
For a more detailed tutorial, see Photorealistic 3D Tiles from Google Maps Platform in CesiumJS.
According to the ArcGIS developer documentation, a service area, or isochrone, represents the geographical extent that can be reached by either driving or walking on a street network. The shape and size of the service area are determined by restrictions on either time or distance. The ability to calculate service areas is invaluable for a range of applications. It aids in optimizing routes, evaluating accessibility, conducting demographic analysis, and facilitating decision-making in areas such as logistics, transportation planning, and emergency response.
To calculate and retrieve service areas, we’ll use ArcGIS location services through a REST API. We’ll query for the service area as GeoJSON data, which will contain polygons that represent areas reachable within a fifteen-minute travel time from a specified position, and visualize that result in CesiumJS.
After creating an ArcGIS location services API key, let’s create a new function, getServiceArea. In the following example, replace YOUR_ARCGIS_API_KEY with your ArcGIS API key.
  const authentication = arcgisRest.ApiKeyManager.fromKey("YOUR_ARCGIS_API_KEY");

  async function getServiceArea(cartographic) {
    const coordinates = [
      Cesium.Math.toDegrees(cartographic.longitude),
      Cesium.Math.toDegrees(cartographic.latitude),
    ];

    let geojson;
    try {
      const response = await arcgisRest.serviceArea({
        facilities: [coordinates],
        authentication,
      });

      geojson = response.saPolygons.geoJson;
    } catch (error) {
      console.log(`Failed to load service area: ${error}`);
    }

    if (!Cesium.defined(geojson)) {
      return;
    }

    let dataSource;
    try {
      dataSource = await Cesium.GeoJsonDataSource.load(geojson, {
        clampToGround: true,
      });
      viewer.dataSources.add(dataSource);
    } catch (error) {
      console.log(`Failed to load geojson: ${error}`);
    }

    if (!Cesium.defined(dataSource)) {
      return;
    }
  }
Then, let’s call the function at a location in San Francisco.
  viewer.camera.setView({
    destination: Cesium.Cartesian3.fromDegrees(-122.38329, 37.74015, 16000),
    orientation: {
      pitch: Cesium.Math.toRadians(-70.0),
    },
  });

  const cartesian = Cesium.Cartesian3.fromDegrees(-122.39429, 37.78988);
  getServiceArea(Cesium.Cartographic.fromCartesian(cartesian));
You should see the following result:
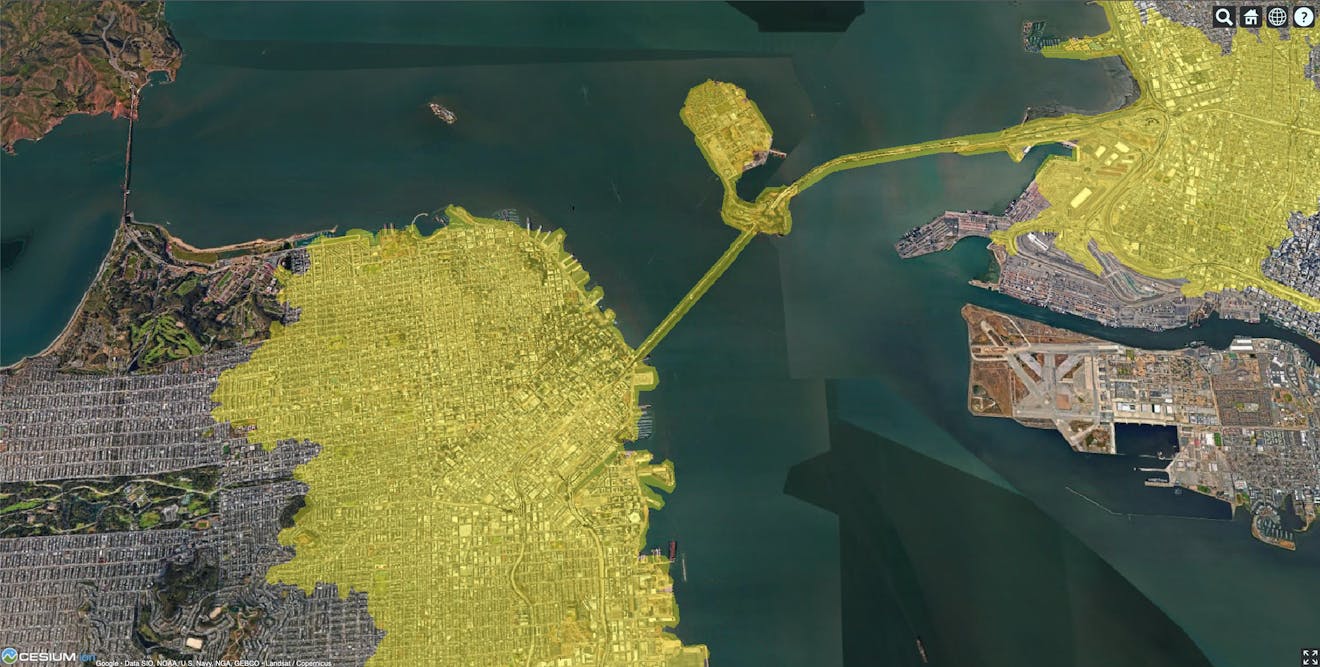
To make these results more useful and visually appealing, we’ll use CesiumJS to apply styling techniques that will provide valuable insights at a glance.
There are three polygons in the GeoJSON data representing areas accessible via five-, ten-, and fifteen-minute drives. Based on the travel time metadata associated with each polygon, we will assign varying shades of blue to represent the different time intervals. This color gradient allows users to quickly identify areas with shorter or longer travel times.
To our getServiceArea function, add this block to set the polygon color based on the FromBreak property:
    const entities = dataSource.entities.values;

    for (let i = 0; i < entities.length; i++) {
      const feature = entities[i];
      feature.polygon.outline = false;

      if (feature.properties.FromBreak == 0) {
        feature.polygon.material = Cesium.Color.fromHsl(
          0.5833,
          0.8,
          0.9,
          0.5
        );
      } else if (feature.properties.FromBreak == 5) {
        feature.polygon.material = Cesium.Color.fromHsl(
          0.5833,
          0.9,
          0.7,
          0.5
        );
      } else {
        feature.polygon.material = Cesium.Color.fromHsl(
          0.5833,
          1.0,
          0.4,
          0.5
        );
      }
    }
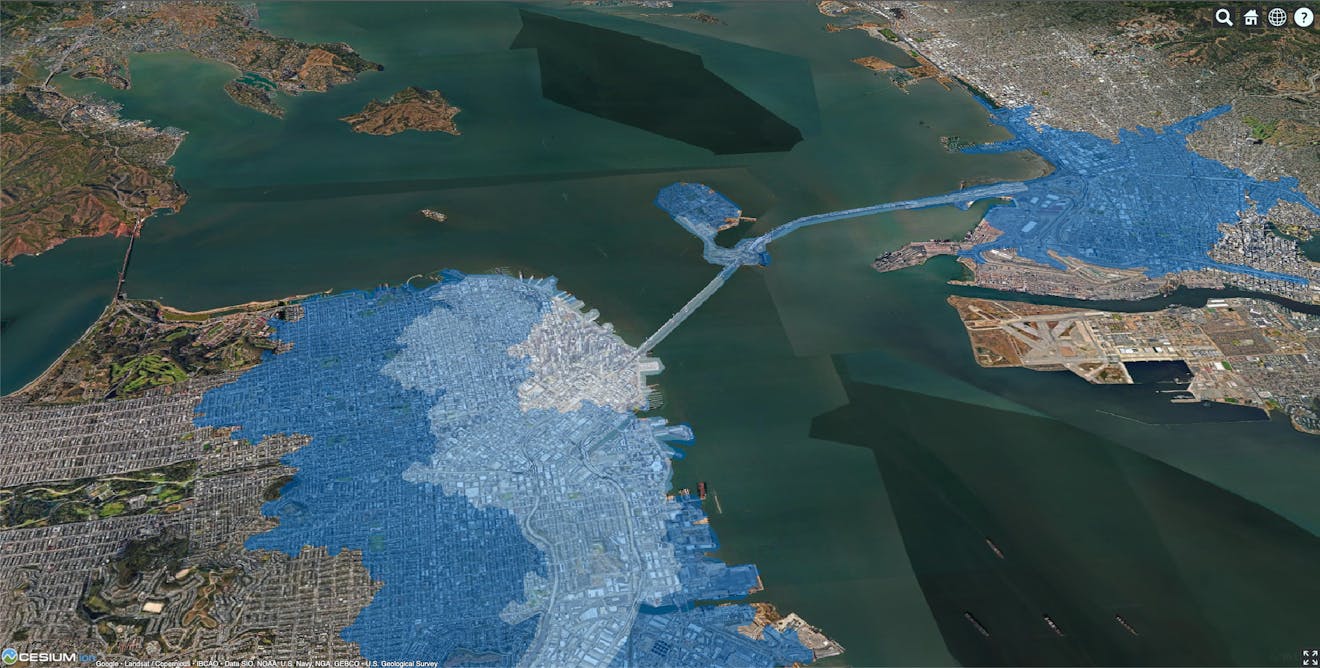
Next, we’ll use inverse classification to dim areas outside of the service area. This dimming effect helps users focus on the relevant information.
To the end of our getServiceArea function, add the following lines:
  const scene = viewer.scene;
  scene.invertClassification = true;
  scene.invertClassificationColor = new Cesium.Color(0.4, 0.4, 0.4, 1.0);
Lastly, let’s mark the position used as input. I used a maki icon, marker.svg, but you can use any image.
Create a billboard, and then set the position to the location used in Step 2.
 const marker = viewer.entities.add({
    name: "start",
    billboard: {
      verticalOrigin: Cesium.VerticalOrigin.BOTTOM,
      heightReference: Cesium.HeightReference.CLAMP_TO_GROUND,
      image: "./marker.svg",
      disableDepthTestDistance: Number.POSITIVE_INFINITY,
      scale: 0.5,
    },
  });

  marker.position = cartesian;
Finally, let’s add utility to our app by allowing the user to choose the position used as input for the spatial query. Scene.pickPosition can be used to get the position under the cursor on press, and we can use the result as input to the getServiceArea function we wrote in the previous steps.
  viewer.screenSpaceEventHandler.setInputAction((movement) => {
    viewer.dataSources.removeAll();
    viewer.scene.invertClassification = false;
    marker.show = false;

    const pickedPosition = viewer.scene.pickPosition(movement.position);

    if (!Cesium.defined(pickedPosition)) {
        return;
    }

    marker.position = pickedPosition;
    marker.show = true;
    viewer.scene.invertClassification = true;

    const cartographic = Cesium.Cartographic.fromCartesian(pickedPosition);
    getServiceArea(cartographic);
  }, Cesium.ScreenSpaceEventType.LEFT_CLICK);
And there you have it! This app will work anywhere on Earth, so make sure to use the geocoder to search out your specific area.
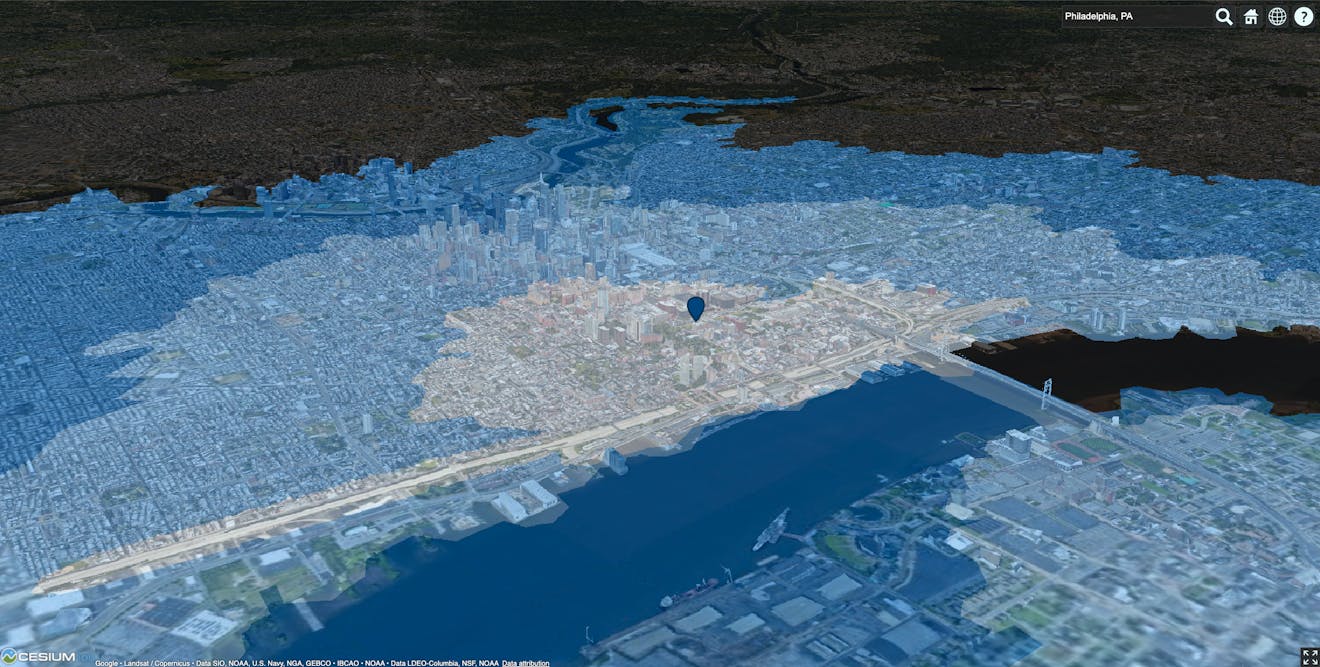
Travel time from Cesium headquarters in Philadelphia, PA, USA.
The example presented here is just one of many possible use cases. ArcGIS location services offer a wide range of additional data layers, mapping, and spatial analysis functions. Combined with the worldwide coverage of Google Maps Platform's Photorealistic 3D Tiles, now accessible through all of Cesium’s runtime engines, there’s more potential than ever for easy collaboration and innovation within the geospatial field.
Learn more in the developer documentation:
Finally, we encourage you to explore the full potential of these technologies. Share your creations and experiences with the wider community on Twitter or LinkedIn or the dedicated community forum. We’re excited to see what you build!