CesiumJS and Webpack
This page is archived. Information on this page may be outdated. See documentation on GitHub, or, for different tutorials and documentation, visit the CesiumJS Learning Center.
webpack is a popular and powerful tool for bundling JavaScript modules. It allows developers to structure their code and assets in an intuitive way and to load different kinds of files as needed with simple require statements. When building, it will trace code dependencies and pack these modules into one or more bundles that are loaded by the browser.
In the first half of this tutorial, we’ll build a simple web app from the ground up using webpack, and then cover the steps to integrate the Cesium npm module. This is a good place to start if you’d like to use CesiumJS to develop a web application. If you’re new to Cesium and are looking to learn to build your first sample app, take a look at our Getting Started Tutorial.
In the second half, we’ll explore more advanced webpack configurations for optimizing an application using CesiumJS.
The complete code and tips for optimizing a CesiumJS webpack app can be found in the official cesium-webpack-example repository.
- A basic understanding of the command line, JavaScript, and web development.
- An IDE or code editor. Developers on the Cesium team members use Visual Studio Code, but a minimal code editor such as Sublime Text will also work.
- Node.js installed. We recommend using the latest LTS version.
In this section, we’ll describe how to set up a basic web app with webpack and a development server. If you’ve already got an app set up and just want to add CesiumJS, skip to Add CesiumJS to a webpack app.
Initialize an app with npm
Create a new cesium-webpack-app directory for your app. Open a console, navigate to the new directory, and run the following command:
npm init
Follow the prompts and populate any details about your app. Press enter to use the defaults. This will create package.json.
Create the app code
Create a src directory for our app code. When we build the app, webpack will produce distribution files in a dist directory.
Create src/index.html and add code for a boilerplate HTML page.
<!DOCTYPE html>
<html>
  <head>
    <meta charset="utf-8">
    <meta http-equiv="X-UA-Compatible" content="IE=edge">
    <meta name="viewport"
      content="width=device-width, initial-scale=1, maximum-scale=1, minimum-scale=1, user-scalable=no">
    <title>Hello World!</title>
  </head>
  <body>
    <p>Hello World!</p>
  </body>
</html>
Next, create an entry point for the app. This is the starting point for webpack to find all the JavaScript source code and dependencies for our bundle.
Create src/index.js and add this text code.
console.log('Hello World!');
npm install --save-dev webpack
Configuration
Create webpack.config.js to define our webpack configuration object.
const path = require('path');

const webpack = require('webpack');

module.exports = {
    context: __dirname,
    entry: {
        app: './src/index.js'
    },
    output: {
        filename: '[name].js',
        path: path.resolve(__dirname, 'dist'),
    }
};
context specifies the base path for the files. entry is used to specify bundles. In this case, the app bundle has src/index.js as the entry point. webpack will output the bundle app.js to the dist folder.
Loaders
webpack loads everything like a module. Use loaders to load in CSS and other asset files. Install the style-loader, css-loader, and url-loader.
npm install --save-dev style-loader css-loader url-loader
Add two module.rules to webpack.config.js: one for CSS files and one for other static files. For each, define test for the types of file to load, and use to specify the list of loaders.
const path = require('path');

const webpack = require('webpack');

module.exports = {
    context: __dirname,
    entry: {
        app: './src/index.js'
    },
    output: {
        filename: '[name].js',
        path: path.resolve(__dirname, 'dist'),
    },
    module: {
        rules: [{
            test: /\.css$/,
            use: [ 'style-loader', 'css-loader' ]
        }, {
            test: /\.(png|gif|jpg|jpeg|svg|xml|json)$/,
            use: [ 'url-loader' ]
        }]
    }
};
Plugins
Define index.html and inject our bundle into that page using a webpack plugin called the html-webpack-plugin.
npm install --save-dev html-webpack-plugin
Require the plugin in webpack.config.js and add it to plugins. Pass src/index.html as our template.
const path = require('path');

const webpack = require('webpack');
const HtmlWebpackPlugin = require('html-webpack-plugin');

module.exports = {
    context: __dirname,
    entry: {
        app: './src/index.js'
    },
    output: {
        filename: '[name].js',
        path: path.resolve(__dirname, 'dist'),
    },
    module: {
        rules: [{
            test: /\.css$/,
            use: [ 'style-loader', 'css-loader' ]
        }, {
            test: /\.(png|gif|jpg|jpeg|svg|xml|json)$/,
            use: [ 'url-loader' ]
        }]
    },
    plugins: [
        new HtmlWebpackPlugin({
            template: 'src/index.html'
        })
    ]
};
The configuration file is a JavaScript file, so we can require other Node modules and perform operations.
  "scripts": {
    "build": "node_modules/.bin/webpack --config webpack.config.js"
  }
This script calls webpack and passes in the webpack.config.js configuration file.
We’re using the local installation of webpack and the webpack-dev-server in these scripts. This allows each project to use its own individual version, and is what is recommended by the webpack documentation. If you’d prefer to use the global version, install it globally with npm install --global webpack and use the command webpack --config webpack.config.js to run.
When you run the build command,
npm run build
you should see some output from webpack starting with something like this:
npm run build

> test-app@1.0.0 build C:\workspace\test-app
> node_modules/.bin/webpack --config webpack.config.js

Hash: 2b42bff7a022b5d956a9
Version: webpack 3.6.0
Time: 2002ms
                                        Asset       Size  Chunks                    Chunk Names
     Assets/Textures/NaturalEarthII/2/0/3.jpg    10.3 kB          [emitted]
                                       app.js     162 kB       0  [emitted]         app
The app.js bundle and index.html file will be output into the dist folder.
Run the development server
Use the webpack-dev-server to serve a development build and see our app in action.
npm install --save-dev webpack-dev-server
Add a start script to package.json to run the development server. Set the config file via the --config flag. Use the --open flag to open the app in a browser when the command is executed.
  "scripts": {
    "build": "node_modules/.bin/webpack --config webpack.config.js",
    "start": "node_modules/.bin/webpack-dev-server --config webpack.config.js --open"
  }
Tell the development server to serve files the dist folder. Add this at the bottom of webpack.config.js.
    // development server options
    devServer: {
        contentBase: path.join(__dirname, "dist")
    }
Finally, we can run the app!
npm start
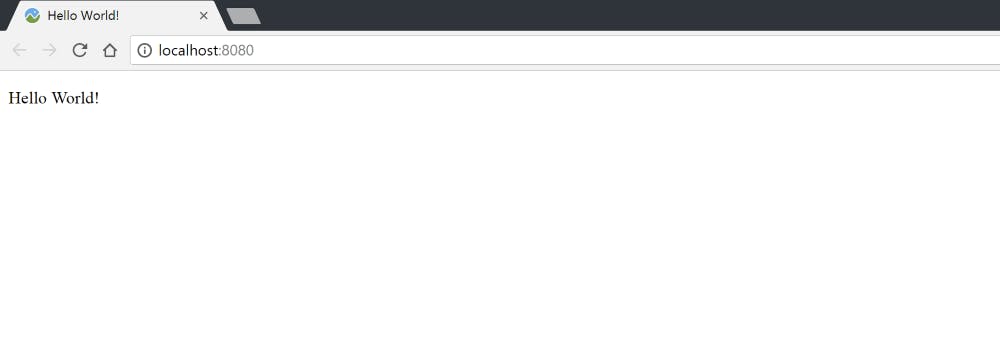
You should see your content served at localhost:8080, and you should see the “Hello World!” message when you open up the browser console.
Install CesiumJS
Install the cesium module from npm and add it to package.json.
npm install --save-dev cesium
CesiumJS is a large and complex library. In additional to JavaScript modules, it also includes static assets such as CSS, image, and json files. It includes web worker files to perform intensive calculations in separate threads. Unlike traditional npm modules, CesiumJS does not define an entry point because of the diverse ways in which the library is used. We’ll need to configure some additional options to use it with webpack.
First, define where CesiumJS is. This tutorial uses the source code, so webpack can include individual models and trace the dependencies. Alternatively, you can use the built (minified or unminified) version of CesiumJS. However, the modules are already combined and optimized, which gives us less flexibility.
Add the following to the top of webpack.config.js:
// The path to the CesiumJS source code
const cesiumSource = 'node_modules/cesium/Source';
const cesiumWorkers = '../Build/Cesium/Workers';
This tutorial uses the npm module for ease of installation, but you could also clone the GitHub repository or use an unzipped release download.
Add the following options to the configuration object to resolve some quirks with how webpack compiles CesiumJS.
 output: {
        filename: '[name].js',
        path: path.resolve(__dirname, 'dist'),

        // Needed to compile multiline strings in Cesium
        sourcePrefix: ''
    },
    amd: {
        // Enable webpack-friendly use of require in Cesium
        toUrlUndefined: true
    },
    node: {
        // Resolve node module use of fs
        fs: 'empty'
    },
output.sourcePrefix: ''overrides the webpack default for adding a \t tab character before each line. CesiumJS has some multiline strings, so we need to override this default with an empty prefix''.amd.toUrlUndefined: truetells CesiumJS that the version of AMD webpack uses to evaluaterequirestatements is not compliant with the standardtoUrlfunction.node.fs: 'empty'resolves some third-party usage of thefsmodule, which is targeted for use in a Node environment rather than the browser.
Add a cesium alias alias so we can reference it in our app code.
   resolve: {
        alias: {
            // CesiumJS module name
            cesium: path.resolve(__dirname, cesiumSource)
        }
    },
Manage CesiumJS static files
Lastly, make sure the static CesiumJS asset, widget, and web worker files are served and loaded correctly.
Use the copy-webpack-plugin to copy static files to the dist directory as part of the build process.
npm install --save-dev copy-webpack-plugin
Require it near the top of our webpack.config.js file.
const CopywebpackPlugin = require('copy-webpack-plugin');
Add the following to the plugins array:
  plugins: [
        new HtmlWebpackPlugin({
            template: 'src/index.html'
        }),
        // Copy Cesium Assets, Widgets, and Workers to a static directory
        new CopywebpackPlugin({
            patterns: [
                { from: path.join(cesiumSource, cesiumWorkers), to: 'Workers' },
                { from: path.join(cesiumSource, 'Assets'), to: 'Assets' },
                { from: path.join(cesiumSource, 'Widgets'), to: 'Widgets' }
            ]
        })
    ],
This copies the Assets and Widgets directories, and the built web worker scripts.
If you are using a fork of the CesiumJS repo, the Build folder will not already exist. Run npm run release to produce the build output. For more information, see the Cesium Build Guide.
Define an environment variable that tells CesiumJS the base URL for loading static files using the webpack DefinePlugin. The plugins array will now look like this:
 plugins: [
        new HtmlWebpackPlugin({
            template: 'src/index.html'
        }),
        // Copy Cesium Assets, Widgets, and Workers to a static directory
        new CopywebpackPlugin({
            patterns: [
                { from: path.join(cesiumSource, cesiumWorkers), to: 'Workers' },
                { from: path.join(cesiumSource, 'Assets'), to: 'Assets' },
                { from: path.join(cesiumSource, 'Widgets'), to: 'Widgets' }
            ]
        }),
        new webpack.DefinePlugin({
            // Define relative base path in cesium for loading assets
            CESIUM_BASE_URL: JSON.stringify('')
        })
    ],
Require CesiumJS modules in our app
There are a few ways we can require CesiumJS modules within our application. You can use either CommonJS syntax or ES6 import statements.
You can import the whole CesiumJS library or require only the specific modules you need. Including modules will result in webpack compiling only those modules and their dependencies in your bundle instead of the entire library.
CommonJS style require
To require all of CesiumJS:
var Cesium = require('cesium/Cesium');
var viewer = new Cesium.Viewer('cesiumContainer');
To require an individual module:
var Color = require('cesium/Core/Color');
var color = Color.fromRandom();
import Cesium from 'cesium/Cesium';
var viewer = new Cesium.Viewer('cesiumContainer');
To require an individual module:
import Color from 'cesium/core/Color';
var color = Color.fromRandom();
require('cesium/Widgets/widgets.css');
Create a new file, src/css/main.css, for styling our app:
html, body, #cesiumContainer {
    width: 100%;
    height: 100%;
    margin: 0;
    padding: 0;
    overflow: hidden;
}
Create a div for the CesiumJS Viewer in the index.html body. Replace <p>Hello World!</p> with this div:
<div id="cesiumContainer"></div>
Delete the contents of index.js and include Cesium and our CSS files:
var Cesium = require('cesium/Cesium');
require('./css/main.css');
require('cesium/Widgets/widgets.css');
Add this line to create the Viewer:
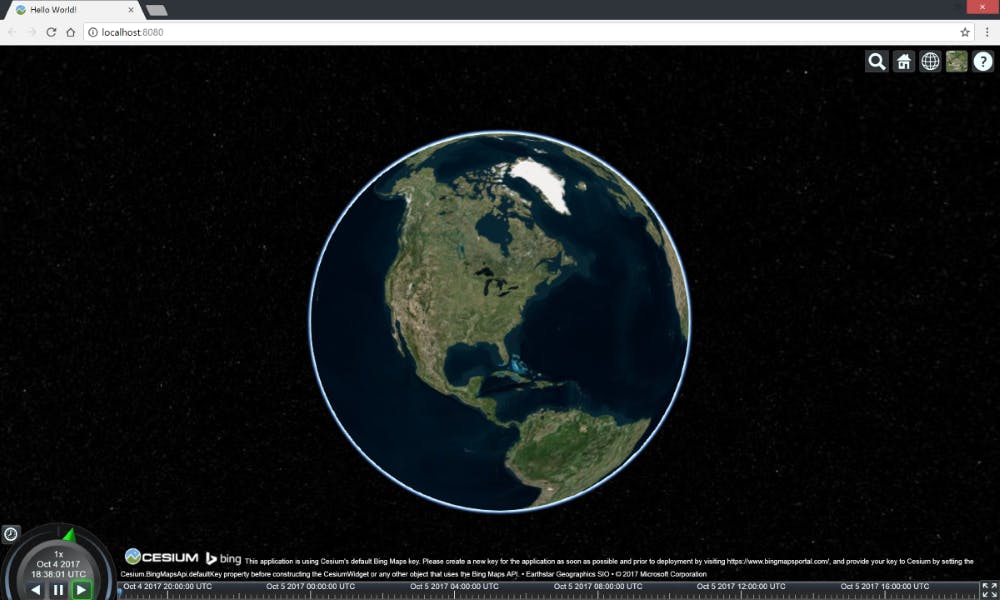
var viewer = new Cesium.Viewer('cesiumContainer');
Run the app with npm start to see the Viewer in your browser!
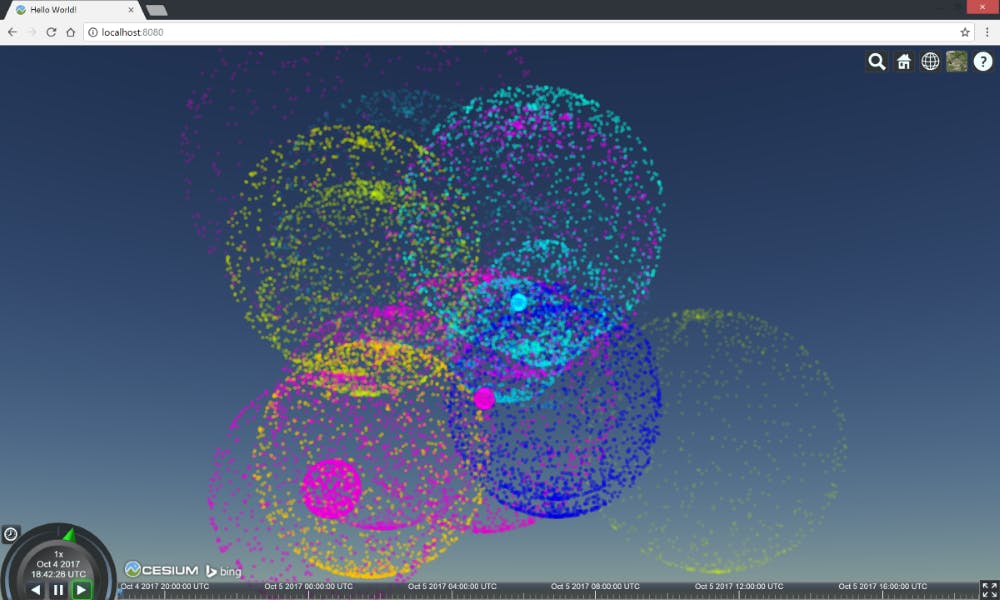
Copy and paste your favorite Sandcastle example. For example, The Particle System Fireworks demo makes for a great conclusion.
webpack can be leveraged in many more ways to increase performance, decrease your bundle size, and perform additional or complex build steps. Here we’ll discuss a few configuration options relevant to using the CesiumJS library.
Our configuration for an optimal production Cesium webpack build can be found in our example repo at webpack.release.config.js
Code splitting
webpack packages CesiumJS in the same chunk as our application by default, which results in a large file. We can split CesiumJS into its own bundle and improve our app performance using the CommonChunksPlugin. If you end up creating multiple chunks for your app, they can all reference one common cesium chunk.
Add the plugin to your webpack.config.js file, and specify the rule for breaking out CesiumJS modules:
   plugins: [
        new webpack.optimize.CommonsChunkPlugin({
            name: 'cesium',
            minChunks: module => module.context && module.context.indexOf('cesium') !== -1
        })
    ]
devtool: 'eval'
Source maps are not recommended for production.
Remove pragmas
There are developer errors and warnings in the CesiumJS source code that are removed from our minified release builds. Since there’s no built-in webpack way to remove these warnings, we’ll use the strip-pragma-loader.
Install the package:
npm install strip-pragma-loader --save-dev
Include the loader in module.rules with debug set to false:
   rules: [{
        // Strip cesium pragmas
        test: /\.js$/,
            enforce: 'pre',
            include: path.resolve(__dirname, cesiumSource),
            use: [{
                loader: 'strip-pragma-loader',
                options: {
                    pragmas: {
                        debug: false
                    }
                }
            }]
    }]
Uglify and minify
Uglifying and minifying code allows for smaller file sizes in production. For a release build, CesiumJS uglifies JavaScript files and minifies CSS files.
Use the uglifyjs-webpack-plugin to uglify the CesiumJS source.
npm install uglifyjs-webpack-plugin --save-dev
Require it in your config file.
const UglifyJsPlugin = require('uglifyjs-webpack-plugin');
Include it in the list of plugins.
    plugins: [
        new webpack.optimize.UglifyJsPlugin()
    ]
Use the minimize option on the css-loader to minify the CSS.
 module: {
        rules: [{
            test: /\.css$/,
            use: [
                'style-loader',
                {
                    loader: 'css-loader',
                    options: {
                        // minify loaded css
                        minimize: true
                    }
                }
            ]
        }]
    }
The official cesium-webpack-example repo contains the minimal webpack configuration, the hello world code covered in this tutorial, and instructions for optional code configurations.
For a tour of CesiumJS feature to include in your new app, see the Cesium Workshop Tutorial.
Explore demos in Sandcastle and see the CesiumJS Documentation.
To learn more about webpack, take a look at webpack Concepts, or dive into the Documentation.