Connect Your AI Client
In this tutorial you'll connect an AI client to the Cesium ion MCP server, sign in with your ion account, and run your first prompt. By the end, your assistant will be able to see and manage the assets in your account.
- A Cesium ion account (the free community plan works)
- An MCP-compatible client: Claude Desktop, Claude Code, Codex, Cursor, VS Code with GitHub Copilot, or the GitHub Copilot desktop app
The server URL for all clients is https://mcp.ion.cesium.com.
Follow the steps for your client.
1In Claude Desktop, open Settings → Connectors → Add custom connector.
2 Name it “Cesium ion,” paste the server URL, https://mcp.ion.cesium.com, and click Continue.
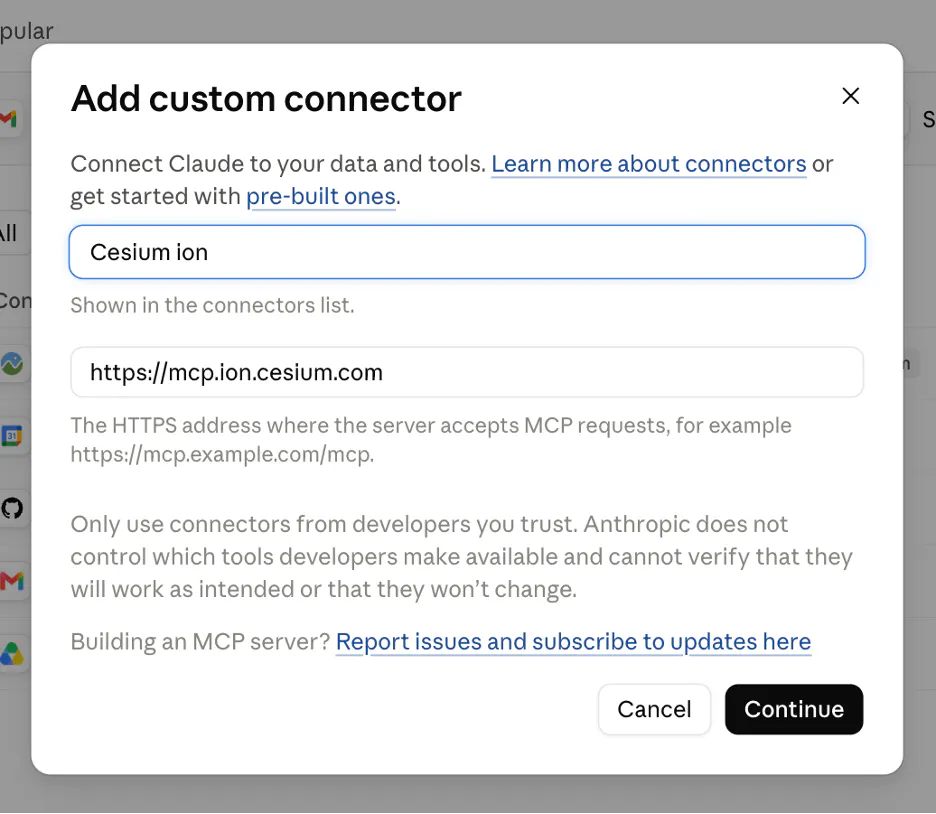
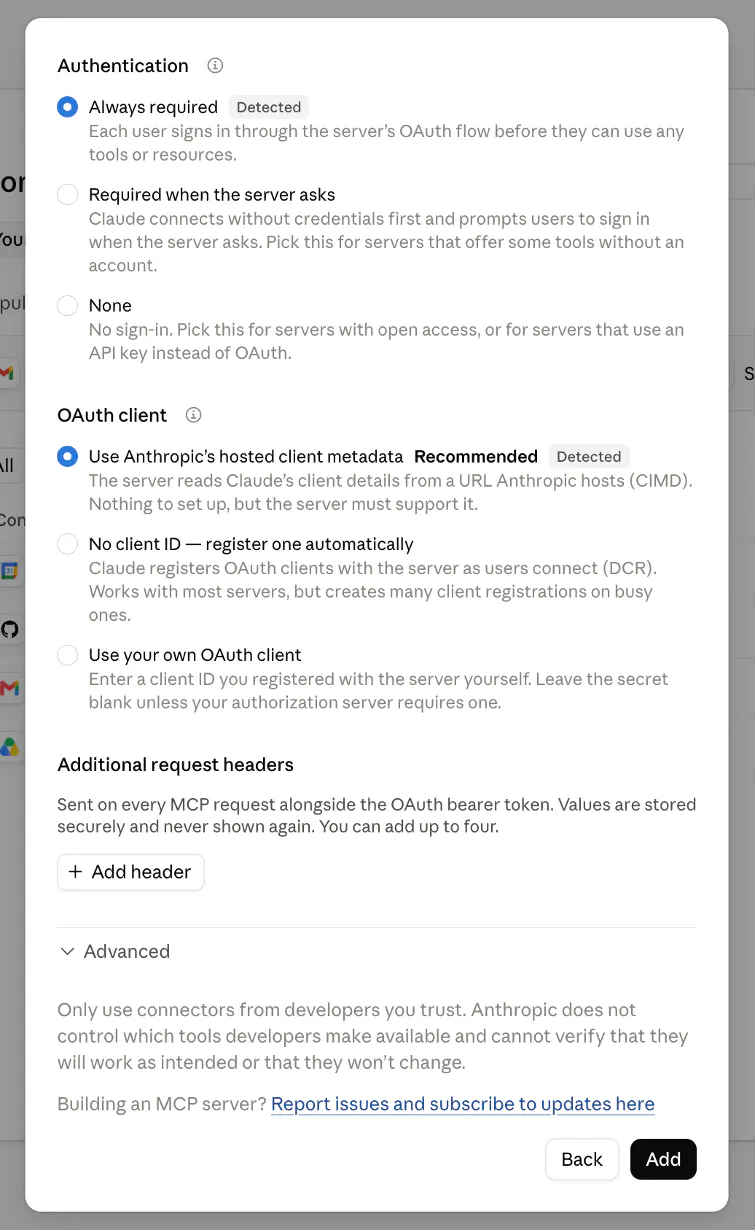
3On the next screen, under Authentication, select Always Required. And under OAuth client, select the CIMD option, Use Anthropic’s hosted client metadata. Then click Add.
4You will be prompted to connect to the newly added MCP server. Click Connect and sign into ion.
5When prompted to grant permissions to Claude to access your ion data, click Allow.
1Run this in your terminal:
claude mcp add --transport http cesium-ion https://mcp.ion.cesium.com
2Launch Claude in your terminal and follow the on-screen prompts to authenticate your new MCP server.
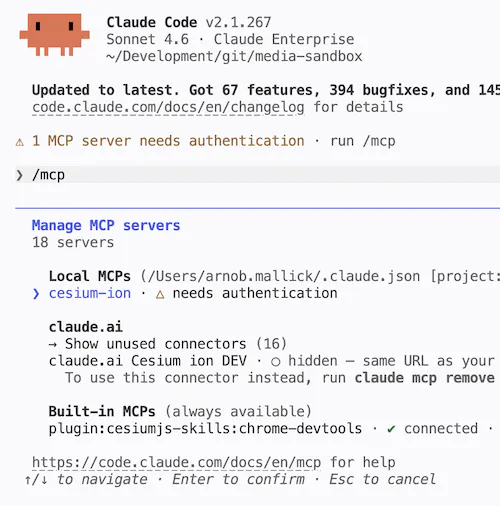
3When prompted to grant permissions to Claude to access your ion data, click Allow.
4If everything goes smoothly, you should see an authentication success message.
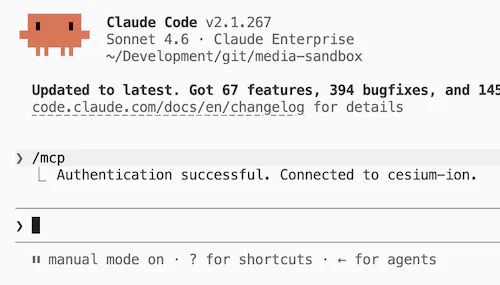
If you are using the Claude Code GUI in VSCode or another IDE, the steps are largely the same. Use the /mcp command or MCP servers menu item and follow the same steps.
1Open the ChatGPT app and navigate to Settings. Then open the Plugins section.
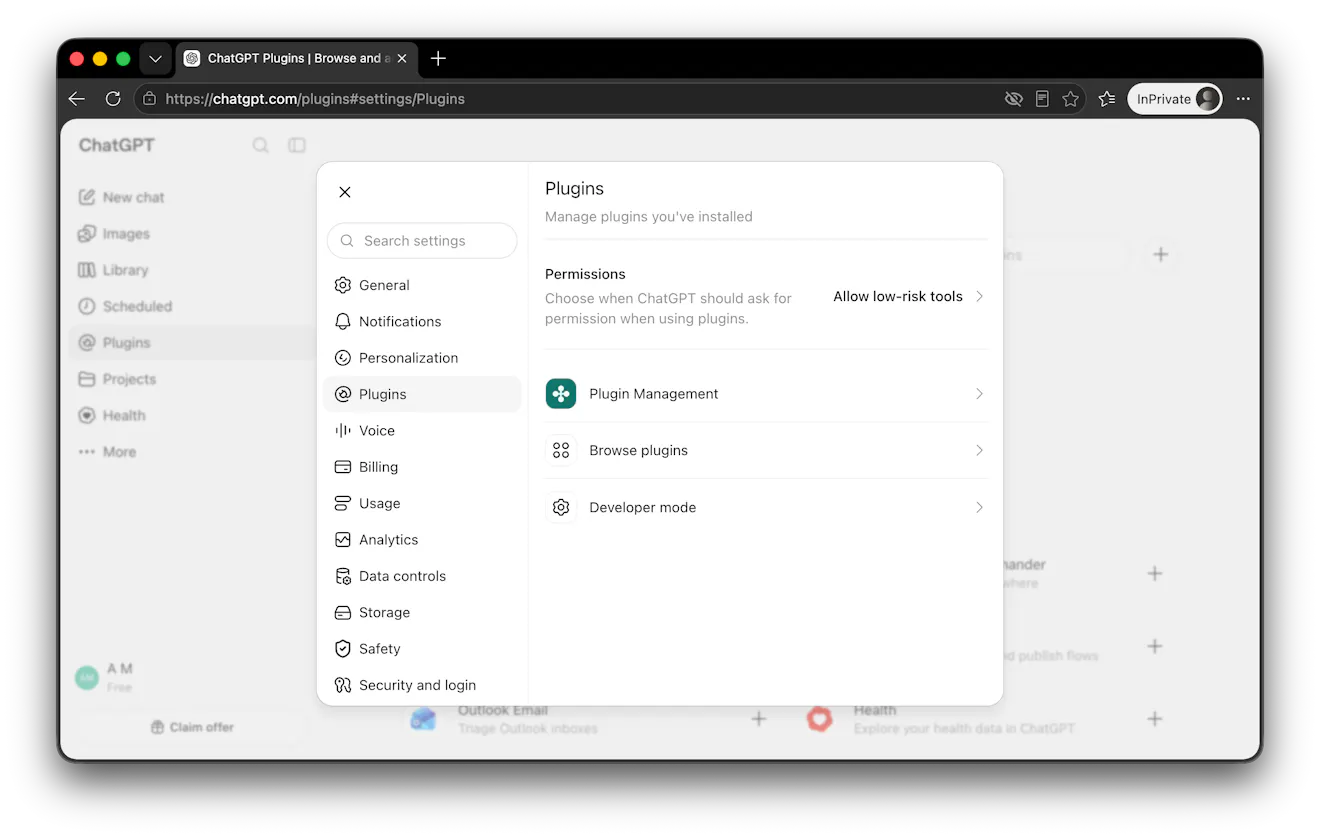
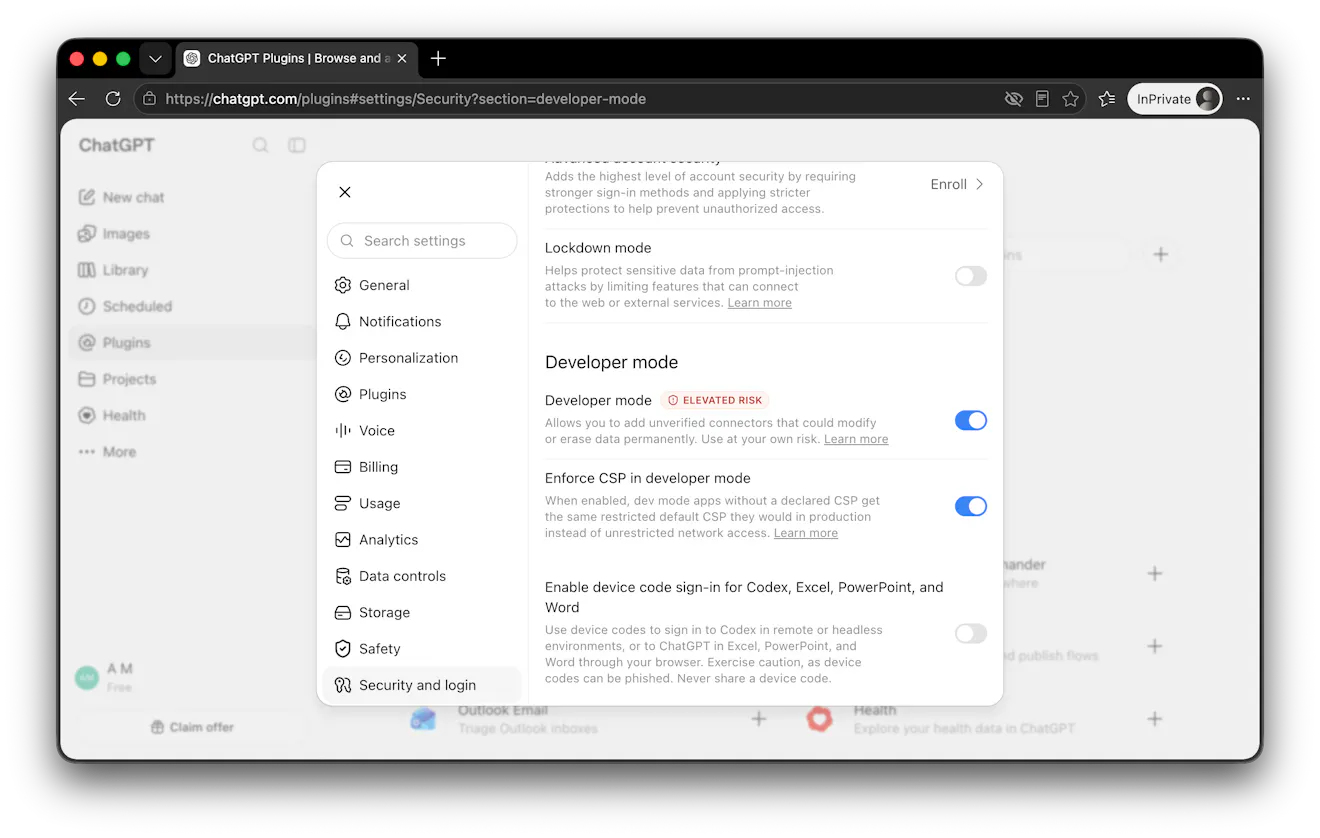
2Click on Developer mode and enable Developer mode if it isn’t already enabled.
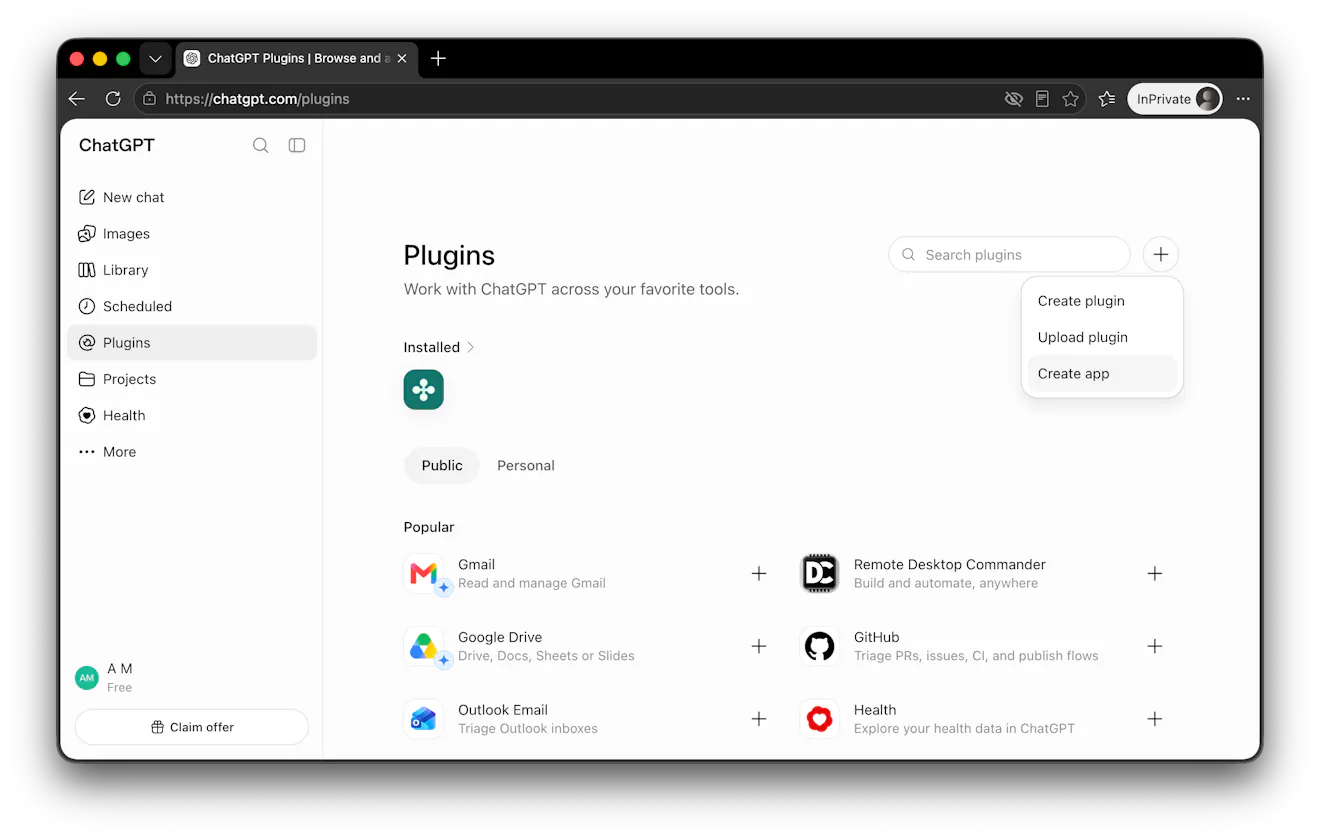
3Now return to the main screen of ChatGPT and open the Plugins page from the navigation menu. Click on the + icon at the top right and select Create app.
4Click Create MCP App and fill out the form. Give the app a name like cesium-ion. Under Connection fill in the Cesium ion MCP server URL: https://mcp.ion.cesium.com. Check the risk acknowledgement box and click Create.
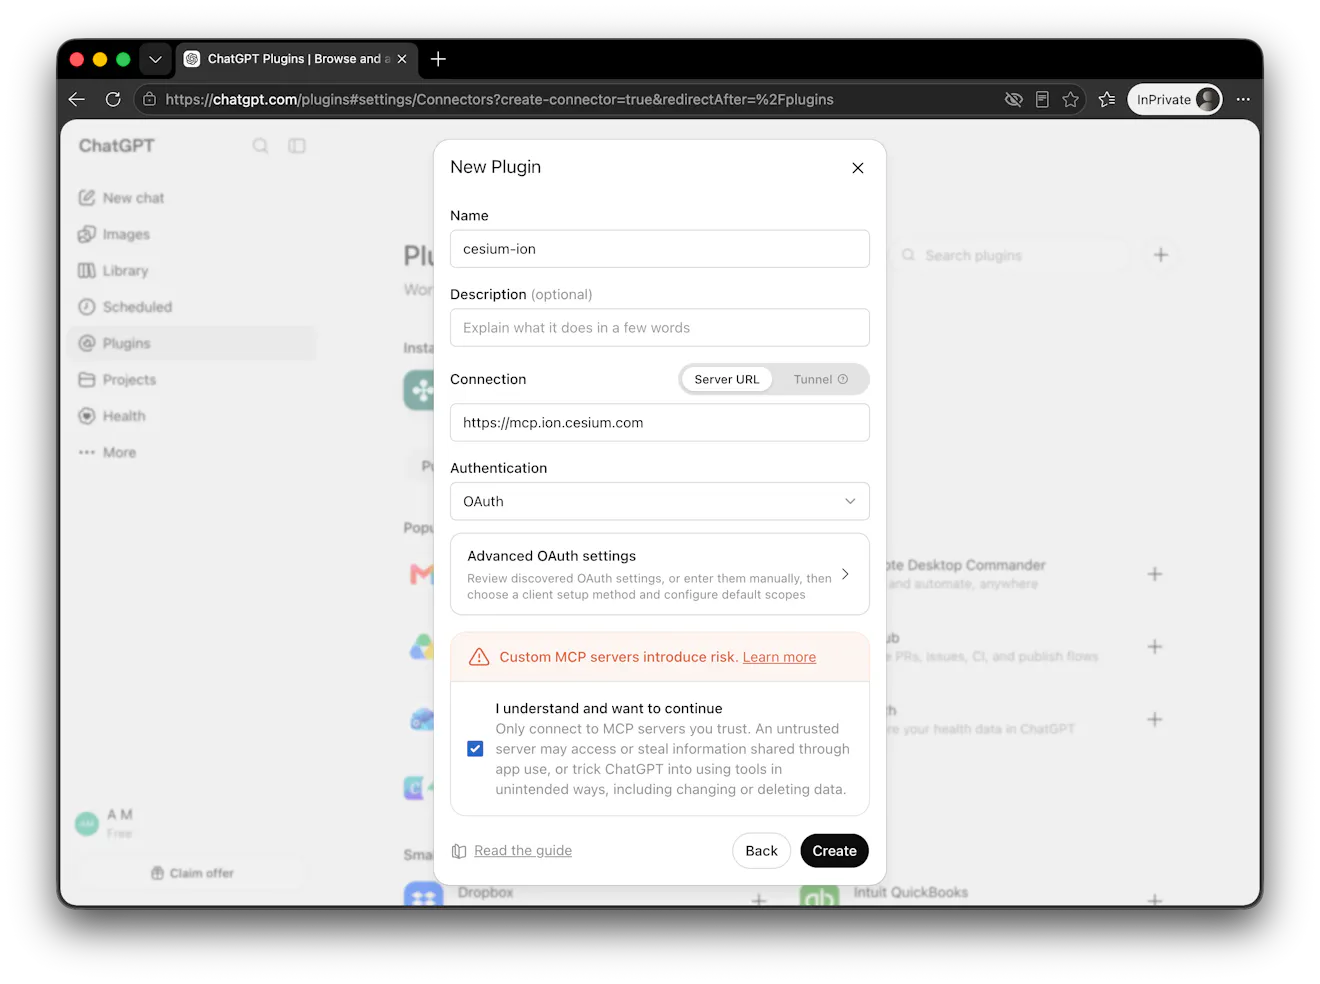
5ChatGPT will automatically try to authenticate with your Cesium ion account. Log in and when prompted to grant permissions to Codex to access your ion data, click Allow.
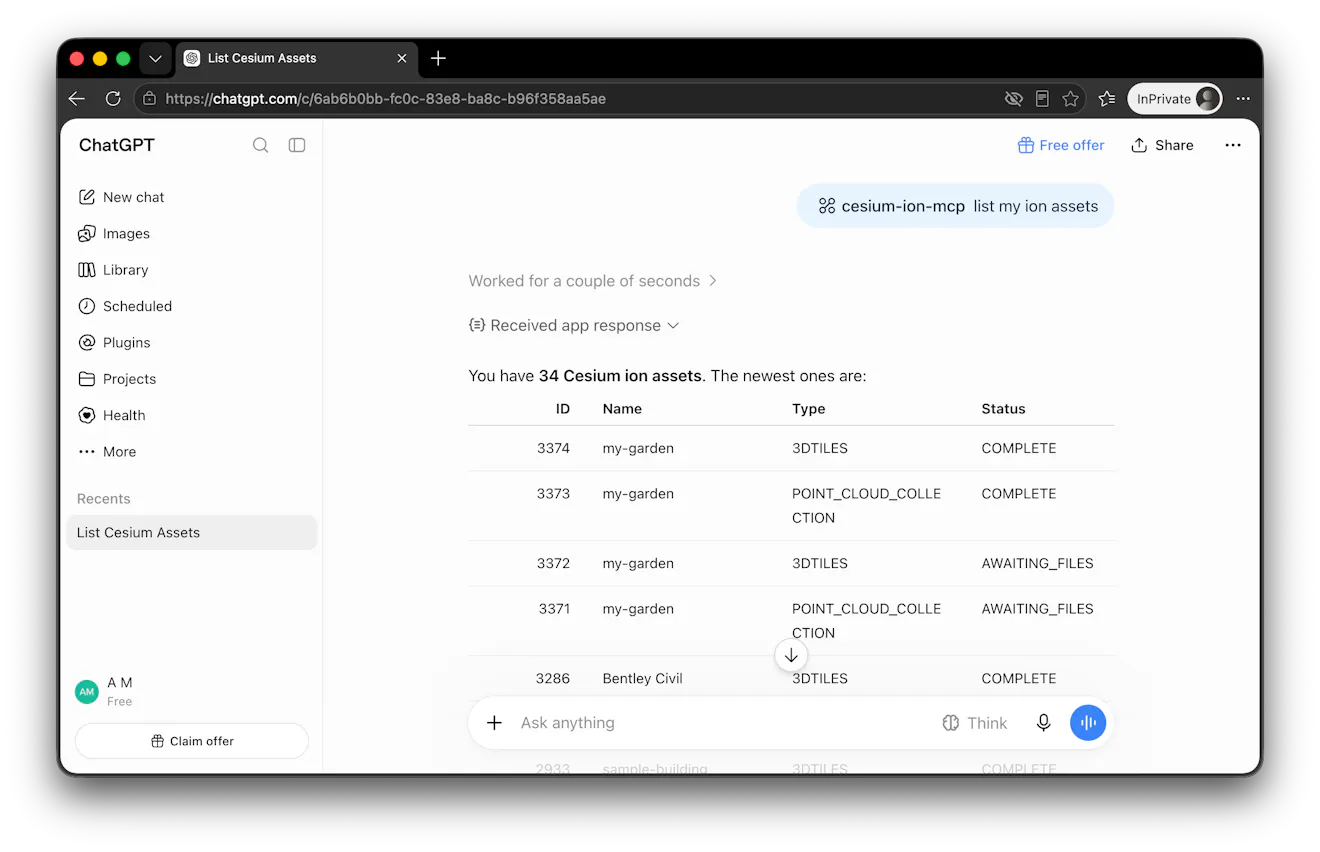
6Now you have access to the Cesium ion MCP server. Return to a new Chat and try it out.
1Run this command in your terminal:
codex mcp add cesium-ion --url https://mcp.ion.cesium.com
2When prompted to grant permissions to Codex to access your ion data, click Allow.
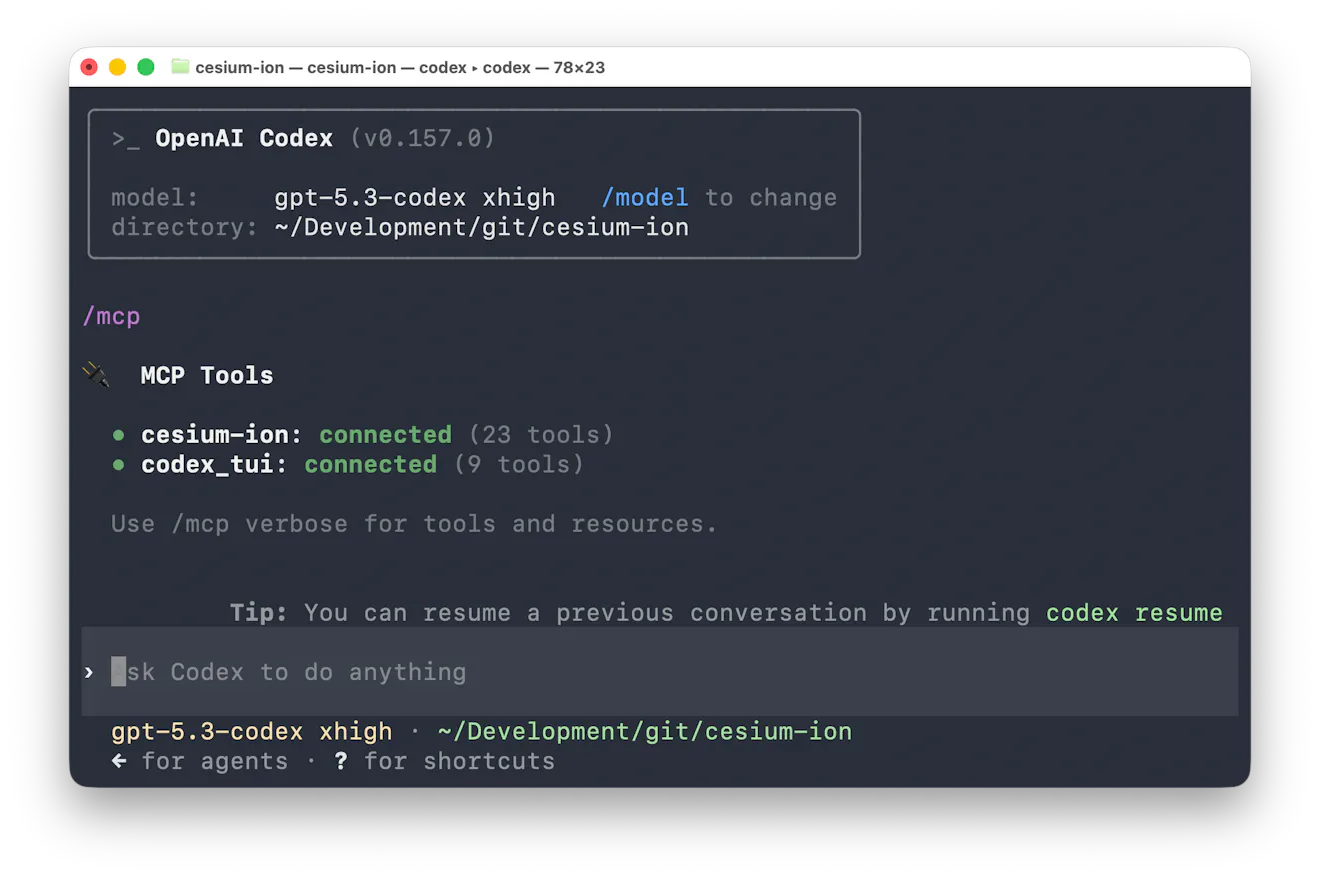
3Launch codex in your terminal and run the /mcp command to verify the Cesium ion MCP server installation. You should see the cesium-ion MCP server listed with status connected.
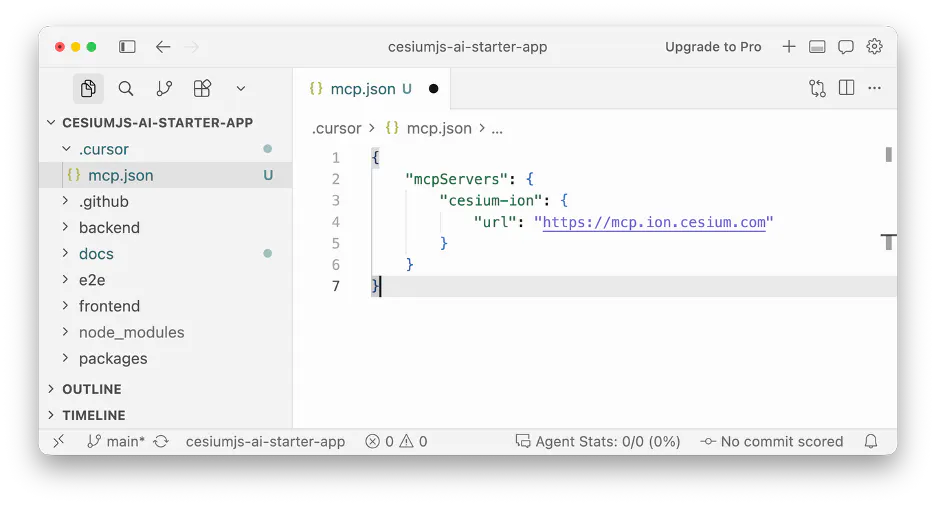
1Open Cursor and add the MCP server to your ~/.cursor/mcp.json file to make the MCP server available everywhere. Or if you want to keep it project-specific add the following to .cursor/mcp.json in the root of your project:
{
  "mcpServers": {
    "cesium-ion": {
      "url": "https://mcp.ion.cesium.com"
    }
  }
}
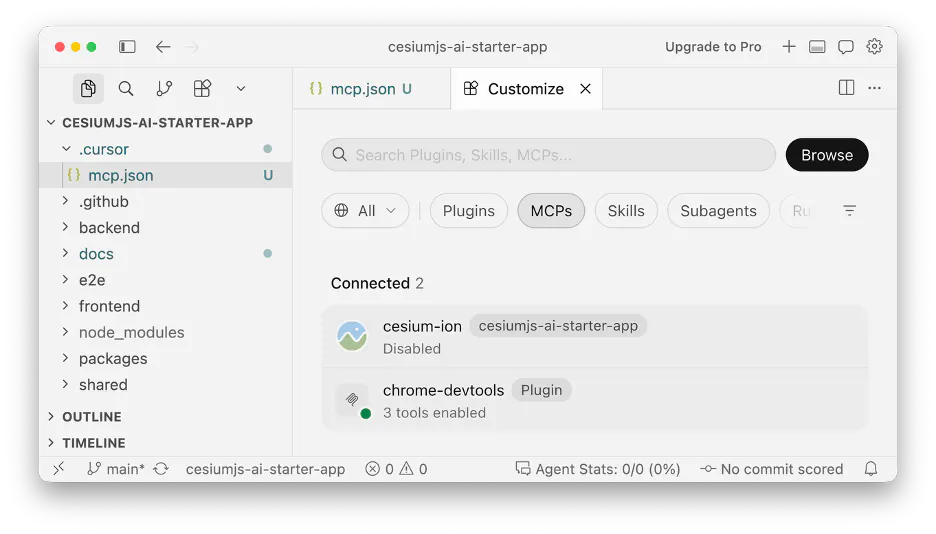
2Open the MCP Settings page and click on the cesium-ion entry. It should read "Disabled."
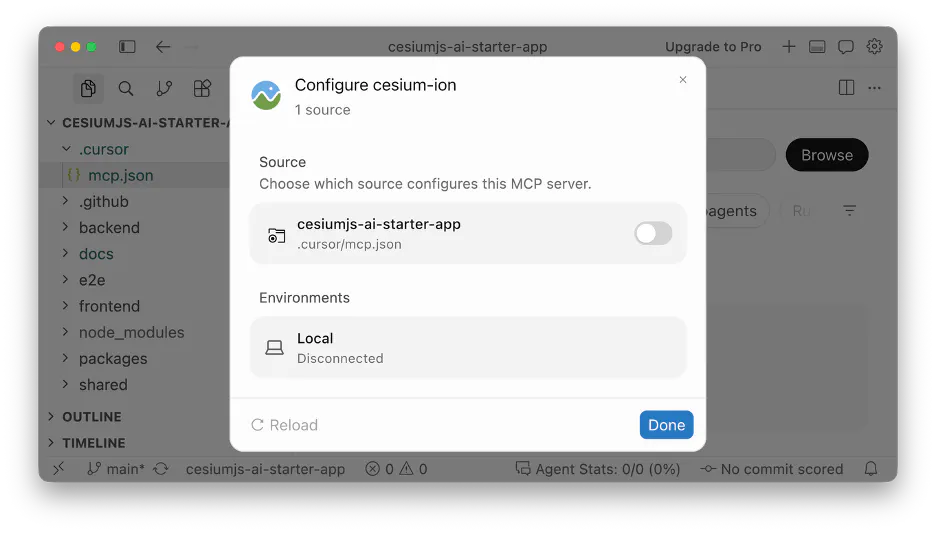
3Then flip the toggle switch to enable the MCP server. The UI should prompt you to Authenticate.
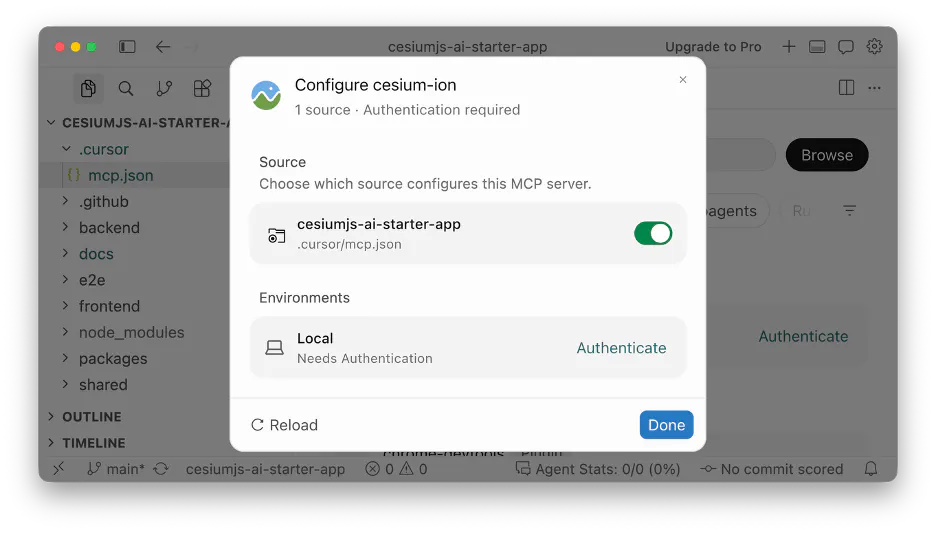
4Click Authenticate and sign in to ion.
5When prompted to grant permissions to Cursor to access your ion data, click Allow.
1Open the Command bar in VS Code. Command + Shift + P on Mac. Ctrl + Shift + P on other platforms.
2Type in mcp add and select the option: MCP: Add Server...
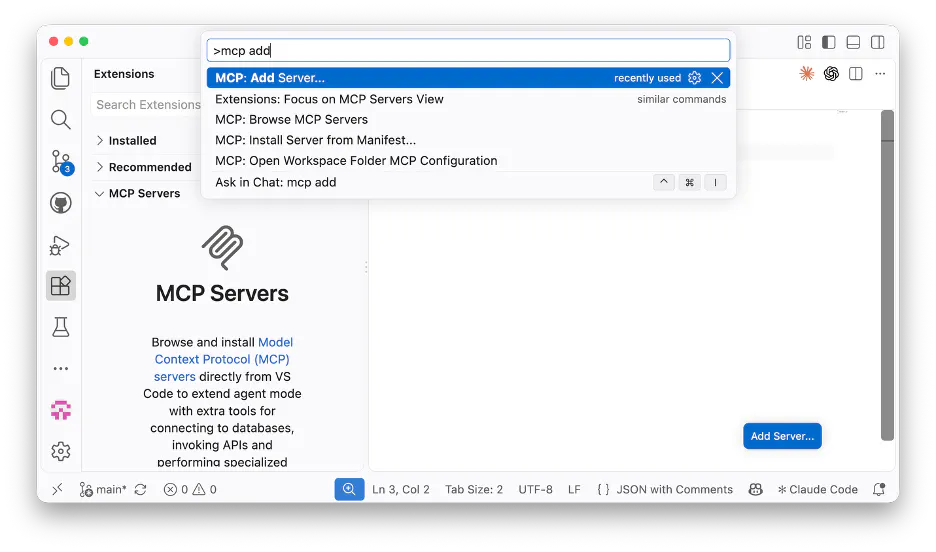
3Select HTTP for the type of MCP server.
4Then enter the Cesium ion MCP server URL: https://mcp.ion.cesium.com
5You will be prompted to name the server. Give your server a name like “cesium-ion.”
6Then choose Install Server Locally...
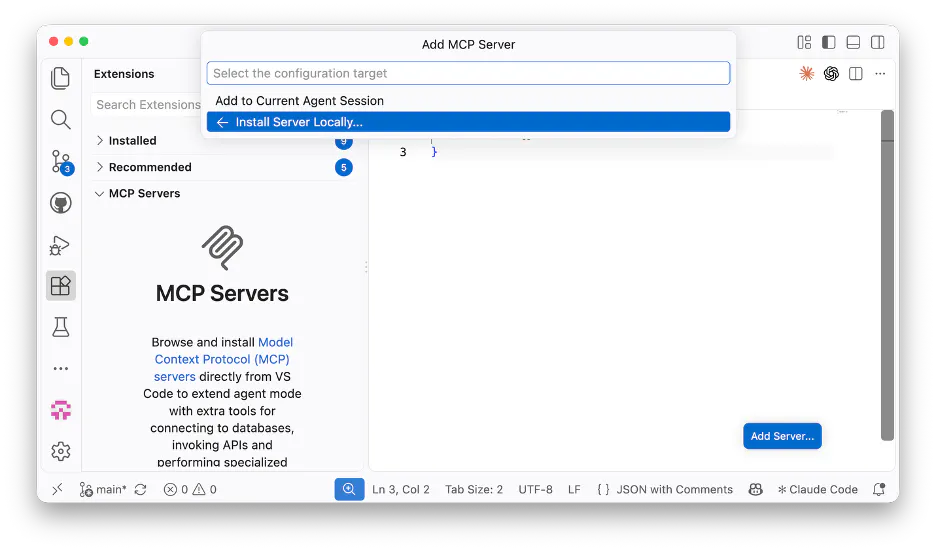
7You will be given two options for the install: Global or Workspace. Global will make the Cesium ion MCP server available to you every time you use GitHub Copilot in VS Code. Workspace will install the server only for the current project you have open.
8You should see a mcp.json file generated containing the configuration you provided.
9Before you can use the server, you need to turn it on and get authenticated. Open the Command bar again. Command + Shift + P on Mac. Ctrl + Shift + P on other platforms. Find the MCP: List Servers command.
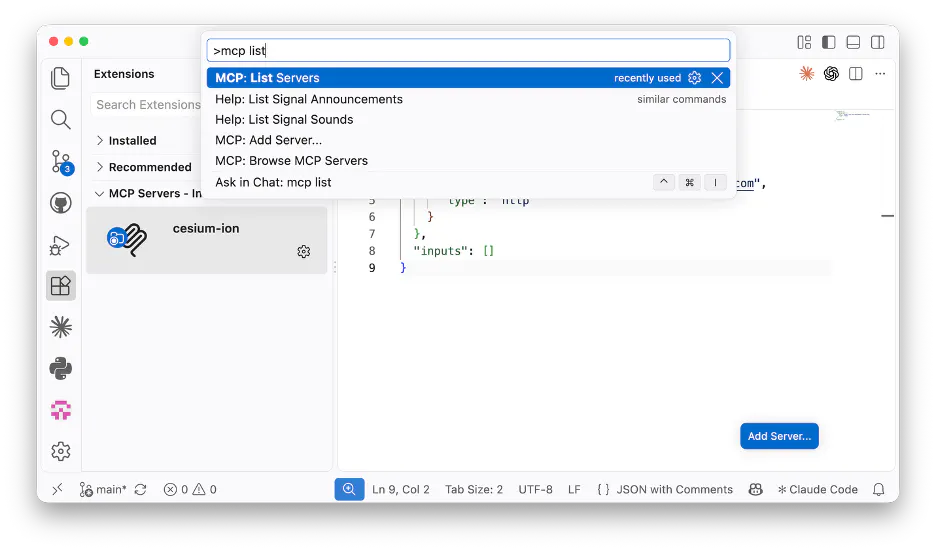
10Select the Cesium ion MCP server from the list. And select Start Server.
11You will be prompted to authenticate with Cesium ion. Choose MCP and follow the instructions to log in.
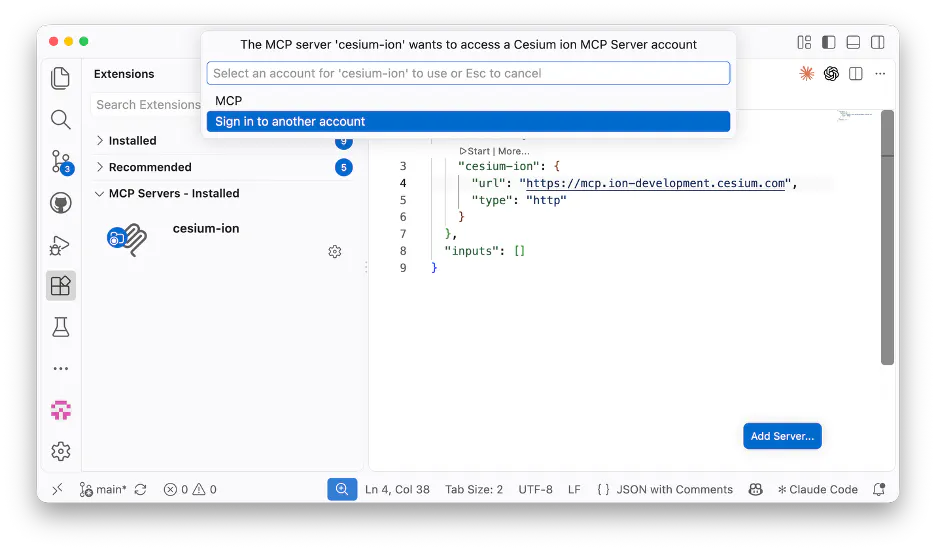
12When prompted to grant permissions to VS Code to access your ion data, click Allow.
1Navigate to the Customize section of the GitHub Copilot app.
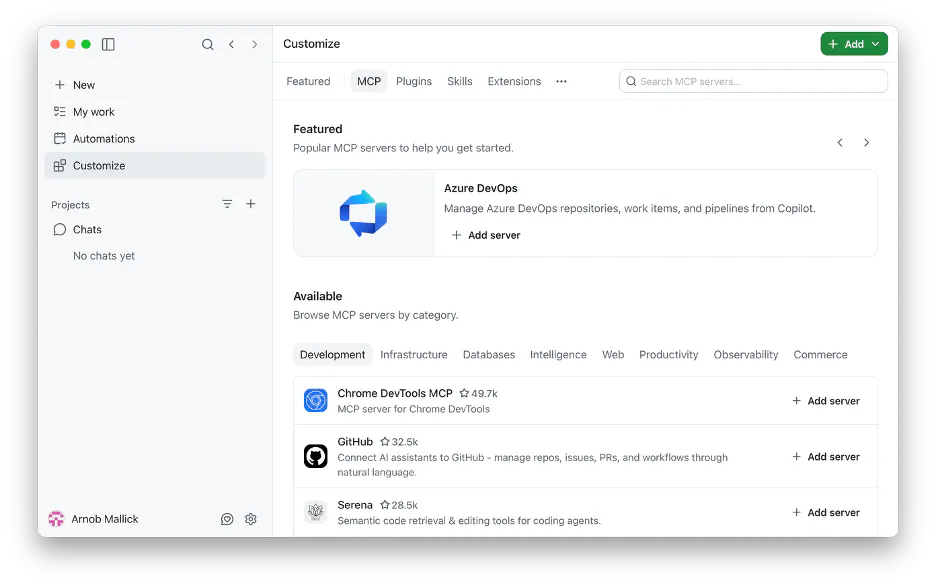
2Click Add and choose MCP Server.
3Give the Cesium ion MCP server a name. Select HTTP and enter the server URL: https://mcp.ion.cesium.com. Click Add server.
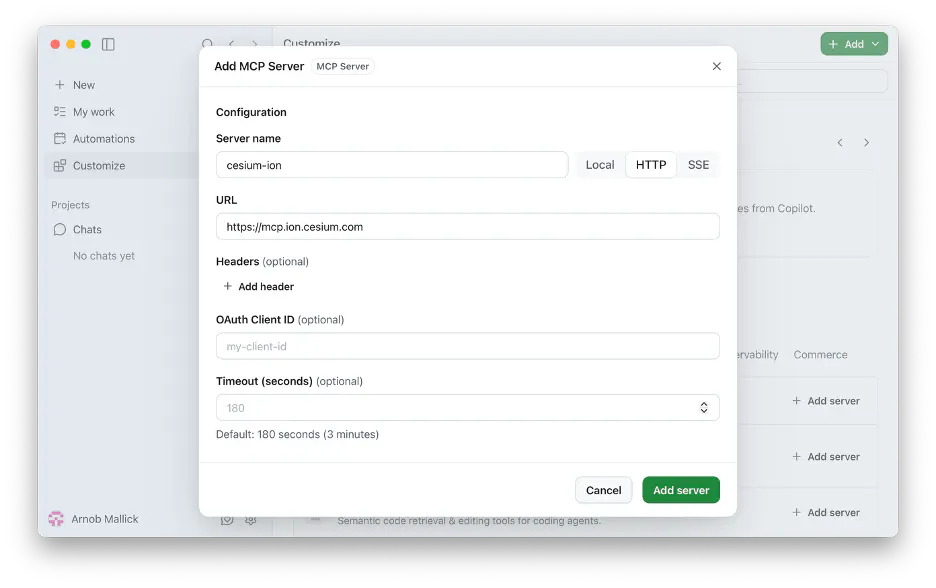
4GitHub Copilot will attempt to connect and realize it needs you to authenticate with Cesium ion. Find the Cesium ion MCP server in the list of installed servers and click Sign in.
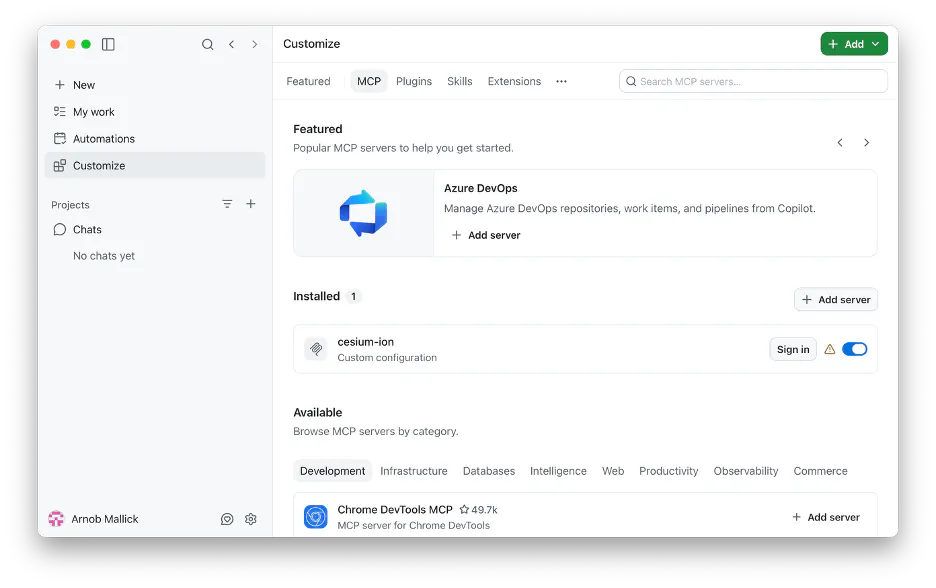
5You will be redirected to Cesium ion’s login page. When prompted to grant permissions to GitHub Copilot to access your ion data, click Allow.
The first time your client talks to the server, it will start an OAuth sign-in flow.
1Your client asks for permission to authenticate with Cesium ion. Allow it.
2A browser window opens on ion.cesium.com. Sign in if you aren't already.
3ion shows a consent page listing the five permissions the MCP server needs: List Assets, Read Asset, Write Asset, Read Labels, and Write Labels.
4Review the permissions and click Allow.
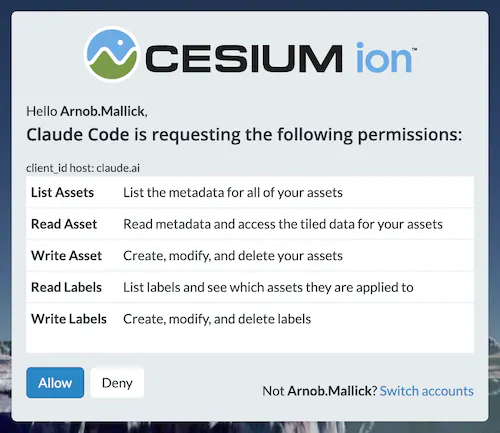
The MCP server never sees your ion password. It receives a token issued by ion, limited to the scopes you approved. You can revoke it at any time from your ion account's authorized applications settings.
Open a chat and ask:
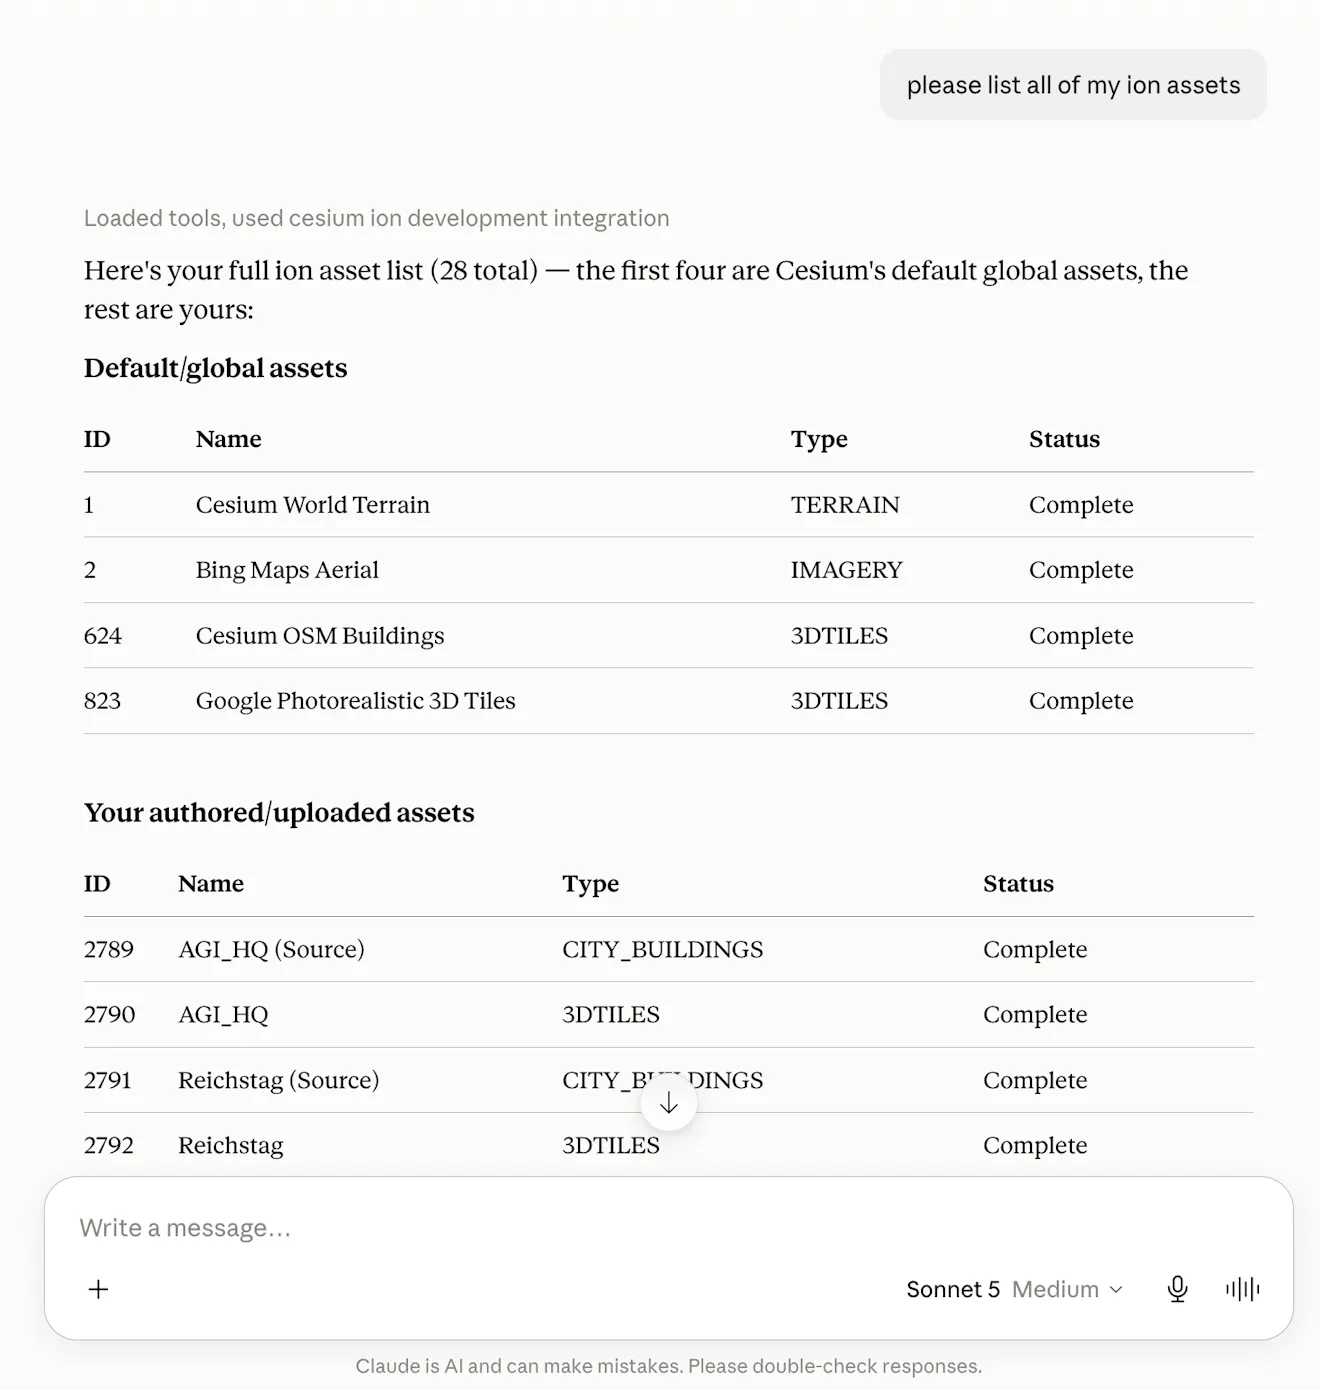
List my ion assets.
The assistant should call the list_assets tool and show your assets with their IDs, types, and tiling statuses. If your account is new and empty, you'll see the default assets like Cesium World Terrain.
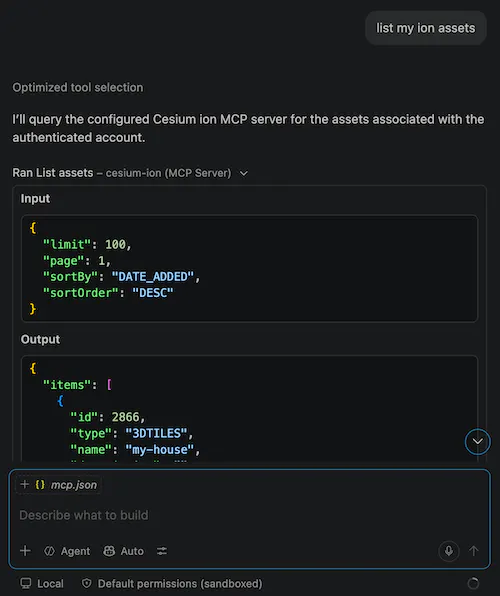
Try a couple more:
Show me the details of asset 1.
Find all my imagery assets.
The OAuth window never opens, or the client reports it can't fetch server metadata. Check the server URL is exactly https://mcp.ion.cesium.com. A typo in the host will fail before sign-in starts.
"Unauthorized" or "invalid token" errors after connecting. Your session may have expired or been revoked. Remove and re-add the server (or use your client's "re-authenticate" action) to sign in again.
Tools appear but every call fails with a 401 or 403. The account you signed in with may not have permission for that operation, such as a team member role without write access trying to modify assets. Verify that you are signed in with the correct account or reach out to the owner of the asset to ensure you have the required permissions.
The upload importer doesn't appear when creating an asset. Your client doesn't support MCP Apps (interactive tool panels). All other tools should still work; see Uploading Data with the Asset Importer for which clients support the importer.
You're connected! Continue with Managing Assets with AI to learn the core asset workflows or jump straight to Uploading Data with the Asset Importer to tile your own data.