Tiling 3D Buildings
Cesium ion allows you to tile 3D buildings to visualize entire cities, or the whole world like Cesium OSM Buildings.
This guide explains how to upload your 3D buildings to Cesium ion.
For uploading other types of 3D models, see the 3D models guide.
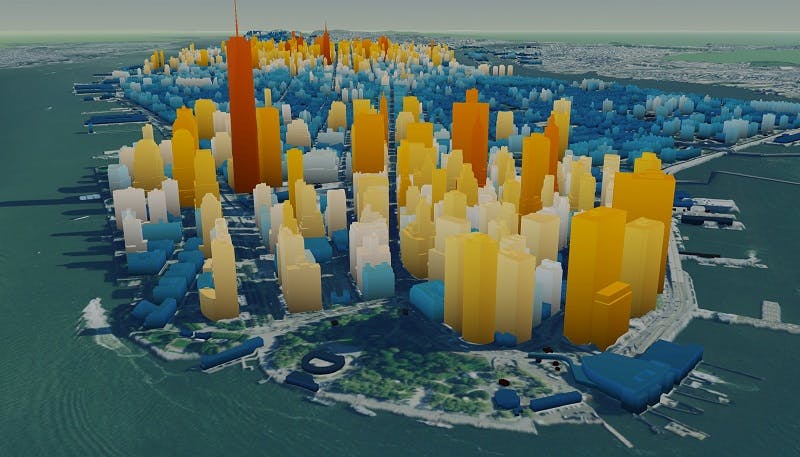
New York City buildings colored by height, visualized in CesiumJS.
You need a Cesium ion account to take this tutorial.
Cesium ion is an open platform for tiling and hosting. It will serve your buildings as 3D Tiles to any compatible client, like CesiumJS.
| Format | File extensions |
|---|---|
| CityGML | .citygml, .xml, .gml |
| KML/COLLADA | .kml, .kmz, .dae |
- Files may be zipped.
- Any per-building properties in the source data will be included in the 3D Tiles output.
- For KML/COLLADA input, each building should be a separate COLLADA model. You should have one or more KML files that specify the location on the globe and any properties for each building.
Cesium ion tiles your buildings into 3D Tiles when you upload them. Here are sample files you can download to try this out:
- On the My Assets tab of Cesium ion, press Add Data to upload your model.
- Select KML/COLLADA (tile as 3D Tiles) or CityGML.
- Select the options you want to apply, including clamping the buildings to terrain.
Select the Clamp to terrain option to move individual buildings down to the underlying ground height during tiling. Use this option to get accurate real-world building heights, or if you are visualizing your buildings on top of a 3D terrain layer.
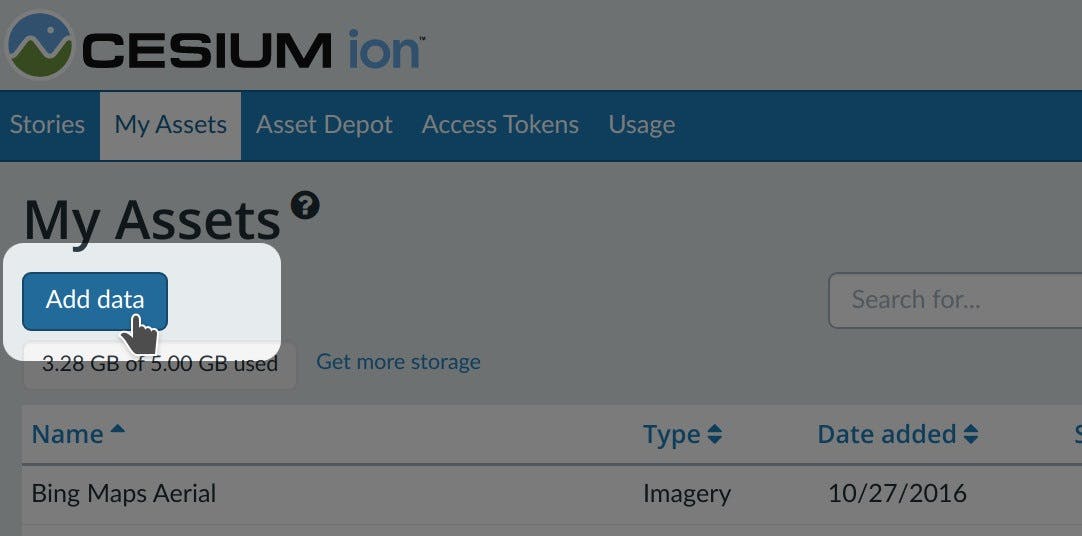
Press Add Data to upload and tile your 3D building models.
The easiest way to visualize and share your asset is using Cesium Stories.
- In the Stories tab, click New Story.
- Under Assets, click the Add asset button and choose your asset.
- Click on the zoom button (magnifying glass) to go to your asset in the scene. Adjust the view to your liking.
- Click on Capture view to save the view.
- Click Share and give your story a name.
You can now share your data in an interactive scene! Learn more about Stories with this tutorial.
Use your asset in a custom app
When you click on an asset in My Assets, you’ll see a preview panel on the right side of the screen.
- The preview panel displays the asset ID, which you’ll need for loading this asset in CesiumJS or other engines.
- You’ll find a code snippet for loading this asset in CesiumJS at the bottom of this panel.
- Click Open complete code example to see your asset in Sandcastle.
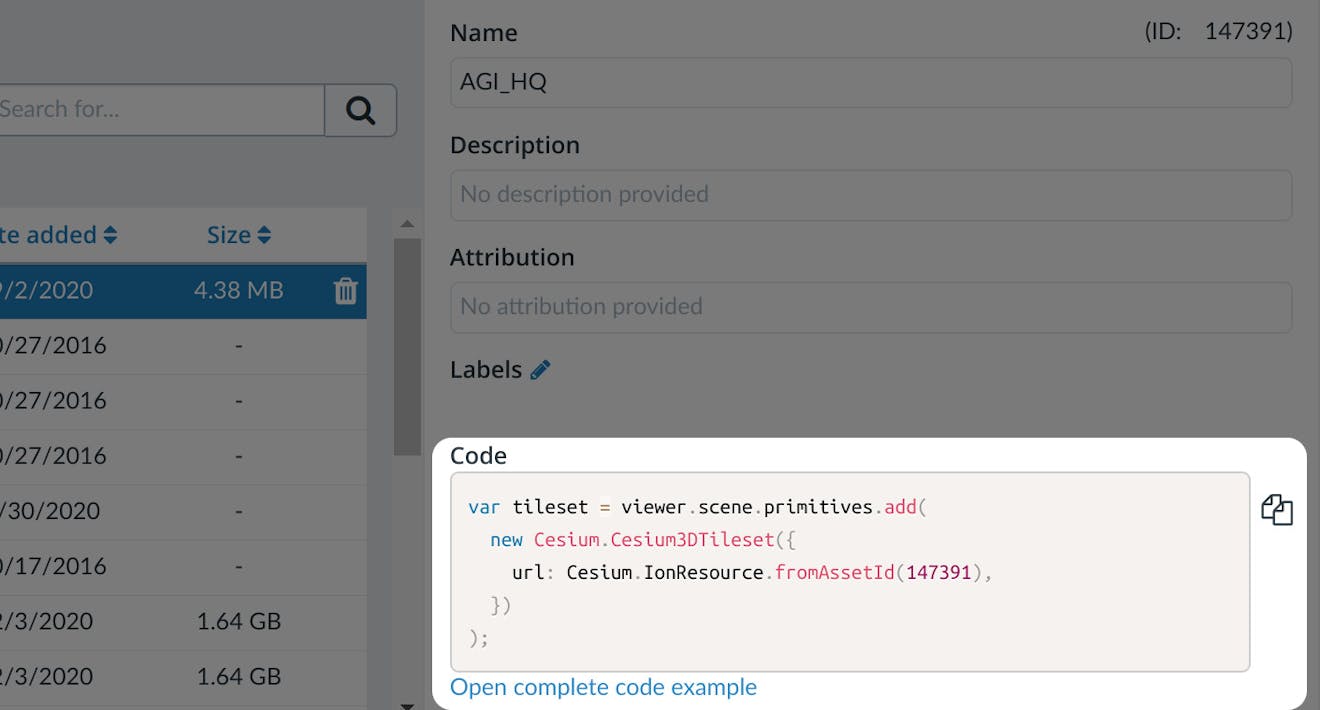
You’ll find a code example for adding this asset to your CesiumJS app at the bottom of the asset preview window.
Learn how to set up a CesiumJS app with the quickstart guide.
- For a fun example of the useful ways you can work with buildings in Cesium, take the short Visualize a proposed building tutorial.
- See a code example of how to style your buildings using the 3D Tiles Styling language.
- Check out this tutorial on how to use Cesium Stories to style and share your 3D Buildings without writing code.