Cesium Moon and Cesium Mars in Cesium for Unreal
This tutorial guides you through importing Cesium Moon and Cesium Mars into your Cesium for Unreal projects through Cesium ion.
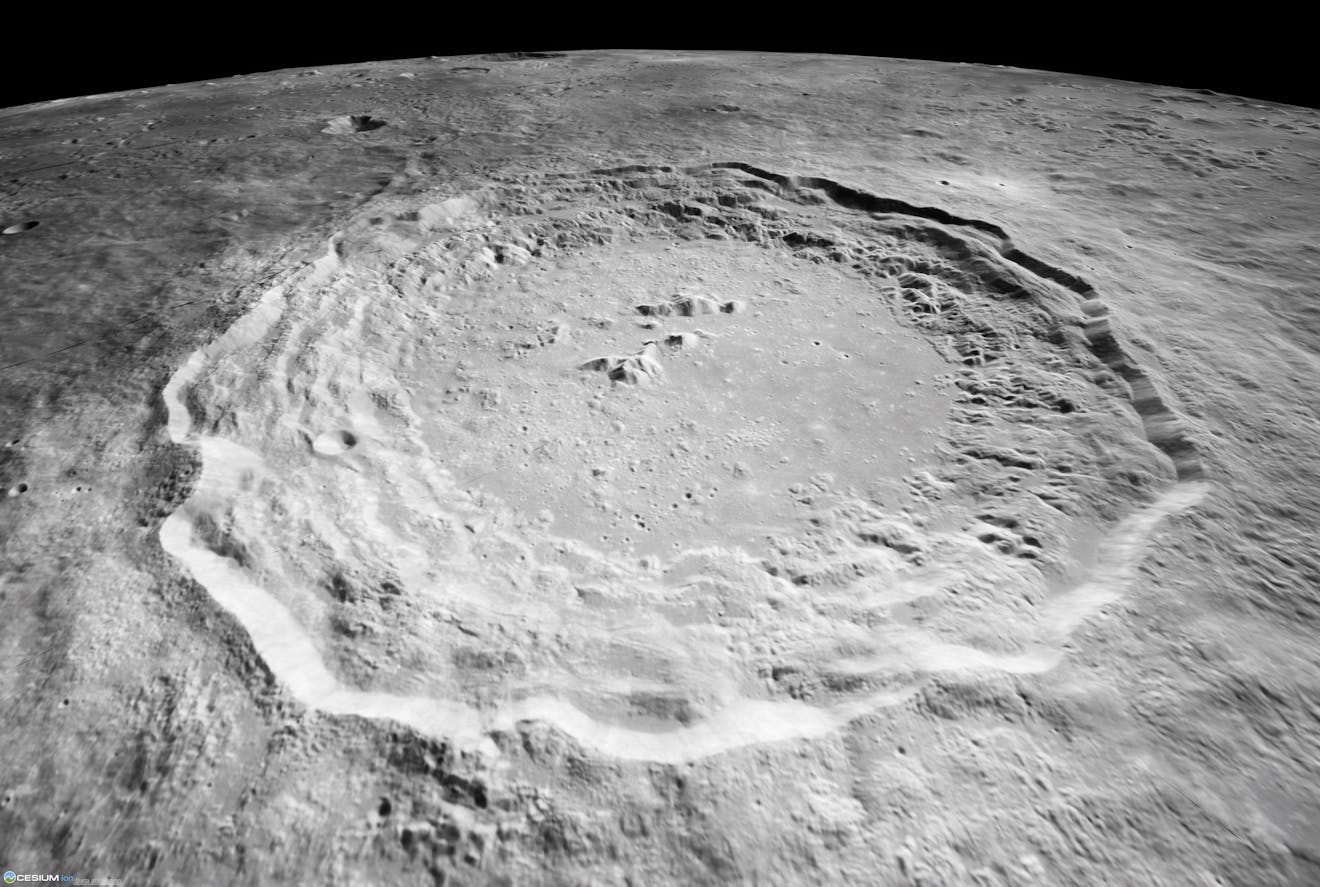
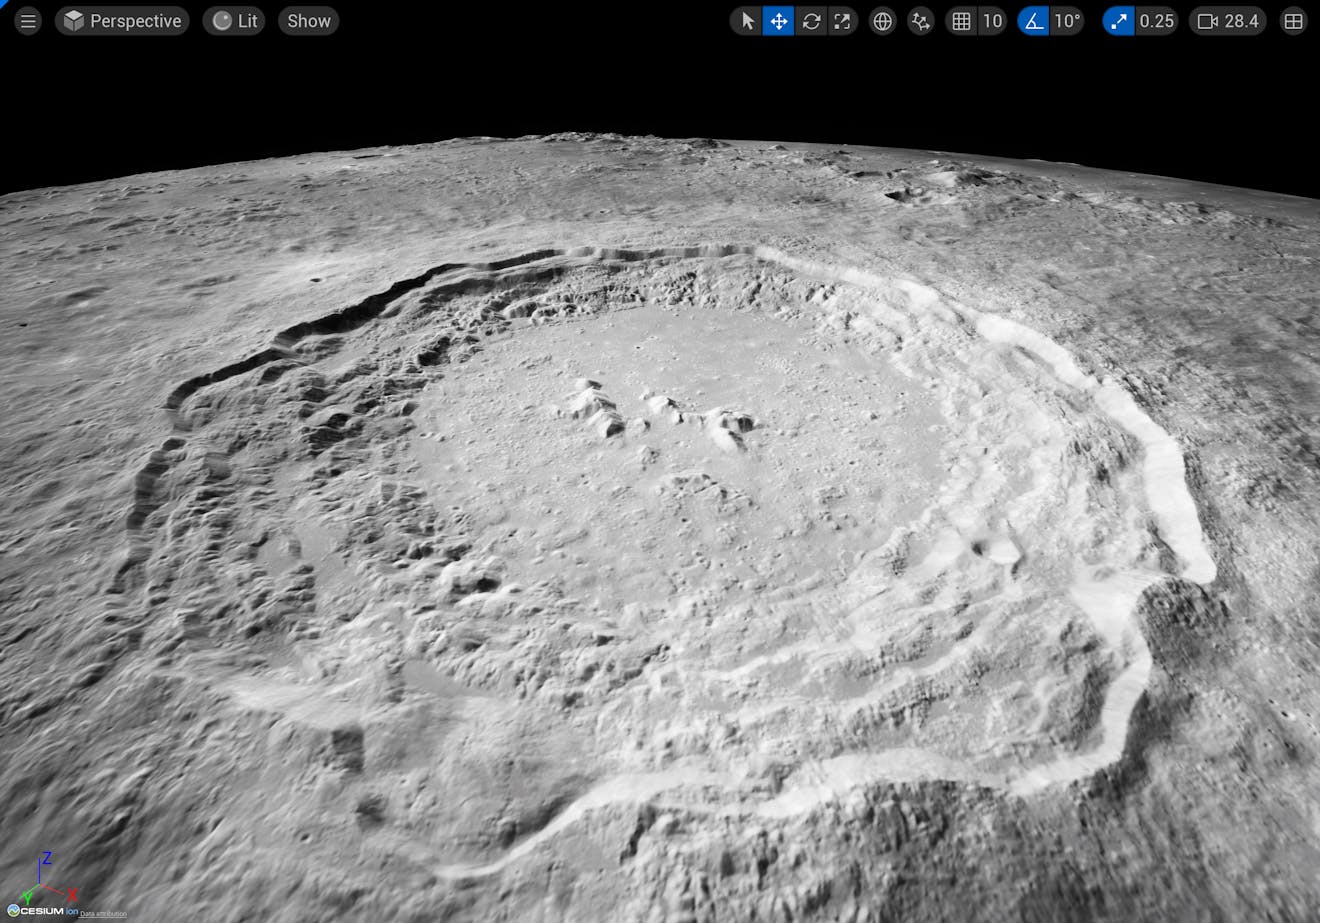
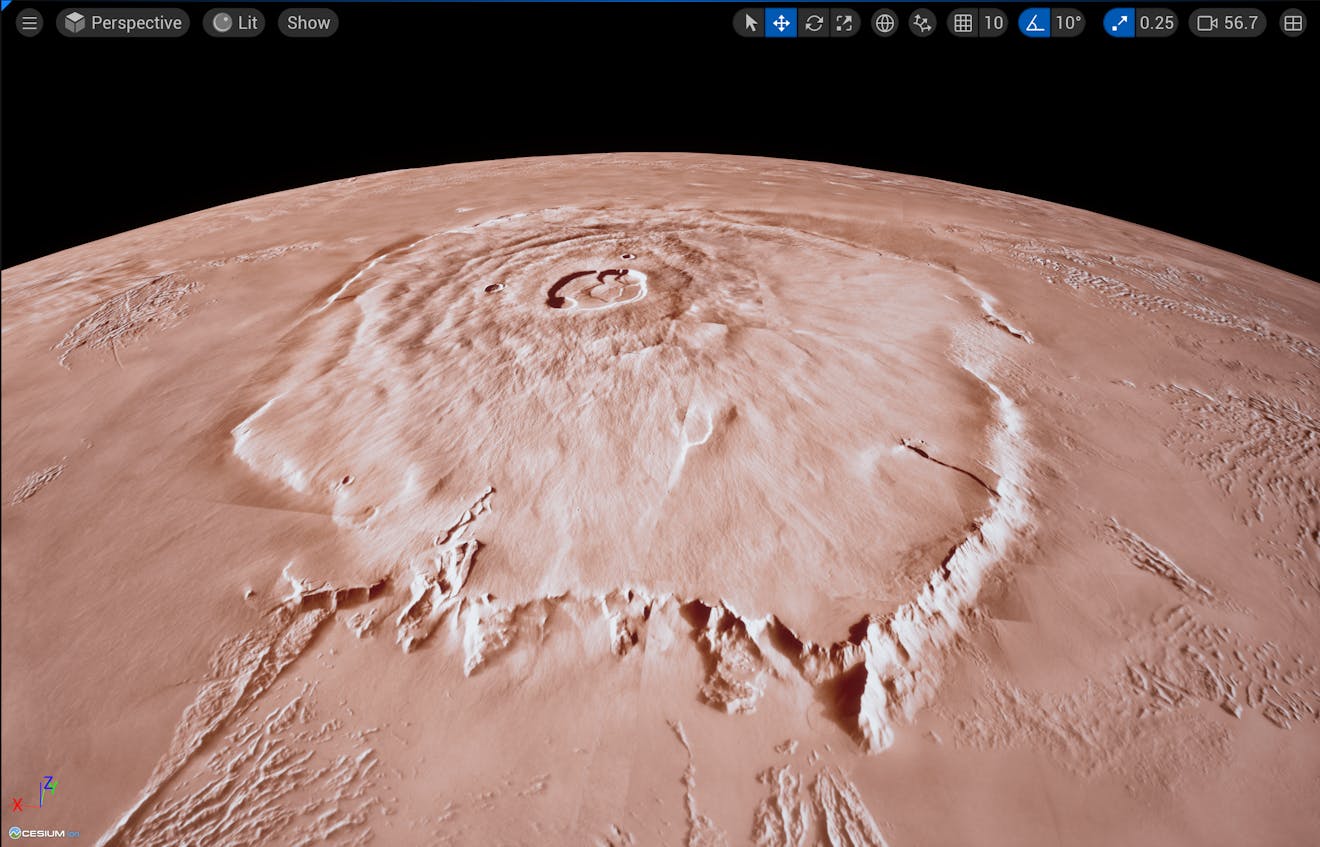
The Copernicus Crater, visualized with Cesium Moon in Cesium for Unreal.
You’ll learn how to:
- Add Cesium Moon and Cesium Mars to your Unreal Engine level using Cesium ion.
- Configure the ellipsoid model used by CesiumGeoreference component.
- Cesium for Unreal version 2.7.0 or later.
- A Cesium ion account to stream Cesium Moon or Cesium Mars into Unreal Engine. Sign up for a free Cesium ion account if you don’t already have one.
- Know how to set up a basic Cesium for Unreal application. Check out our Cesium for Unreal Quickstart guide for instructions on starting with the Cesium for Unreal plugin.
This tutorial assumes that you have already created a project and installed the Cesium for Unreal plugin. If you have not yet created a project, see the Quickstart for detailed instructions.
1Create a new level by clicking File > New Level. In the window that appears, select Empty Level to start with a blank scene.
2Open the Cesium panel by going to Window > Cesium.
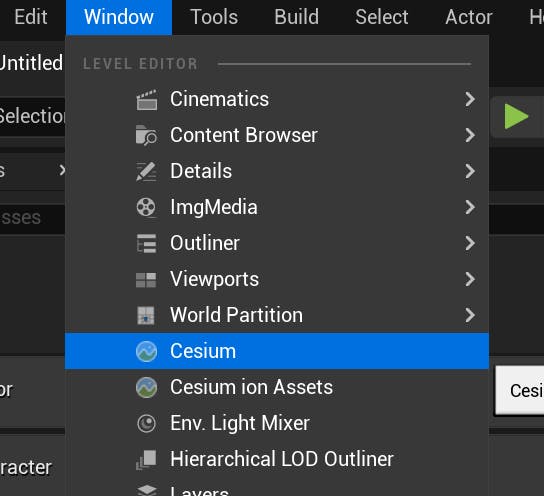
3Add a CesiumSunSky actor to the scene using the “Quick Add Basic Actors” section of the Cesium panel.
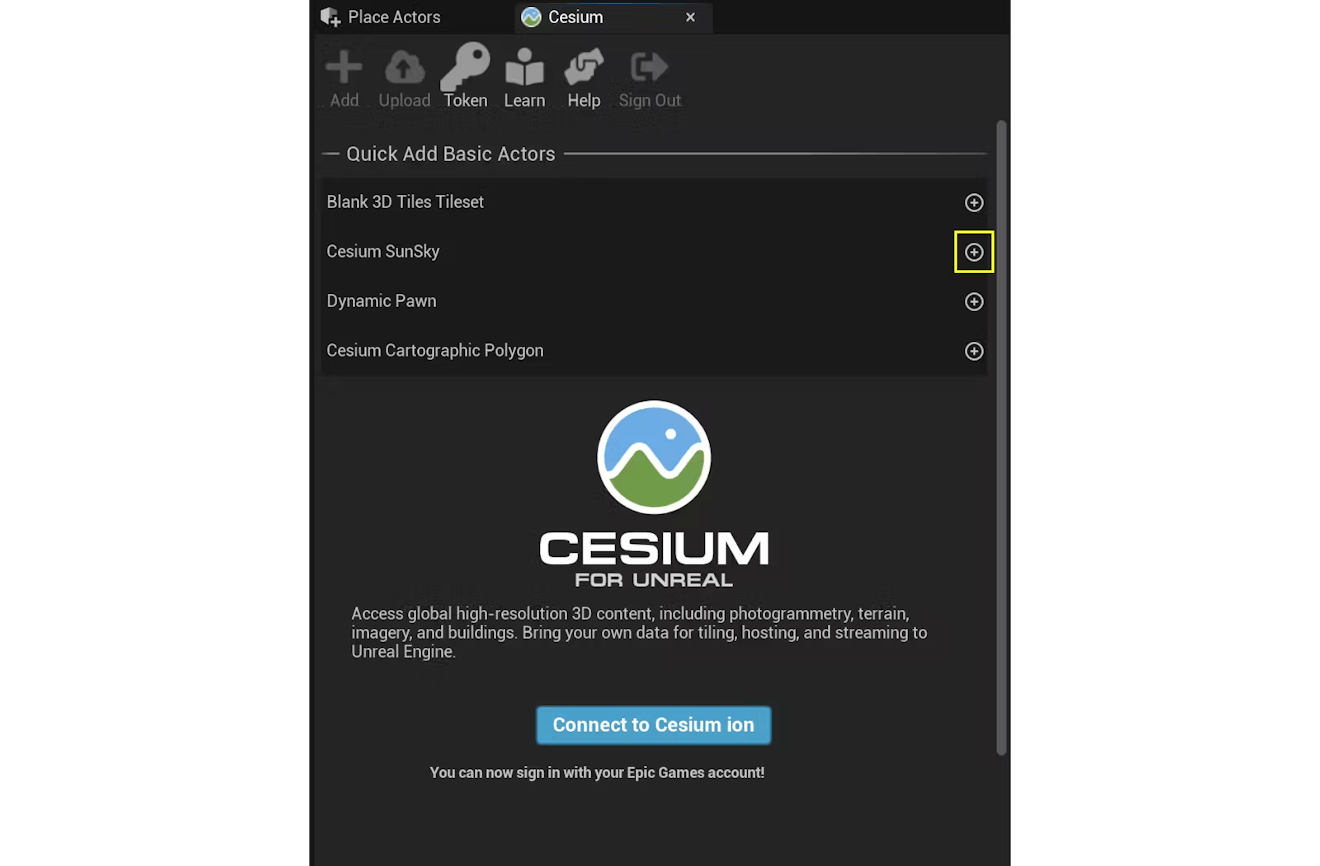
This will also add a CesiumGeoreference actor to the scene.
4If this is your first time using Cesium for Unreal, the scene may appear completely white. There are steps to fix this included in the infobox under Step 3.4 of the Quickstart tutorial.
In addition to realistic light intensity values, CesiumSunSky includes atmosphere effects that are configured to emulate the atmosphere of Earth. However, these effects will need to be adjusted when working with the Moon and/or Mars.
With the CesiumSunSky actor selected in the Outliner, click the SkyAtmosphere component.
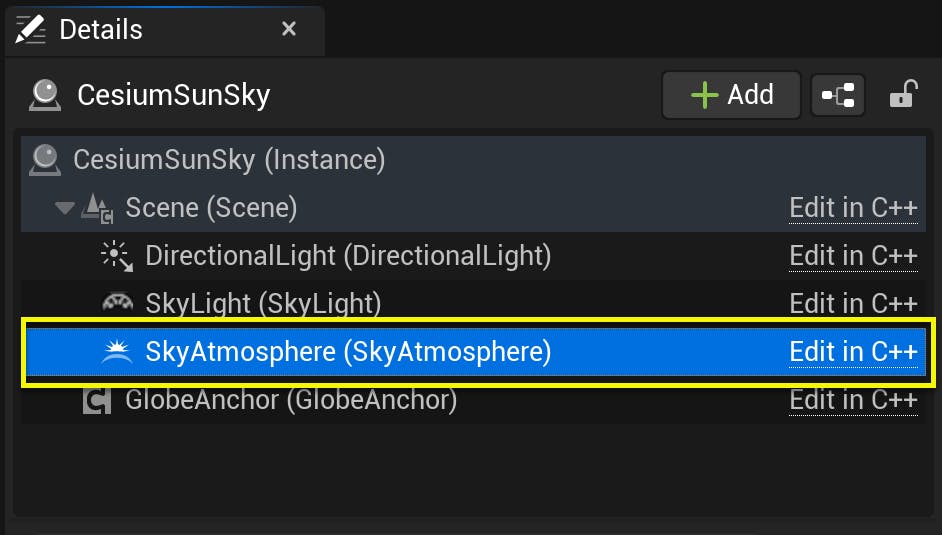
Reduce the atmosphere’s appearance by setting the Atmosphere - Rayleigh > Rayleigh Scattering Scale to 0.0, as well as the Atmosphere - Mie > Mie Scattering Scale to 0.0.
This will make your scene black, but that is expected.
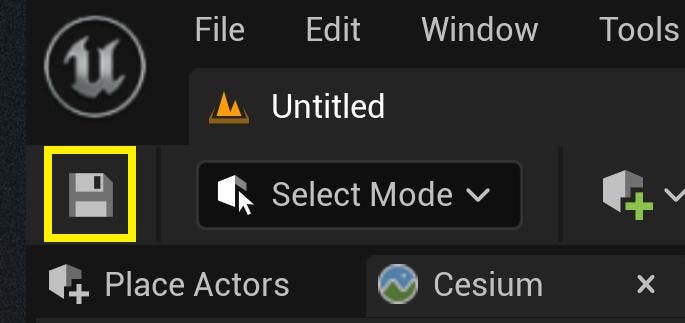
5Finally, save your scene using the Save icon in the top bar or with Ctrl+S. Give your scene a name.
By default, Cesium for Unreal uses the WGS84 ellipsoid to handle geospatial math and georeference the level. This model works well for the Earth, but not other celestial bodies. Thus, Cesium for Unreal provides alternative ellipsoid presets so you can properly visualize the Moon and Mars in Unreal Engine.
1First, select the CesiumGeoreference actor in the World Outliner. In the Details panel, look for Ellipsoid under the Cesium category.
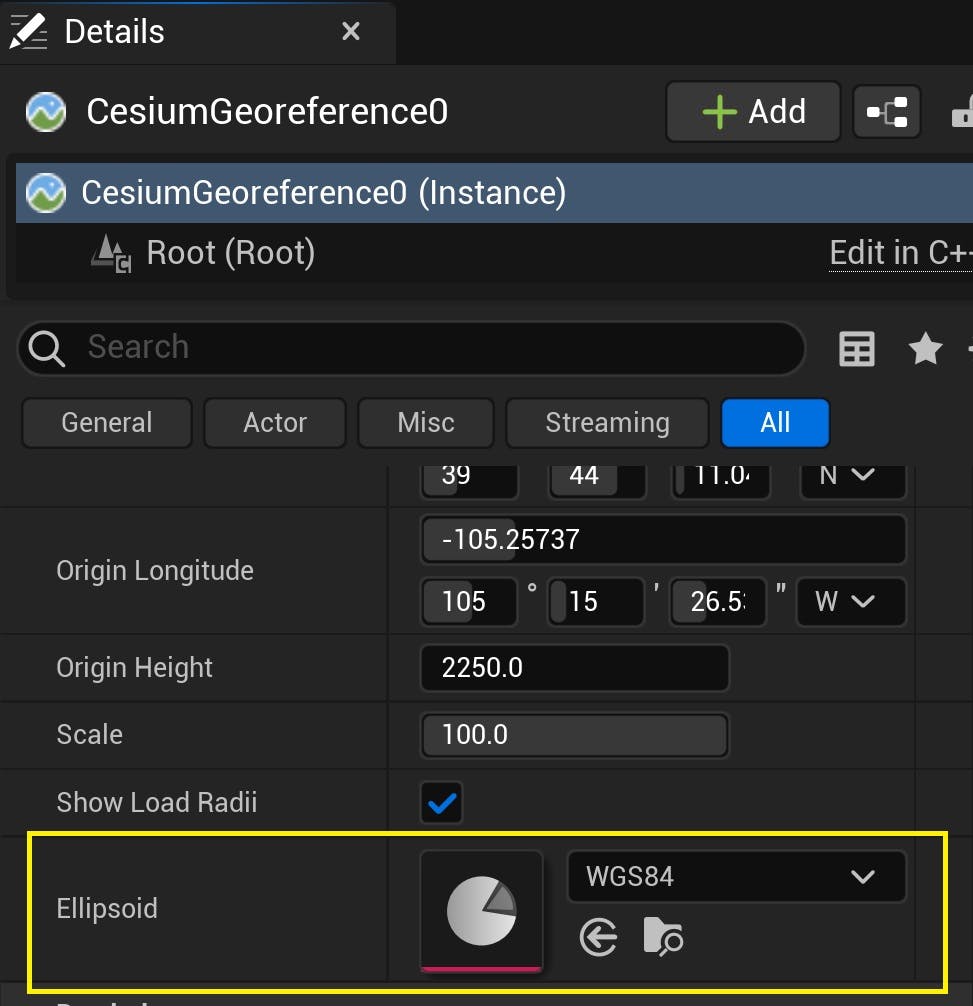
2In the dropdown, select IAU2015_Moon or IAU2015_Mars, depending on which celestial body you want to add.
Now when you add Cesium Moon or Cesium Mars to your level, the data will stream in correctly. Without this step, you may see erratic tile loading behavior due to the mismatched ellipsoid model.
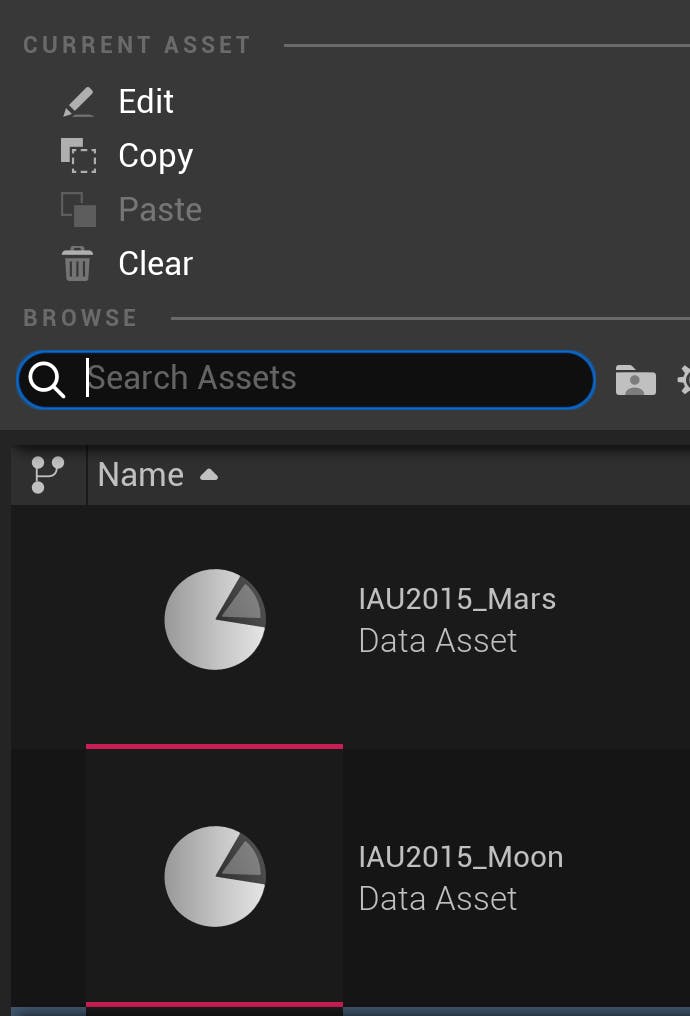
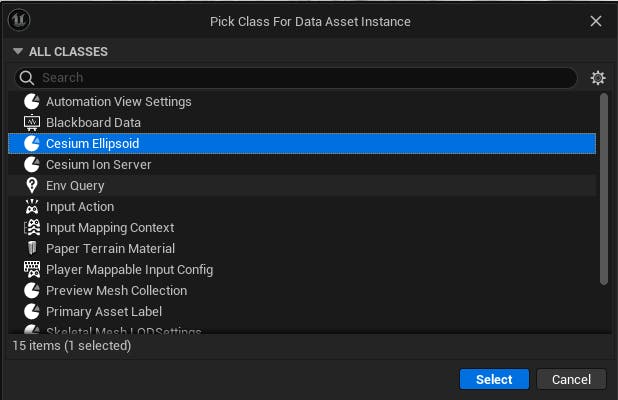
Want to use a custom ellipsoid model? You can create one in the Content Drawer by clicking Add, then selecting Miscellaneous > Data Asset, and then selecting Cesium Ellipsoid from the available classes.
Then, open the Asset Editor for the new ellipsoid. You can specify whatever values you want to use under the Radii property.
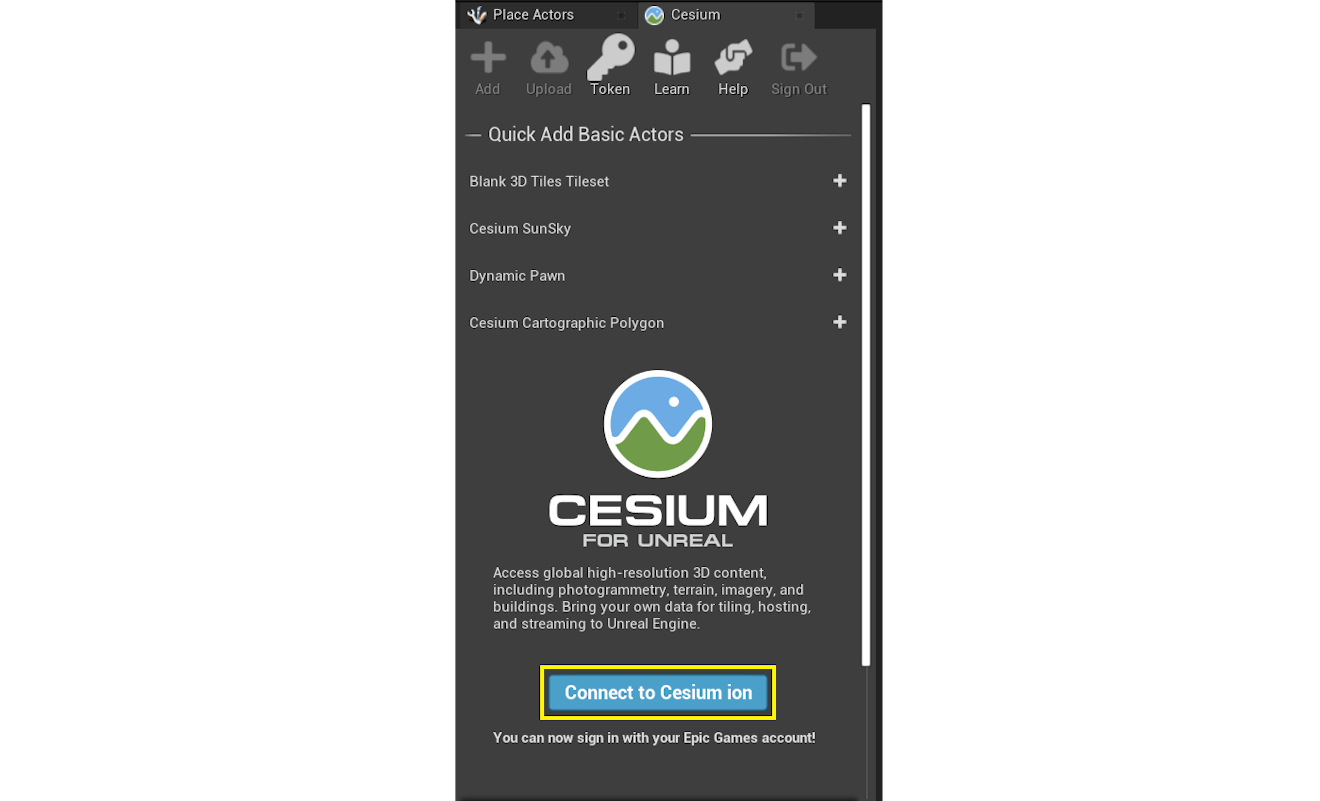
If you are already connected to your Cesium ion account in Cesium for Unreal, skip to Step 4. Otherwise, follow the steps below to connect your account.
1In the Cesium panel, click on the Connect to Cesium ion button.
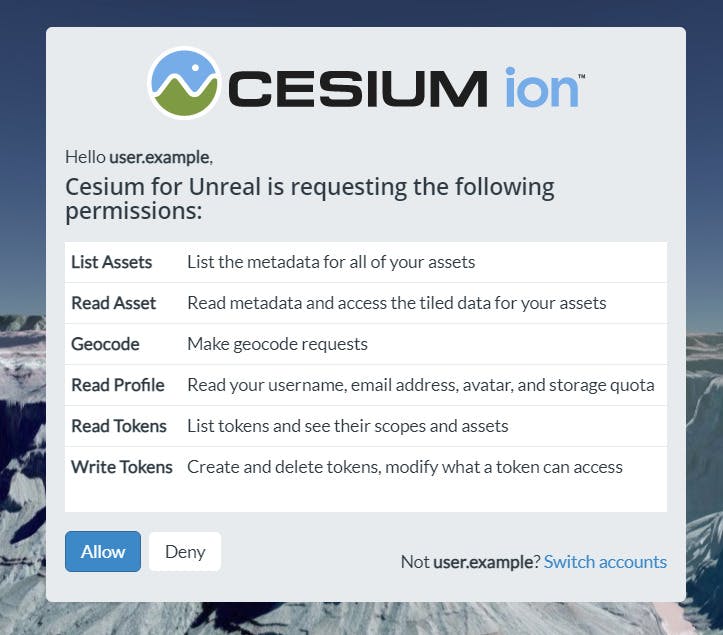
2A pop-up browser window will open. If you are not logged in, log in to your Cesium ion account. You can also sign in with your Epic Games, GitHub, or Google account.
3Once you are logged in, you'll see a prompt asking you to allow Cesium for Unreal to access your assets. Select Allow, and then return to Unreal Engine to continue.
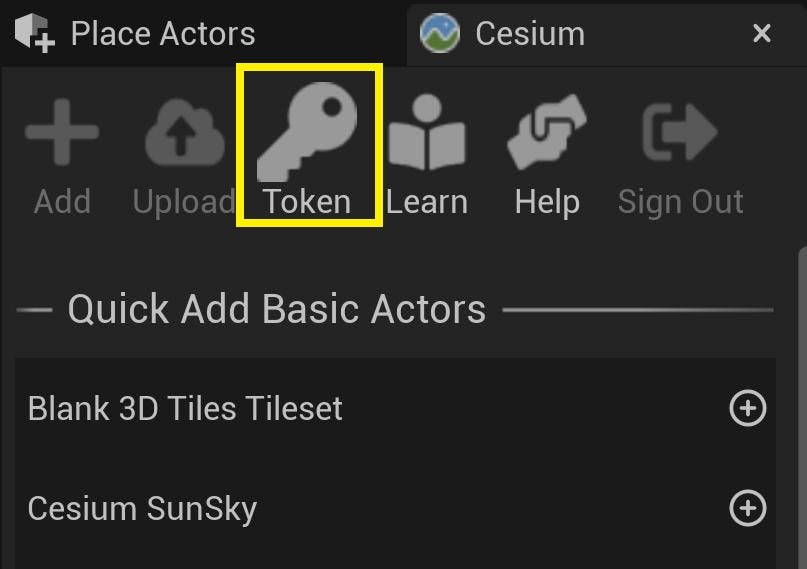
4Now, you'll create a default Access Token for your project. Every asset that you stream from Cesium ion requires an Access Token, including Cesium Moon and Cesium Mars. In this tutorial, you'll set a project-wide access token for all your assets to use.
Click on the Token button at the top of the Cesium panel.
5A new window will appear to configure the token. Select the Create a new token option and rename the token if you wish. Then, press the Create New Project Default Token button.

The new token you created will be added to your Cesium ion account.
If you already have a token in your Cesium ion account that you would like to use, you can select it from the "Use an existing token" dropdown instead of creating a new one.
The next few steps are applicable to both Cesium Moon and Cesium Mars, so follow along with the dataset of your choice!
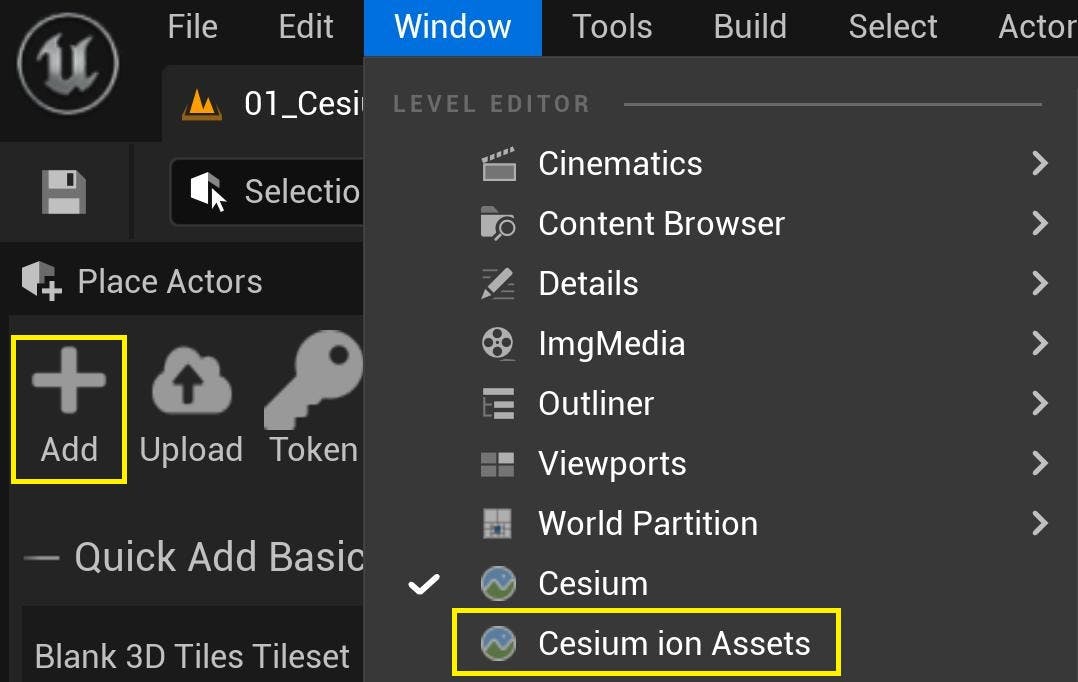
1Click the Add button to open the Cesium ion Assets panel. Alternatively, go to Window > Cesium ion Assets.
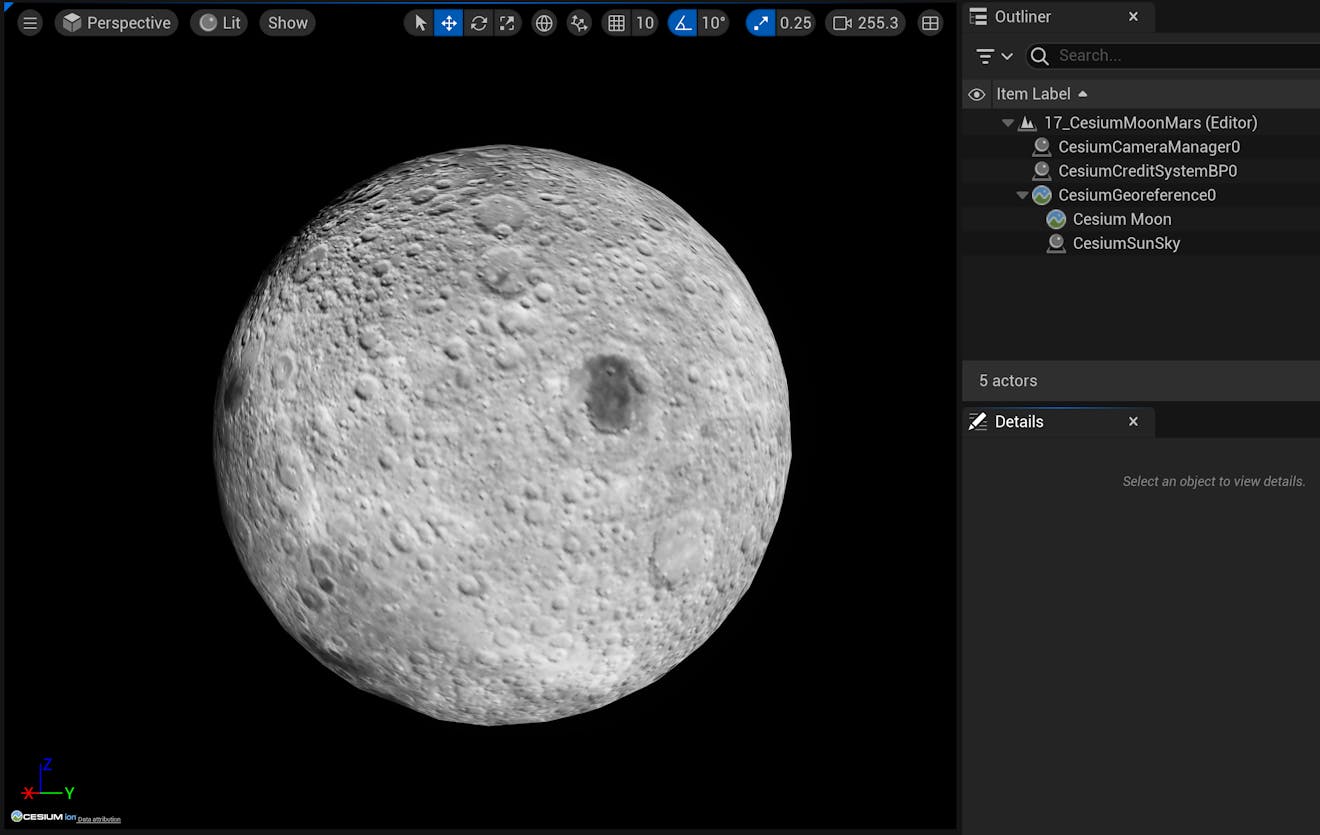
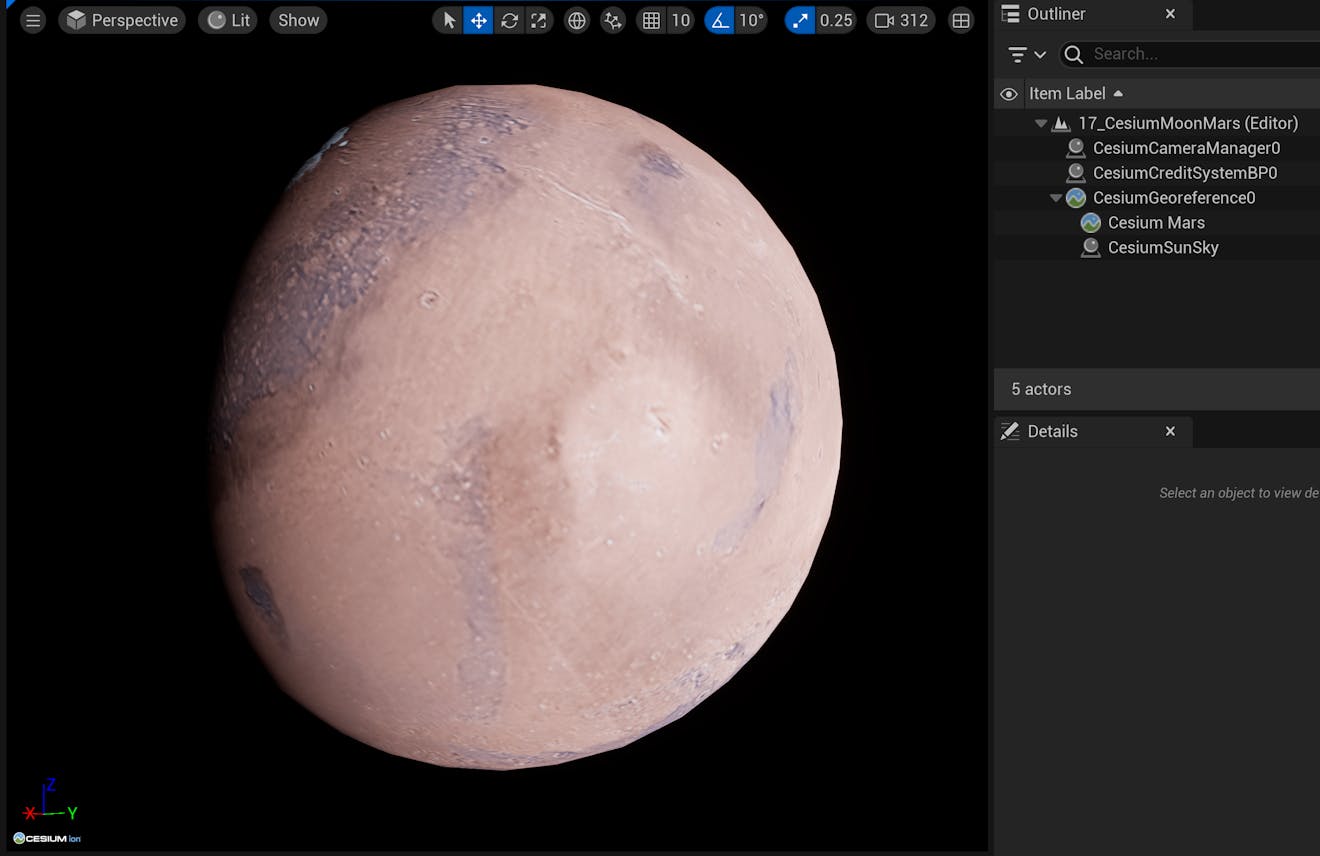
2Find Cesium Moon or Cesium Mars in the asset list. Click on it, and then click Add to Level.

Can’t find these assets in your asset list? Visit the Asset Depot pages for Cesium Moon or Cesium Mars and click Add to my assets. Then return to Unreal Engine and refresh the asset list using the button in the upper left of the Cesium ion Assets panel.
The asset will appear in the World Outliner as a newly created Cesium3DTileset. Double-click it to focus the Editor camera on the entire celestial body.
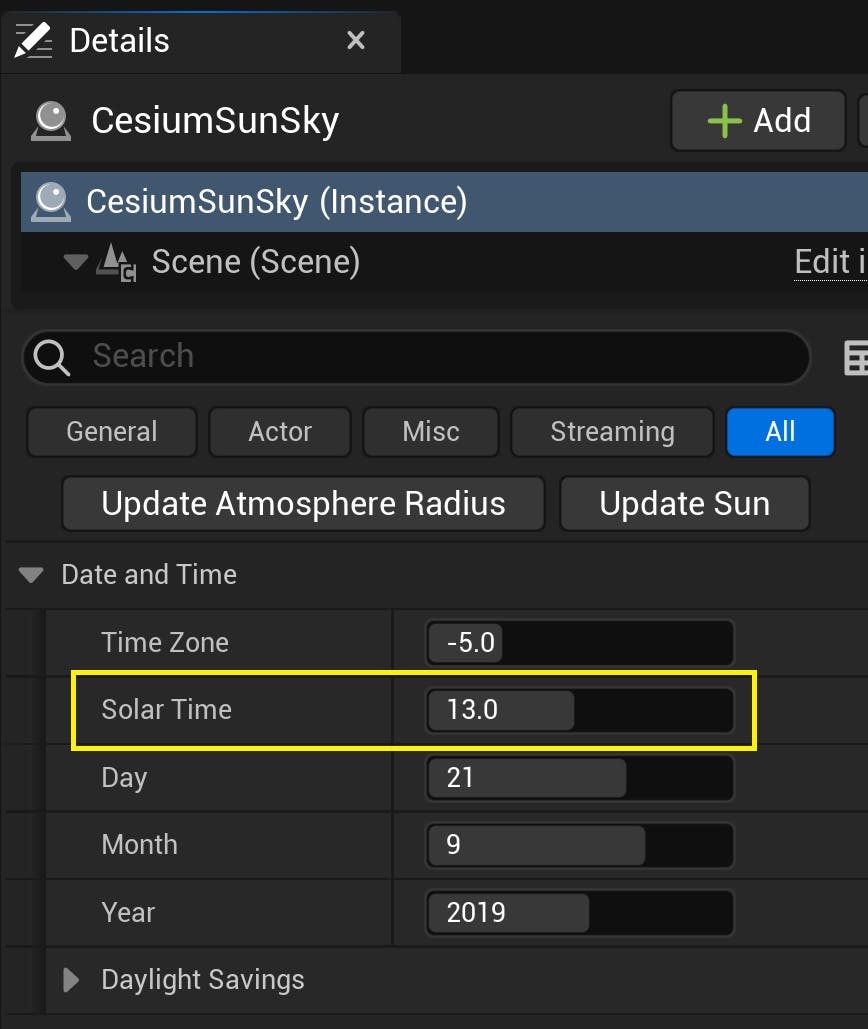
If you still can’t see it in the viewport, you may be looking at part of the body in shadow. You can change the lighting to a better angle by adjusting the Solar Time property on CesiumSunSky.
Before you begin to build applications with Cesium Moon or Cesium Mars in Unreal Engine, you’ll want to learn to georeference your level. By default, Unreal Engine does not account for many geospatial variables, such as the curvature of the ellipsoid or its radial direction of gravity. However, with the CesiumGeoreference actor, you can position your scene in an ellipsoidal context so it more smoothly interacts with the local Unreal environment.
1Click on the CesiumGeoreference actor in the World Outliner. Locate the Latitude, Longitude, and Height properties in the Details panel.

2Set these coordinates to the location of a notable landmark on your chosen celestial body.
For Cesium Moon, you can use the coordinates of Copernicus Crater, a large impact crater that is 93km in diameter and visible from Earth with binoculars:
Latitude: 9.62
Longitude: -20.08
For Cesium Mars, you can use the coordinates of Olympus Mons, a large shield volcano that is over 21.9km tall—about 2.5 times the elevation of Mount Everest above sea level:
Latitude: 18.65
Longitude: -133.8
Read more in-depth about georeferencing in Step 3 of the Adding Datasets tutorial.
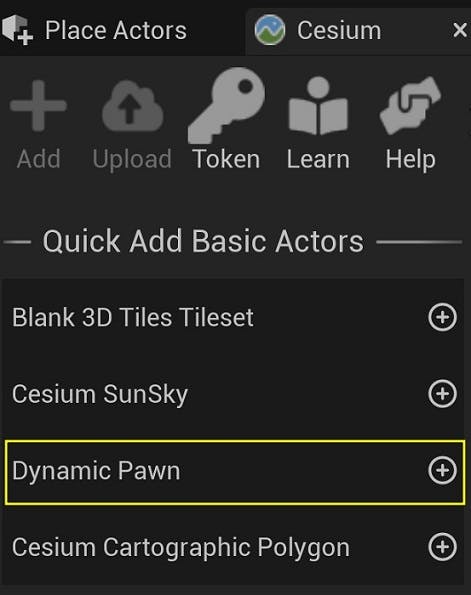
Lastly, let’s add a Dynamic Pawn to the level. The Dynamic Pawn is a controller included in the Cesium for Unreal plugin that will help you navigate the large size of celestial bodies during play mode.
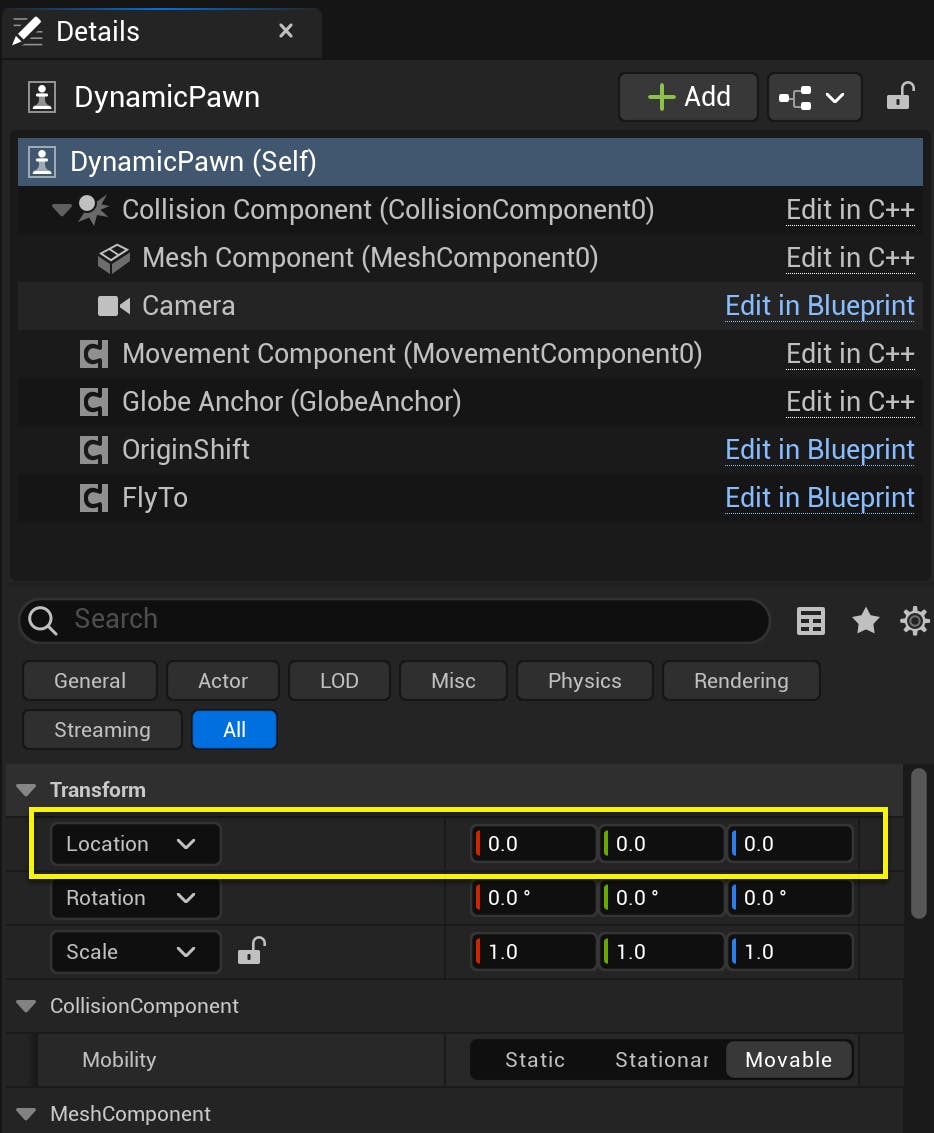
1Using the Cesium panel, add a Dynamic Pawn to your scene.
Make sure the pawn’s Location is set to the Unreal origin (0,0,0) in the Details panel.
2You're ready to test out your scene! Press the Play button at the top toolbar.

You can use the W, A, S, and D keys and the mouse to fly around. You can also use the Q and E keys to move the camera vertically with respect to the celestial body. Use the mouse scroll wheel if you need to change your speed.
For more information about the Dynamic Pawn and navigating your Unreal Engine levels, check out Step 7 of the Quickstart tutorial.
See our other Cesium for Unreal tutorials to learn how to build apps on top of Cesium Moon and Cesium Mars! You may want to explore Placing Objects on the Globe or Building Global Scenes with Georeferenced Sublevels. Check out other locations using the Gazetteer of Planetary Nomenclature for the Moon or NASA’s Mars Trek.