Create 3D Reality Models with Cesium ion
Cesium ion allows you to reconstruct a 3D reality model from a collection of photos. This guide explains how.
This feature is available as a tech preview. Gaussian splats may evolve during the technical preview. Assets created earlier may need to be retiled to take advantage of the latest rendering and level‑of‑detail (LOD) improvements. During this tech preview, you do not have access to reporting on your usage of this service.
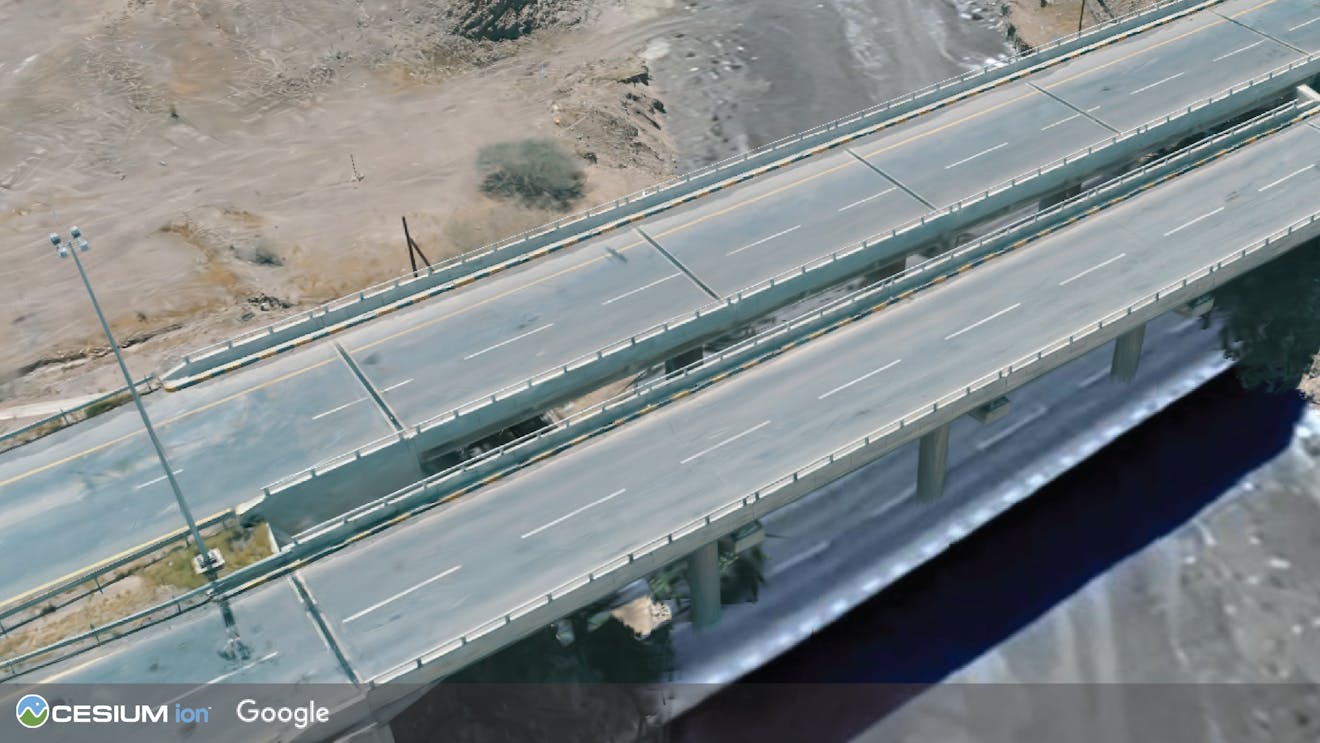
3D Tiles Gaussian splats of a bridge, reconstructed from photos by Cesium ion and shown with Google Photorealistic 3D Tiles.
You need a Cesium ion account to take this tutorial. Sign up or log in to Cesium ion.
Cesium ion is an open platform for tiling and hosting. It will serve your reality models as 3D Tiles to any compatible client, like CesiumJS.
Cesium 3D model reconstruction is not yet available for Cesium ion Self-Hosted.
When preparing your camera and capture strategy, focus on these five principles for optimal output:
- Lock your camera settings and hardware (consistency beats everything).
All photos should behave as if they came from a single, unchanging camera.
- Example: Use the same physical camera for the entire capture.
- Example: Keep focal length, sensor dimensions, and resolution fixed.
- Example: Avoid switching lenses or zooming mid‑capture.
- Create parallax (move through space; don’t just rotate).
Good reconstruction requires viewpoint change, not just camera rotation.
- Example: Walk a slow orbit around your subject instead of pivoting in place.
- Example: For buildings or large structures, capture multiple rings at different distances or heights.
- It’s important to use a minimum of 3 capture orbits of your subject. The first pass is with your camera above your head pointing down. The second pass is at medium height with the camera facing forward. Finally, the third pass is lower with the camera point up.
- Maintain strong overlap (don’t leave gaps).
Every image should share visual features with nearby images to aid reconstruction.
- Example: Ensure each photo reuses features from adjacent viewpoints.
- Example: Add extra passes around high‑detail or “thin” geometry like rails, edges, or wires.
- Keep your imagery sharp.
Motion blur and noise reduce reconstruction quality.
- Example: Stabilize camera motion and avoid fast pans.
- Example: Prioritize good lighting to reduce ISO noise.
- Example: If capturing from video, choose settings that minimize motion blur.
- Keep the scene static (motion becomes artifacts).
Moving objects are reconstructed inconsistently and often appear as artifacts.
- Example: Avoid heavy wind in foliage.
- Example: Minimize people, vehicles, or dynamic lighting changes in frame.
These principles apply to all Cesium ion reconstruction outputs—meshes, point clouds, and Gaussian splats. Different outputs may surface different artifacts, but they share the same underlying capture requirements.
The following example shows the capture paths required to create a detailed Gaussian splat reconstruction.
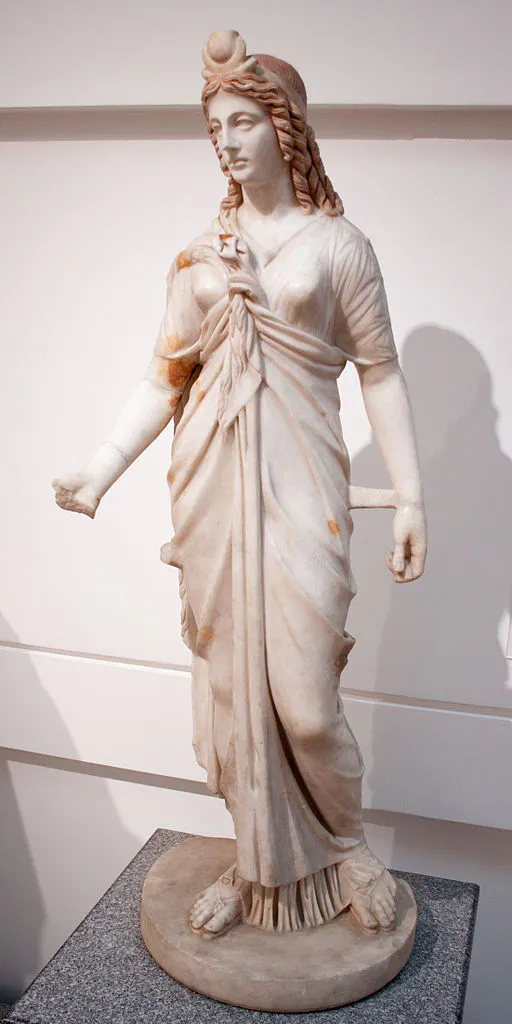
Real-world image of the Statue of Isis in Rome, Italy.
Multiple orbits are required to capture every detail of your subject.
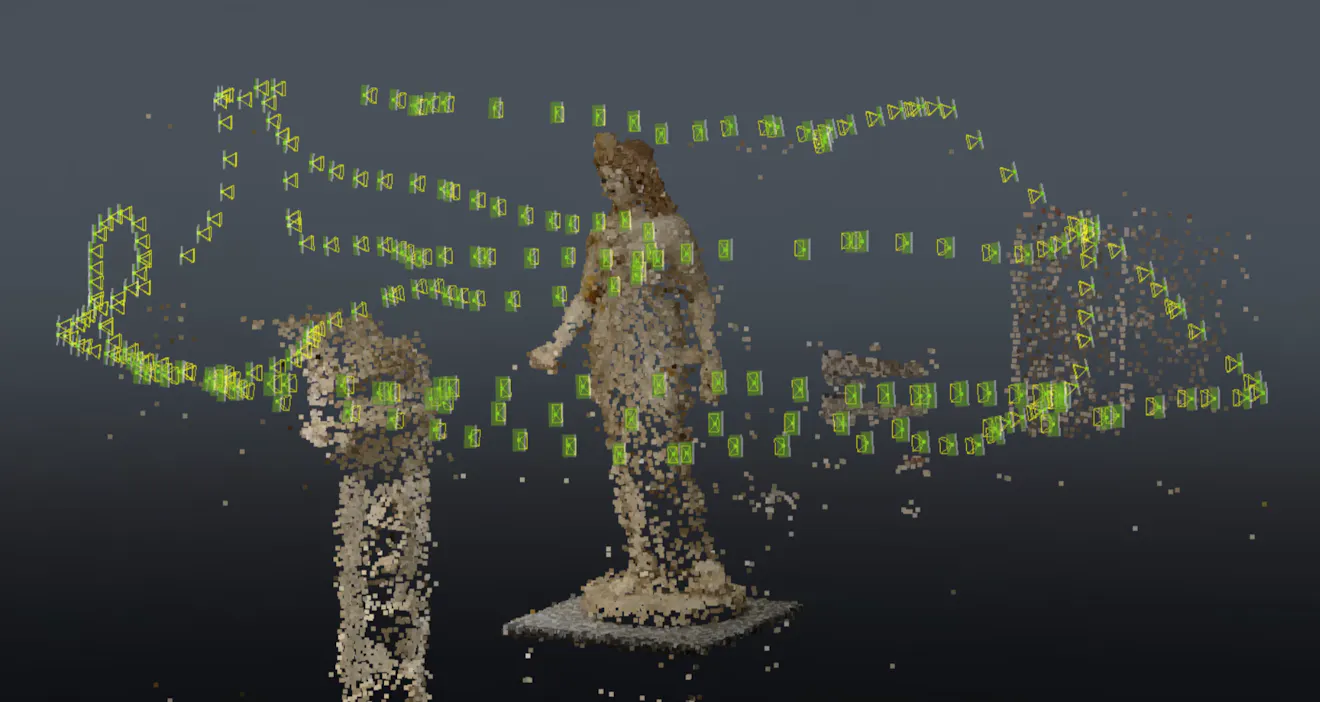
Each rectangular icon represents a photo capture that was used to generate an aerotriangulation of the Statue of Isis. Capture performed by Victoriya Kashtanova, Bentley Systems.
Once your reconstruction completes in Cesium ion, validate the placement in Cesium Stories and adjust the placement, if necessary, by leveraging “Adjust tileset location.”
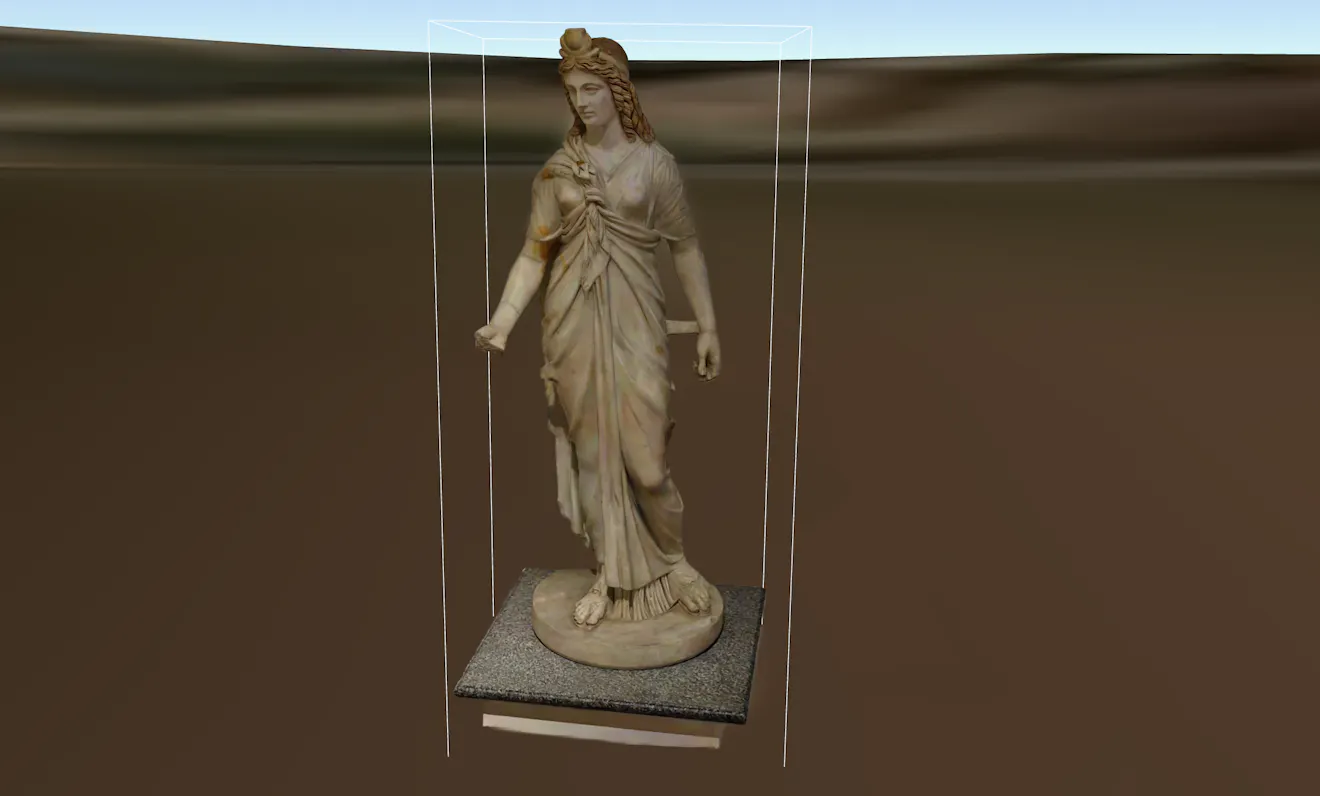
3D Gaussian splat tileset representation of the Statue of Isis as viewed in CesiumJS.
Here is a sample photo collection you can use to try out reconstruction: Bridge.zip.
To generate a 3D reality model from photos,
- On the My Assets tab of Cesium ion, press Add Data to upload your photos (multiple photos or a file archive).
- Packaging guidance: You’ll want to ensure you have a clean folder structure. Best practices for uploading a zip file include a single root folder and avoiding nested archives or unrelated files.
- If desired, edit the name for your asset.
- Select Photos (for 3D reconstruction).
- Select the options you want to apply:
- Choose the desired output quality.
- Select whether you want Gaussian splats and point cloud assets in addition to the default 3D mesh output.
- If the photos were taken indoors or with a low-quality GPS signal, turn off the Use embedded GPS coordinates to georeference the asset option.
Disabling embedded GPS is recommended for indoor captures, underwater scenes, or any environment where position accuracy is uncertain. Placement can be validated and adjusted early using a Cesium Stories preview.
- Push Upload to begin the import and reconstruction.
Cesium ion will then:
- Import the data (uploaded from your file system or whatever location you specified).
- Perform the reconstruction into a 3D mesh and tile the mesh into 3D Tiles and other data formats you selected.
Each output format will be a separate asset in My Assets. The original photos will be available as the source files for the 3D mesh.
Reconstruction can take considerable time, depending on the number and nature of your input photos and on how many output formats you choose. The sample data set will take about an hour to process. Processing time depends on the number and resolution of input images. Longer processing does not indicate higher quality or additional optimization.
The Cesium ion user interface for importing a photo collection. In this example, 3D mesh and 3D Gaussian splats are selected, while the point cloud is toggled off.
If you’ve used other 3D model reconstruction software, you might be used to more options to tune the reconstruction process. Our software should do a good job constructing a 3D model without any fine-tuning. If you are not satisfied with the reconstruction, let us know on the community forum.
The easiest way to visualize and share your reality data is using Cesium Stories.
- In the Cesium ion Stories tab, click New Story.
- Under Assets, click the Add asset button and choose your asset.
- Click the zoom button (magnifying glass) to go to your asset in the scene. As you zoom in and out, you may notice changes in visual detail. This reflects LOD selection and is expected behavior for large or detailed reconstruction assets.
- Click Capture view to save the view.
- Click Share and give your story a name.
You can share your data in an interactive scene! Learn more about Stories with this tutorial.
Use your asset in a custom app
- When you click on an asset in My Assets, you’ll see a preview panel on the right side of the screen.
- The preview panel displays the asset ID, which you’ll need for loading this asset in CesiumJS or other engines.
- At the bottom of this panel, you’ll find a code snippet for loading this asset in CesiumJS.
- Click Open complete code example to see your asset in Sandcastle.
- When using Gaussian splats or newer LOD formats, ensure your target engine or client supports the selected output.
Your data fails to render
- Retile the asset to ensure it uses the latest Gaussian splat and LOD pipeline.
- Verify client or engine compatibility.
Placement looks wrong
- Re‑evaluate embedded GPS assumptions.
- Reprocess with GPS disabled if capture environment had poor positioning confidence.
Looks blurry up close
- This is likely a capture density or distance issue rather than a rendering problem.
- Adjust capture strategy: Reduce camera‑to‑subject distance, increase overlap, or add viewpoints.
- To learn how to upload your existing reality data, see the Tiling Photogrammetry Models or Tiling Point Clouds guides.
- See Analyze 3D Reality Models with Cesium ion to learn how to apply classification segmentation to your reality data.
- Follow this tutorial on how to use Cesium Stories to share your 3D reality data without writing code.
- Learn how to view a 3D Gaussian splat tileset with LODs in CesiumJS and in Cesium for Unreal.
- Peruse the Bentley Systems ContextCapture/iTwin Capture photo acquisition guide.
- Read this introduction to Gaussian splatting in iTwin Capture Modeler.
- Check out The New York Times R&D field guide to Gaussian splatting, a good resource for capture best practices as it relates to Gaussian splats.