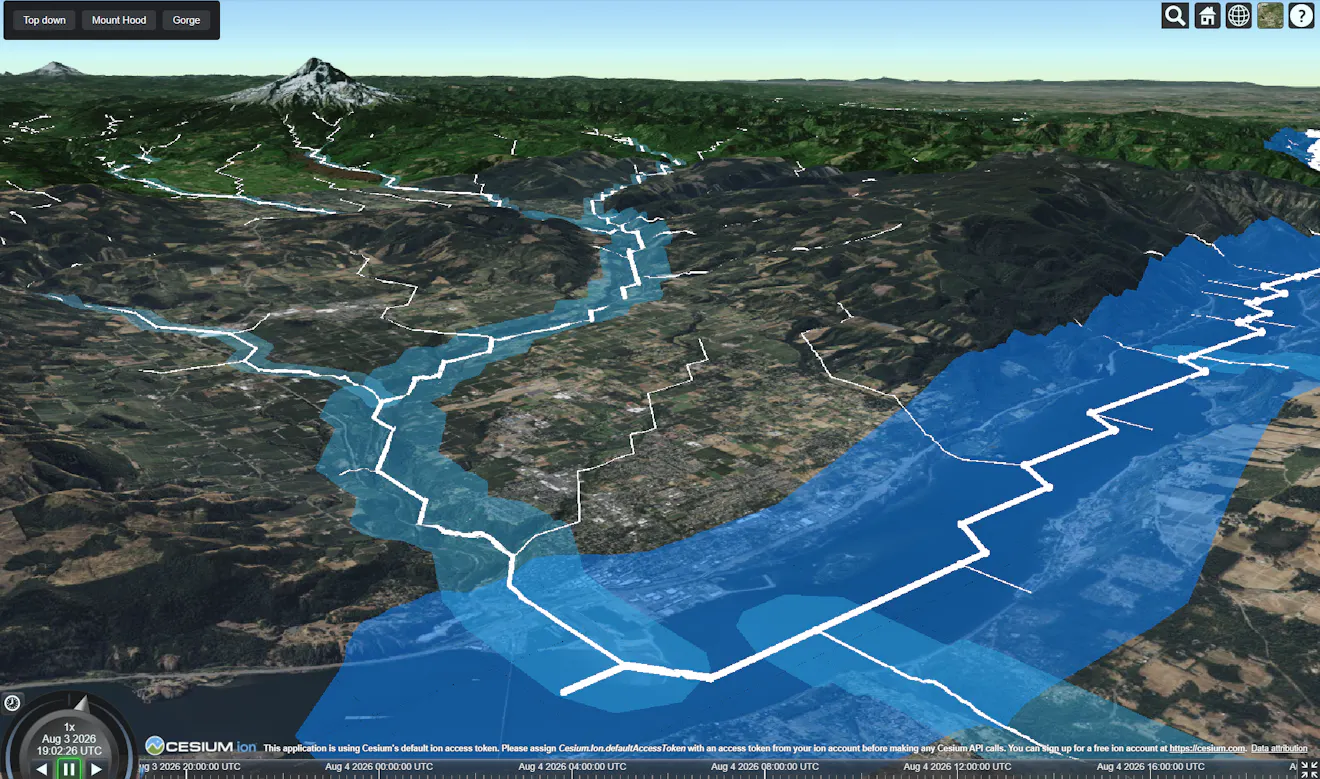
Many vector datasets, including roads, rivers, parcels, and administrative boundaries, are authored as two-dimensional geometry without elevation. When this data is added directly to a 3D scene, it may be rendered below terrain, intersect mountains, or appear disconnected from the surface it represents.
CesiumJS can drape vector polylines and polygons onto terrain, 3D Tiles, and models at render time. The source data remains unchanged, and no preprocessing or height calculation is required.
What you will learn
By the end of this tutorial, you will know how to:
- Drape vector polylines and polygons onto terrain.
- Drape vector data onto 3D Tiles and models.
- Select terrain, 3D content, or both as the receiving surface.
- Style features using their attributes and Cesium3DTileStyle.
- Filter features without modifying the source data.
Prerequisites
To follow this tutorial, you will need:
- CesiumJS 1.145 or later.
- A Cesium ion account and access token when using Cesium World Terrain or an ion-hosted asset. Create a free Cesium ion account if you do not already have one.
- A vector tileset. This tutorial’s Sandcastle example uses the HydroRIVERS dataset, available on Cesium ion as asset 5135960. You can substitute your own vector 3D Tiles asset or an MVT service loaded with MVTDataProvider.
- Familiarity with setting up a basic CesiumJS application. See the CesiumJS Quickstart guide if you have not created one before.
| Height reference | Behavior |
|---|---|
NONE | Uses the heights encoded in the source geometry. This is the default. |
CLAMP_TO_TERRAIN | Drapes the geometry onto terrain. |
CLAMP_TO_3D_TILE | Drapes the geoemtry onto 3D Tiles |
CLAMP_TO_GROUND | Drapes the geometry onto terrain, 3D Tiles, and models |
Begin by creating a CesiumJS viewer with terrain.
Cesium.Ion.defaultAccessToken = "your_ion_token";
const viewer = new Cesium.Viewer("cesiumContainer", {
  terrain: Cesium.Terrain.fromWorldTerrain(),
});
const scene = viewer.scene;
The following sections use this scene when creating both the vector layer and any 3D content that receives the draped geometry.
To drape a vector 3D Tiles asset onto terrain, set heightReference to CLAMP_TO_TERRAIN and pass the scene when creating the tileset.
const tileset = scene.primitives.add(
  await Cesium.Cesium3DTileset.fromIonAssetId(your_asset_id, {
    heightReference: Cesium.HeightReference.CLAMP_TO_TERRAIN,
    scene: scene,
  }),
);

await viewer.zoomTo(tileset);
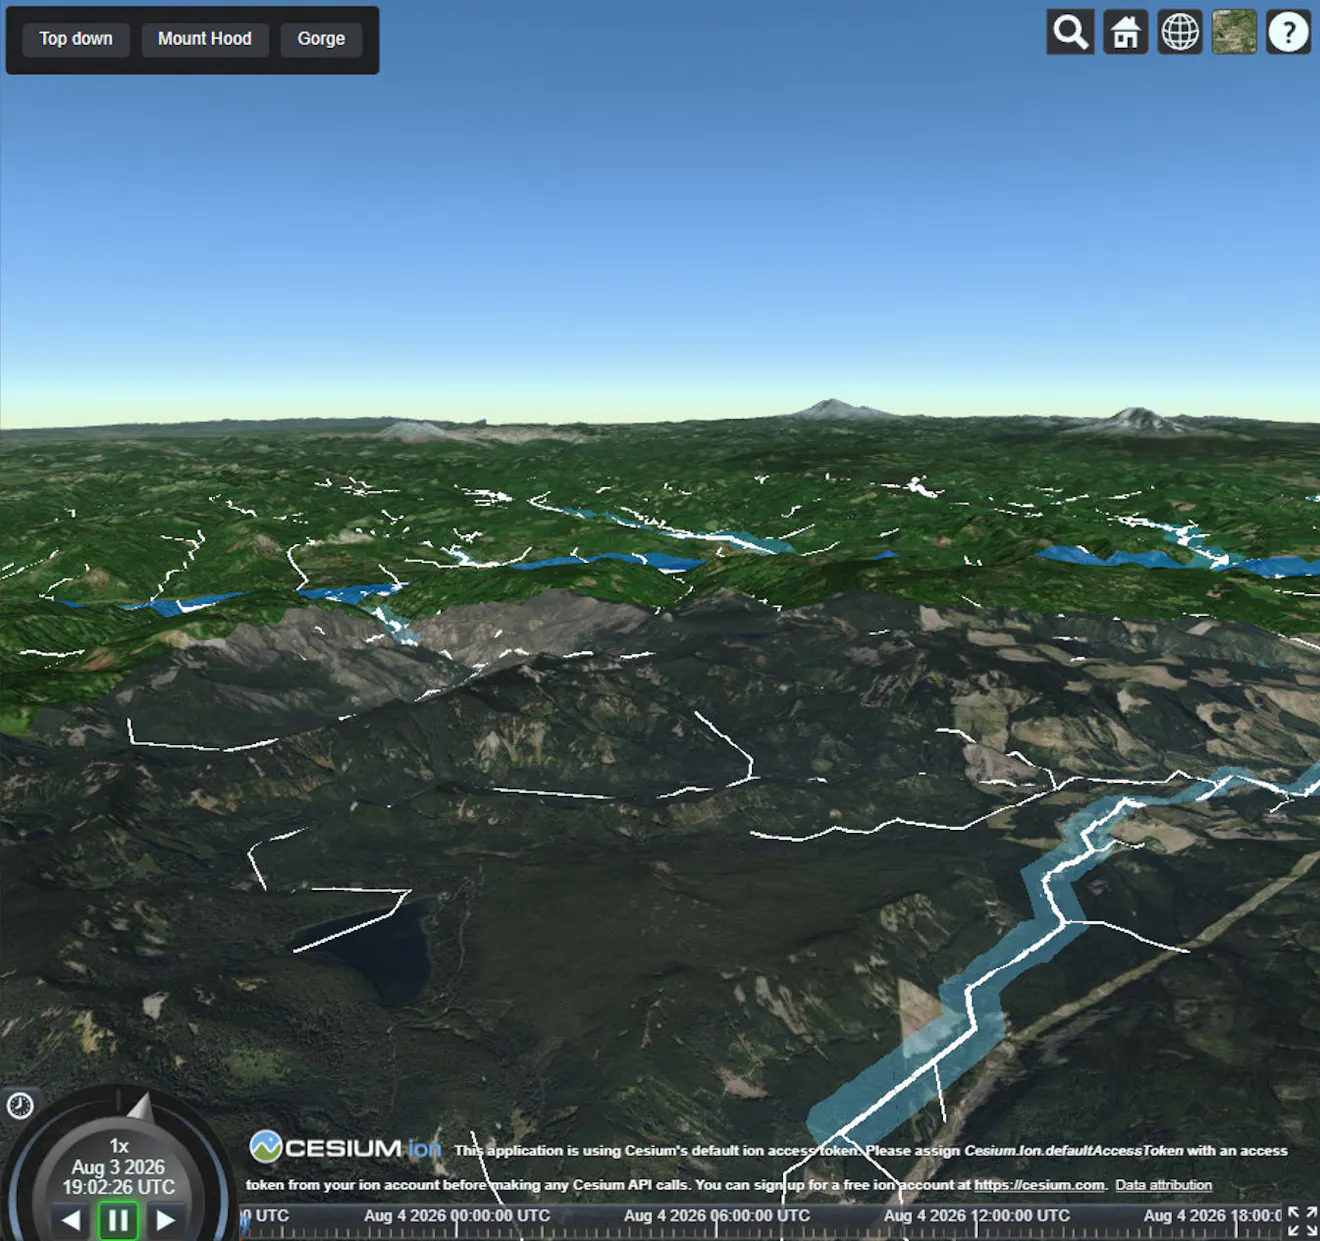
The vector geometry now follows the terrain surface as tiles load and refine. The source geometry remains vector-based, so lines and polygon boundaries retain their visual clarity as the camera moves closer.
MVTDataProvider accepts the same clamping options.
const provider = scene.primitives.add(
  await Cesium.MVTDataProvider.fromUrl(
"https://example.com/tiles/{z}/{x}/{y}.pbf",
    {
      maxZoom: 14,
      heightReference: Cesium.HeightReference.CLAMP_TO_TERRAIN,
      scene: scene,
    },
  ),
);

const tileset = provider.tileset;

await viewer.zoomTo(tileset);
The MVT source is transcoded into a Cesium3DTileset at runtime. Access it with provider.tileset to apply styles, subscribe to tile events, or read runtime statistics.
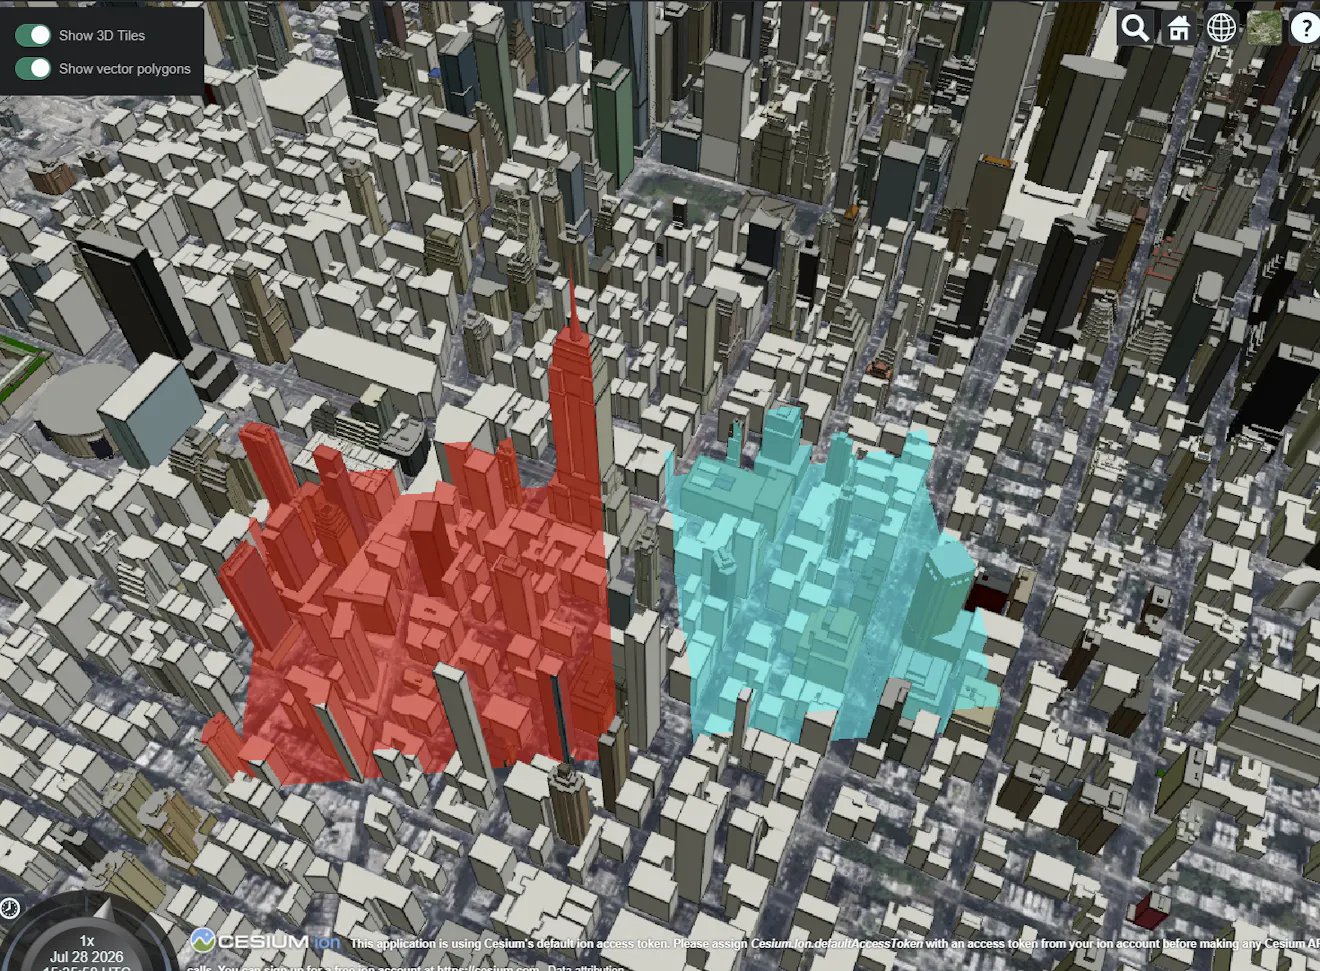
Terrain is not always the only relevant surface. For example, a site plan may need to follow building roofs, while a transportation layer may need to remain visible across both terrain and built structures.
Use CLAMP_TO_3D_TILE when the geometry should drape only onto 3D Tiles and models. Use CLAMP_TO_GROUND when it should drape onto both terrain and 3D content.
The following example loads Cesium OSM Buildings and drapes the vector layer onto both terrain and buildings:
const buildings = scene.primitives.add(
  await Cesium.createOsmBuildingsAsync({
    scene: scene,
  }),
);

const tileset = scene.primitives.add(
  await Cesium.Cesium3DTileset.fromIonAssetId(your_asset_id, {
    heightReference: Cesium.HeightReference.CLAMP_TO_GROUND,
    scene: scene,
  }),
);
The receiving 3D Tiles or model must also be associated with the same scene. If scene is not provided when the receiving content is created, its geometry will not participate in draping.
The clamping target is configured when the layer is created. To change the target later, remove the existing layer and create a new one with the desired heightReference option.
Choose the clamping mode according to the meaning of the data:
- Use
CLAMP_TO_TERRAINfor rivers, trails, property boundaries, and other features that belong to the terrain surface. - Use
CLAMP_TO_3D_TILEfor features that should appear on built structures or other 3D content. - Use
CLAMP_TO_GROUNDwhen features should follow whichever supported surface is visible. - Use
NONEwhen the source geometry already contains the intended height.
Draped features retain the attributes stored in the source data. Use Cesium3DTileStyle to control their appearance.
The following example styles roads according to their class property:
tileset.style = new Cesium.Cesium3DTileStyle({
  color: {
    conditions: [
      ["${class} === 'motorway'", "color('#ff6b35')"],
      ["${class} === 'primary'", "color('#f7c59f')"],
      ["true", "color('#cccccc', 0.6)"],
    ],
  },
  lineWidth: "${class} === 'motorway' ? 4.0 : 2.0",
});
Property names are preserved from the source data and are case-sensitive. Expressions such as ${class}, ${NAME}, and ${population} refer directly to attributes with those exact names.
| Geometry type | Supported style properties |
|---|---|
| Points | color, show, pointSize, pointOutlineWidth, pointOutlineColor |
| Lines | color, show, lineWidth |
| Polygons | color, show |
For line features, lineWidth is measured in screen pixels. The displayed width therefore remains visually consistent as the camera zooms in or out. It represents a screen-space width rather than a physical width in meters.
Use the show style property to control feature visibility according to attribute values.
tileset.style = new Cesium.Cesium3DTileStyle({
  show: "${state} === 'CO' && ${length} > 50",
  color: "color('#ffd60a')",
  lineWidth: "3.0",
});
This expression displays only features whose state property is CO and whose length property is greater than 50.
The expression is evaluated in the browser on loaded features. Updating the filter does not require changing the source data, rebuilding the tileset, or sending a new filtering request to the server.
However, styling with show does not reduce the number of tiles downloaded. Features are filtered after their tiles have been loaded.
To update the filter at runtime, assign a new style:
tileset.style = new Cesium.Cesium3DTileStyle({
  show: "${state} === 'UT'",
  color: "color('#2ec4b6')",
  lineWidth: "3.0",
});
The existing tiles do not need to be fetched again.
{
  heightReference: Cesium.HeightReference.CLAMP_TO_TERRAIN,
  scene: viewer.scene,
}
Providing only one of these options is not sufficient.
const buildings = await Cesium.createOsmBuildingsAsync({
  scene: viewer.scene,
});
scene.primitives.remove(tileset);

const updatedTileset = scene.primitives.add(
  await Cesium.Cesium3DTileset.fromIonAssetId(your_asset_id, {
    heightReference: Cesium.HeightReference.CLAMP_TO_GROUND,
    scene: scene,
  }),
);
Lines shimmer or separate near tile boundaries
Requesting higher-detail tiles may improve the result. Reduce the vector tileset’s maximumScreenSpaceError so that it refines earlier.
tileset.maximumScreenSpaceError = 8; If the artifacts remain, please report them on GitHub. Include your browser and GPU, a screenshot, and the style you applied. Artifacts at tile boundaries are usually something we need to fix in the renderer rather than something to work around in your data.
All features use the same style
Verify that the property names in the style expressions match the attributes in the source data exactly.
You can pick a feature and inspect its property IDs:
const picked = viewer.scene.pick(position);

if (
  Cesium.defined(picked) &&
  typeof picked.getPropertyIds === "function"
) {
  console.log(picked.getPropertyIds());
}
Use the returned property names exactly as they appear, including capitalization.
Next steps
Run the example in Sandcastle and replace the sample asset or tile URL with your own vector dataset. Test the available heightReference values to determine which receiving surface best matches the meaning of your data, then add attribute-based styling and filtering for your application.
Share compatibility, rendering, performance, and API feedback on the Cesium Community Forum.