Build a Philadelphia Landmark Tour with CesiumJS Using AI
In this tutorial, you'll use an AI coding agent to build a 3D landmark flyover tour of Philadelphia landmarks powered by CesiumJS, Google Photorealistic 3D Tiles, React, and TypeScript. Instead of writing code by hand, you'll guide your agent with natural language prompts and iterate on the results.
By the end, you'll have:
- A full-screen CesiumJS viewer with a 3D model of Philadelphia
- A UI overlay that displays landmark info and navigation controls
- Smooth camera flights between six Philadelphia landmarks
- An AI coding agent (see the tutorial to Build a CesiumJS App with AI for setup instructions)
- Node.js (v22 or later)
- A Cesium ion account with an access token
- Access to Google Photorealistic 3D Tiles via Cesium ion
- (Optional) A Vercel account to deploy your application
Start by asking your agent to create the project structure. Open an empty folder in your editor and send this prompt:
Prompt:
Create a new Vite + React + TypeScript project for a CesiumJS 3D globe app.
Use vite-plugin-cesium to handle Cesium's static asset configuration.
Initialize package.json, tsconfig, vite.config.ts, and install dependencies.
Your agent should:
- Run npm
create vite@latestwith thereact-tstemplate - Install
cesiumandvite-plugin-cesium - Configure
vite.config.tsto include the Cesium plugin
What's happening: vite-plugin-cesium automatically handles CESIUM_BASE_URL and copies Cesium's static assets (workers, assets, third-party, widgets) to your build output—no manual Webpack/Rollup configuration needed.
Install CesiumJS Agent Skills
The cesiumjs-skills repository provides curated domain skills covering the CesiumJS API. Installing these gives your AI agent accurate, up-to-date knowledge of CesiumJS patterns and best practices, so it writes better code.
Claude Code
One-liner from the terminal (recommended):
claude plugin marketplace add CesiumGS/cesiumjs-skills
Or interactively inside Claude Code:
- Type
/pluginand press Enter. - Select Add Marketplace → enter
CesiumGS/cesiumjs-skills. - Type
/pluginagain → Install Plugin → choosecesiumjs-skills. - Run
/reload-pluginsto activate.
All other code harnesses
These skills follow the open Agent Skills standard. Install them in your project root with:
npx skills add cesiumgs/cesiumjs-skills --all
Ask the agent to replace the default globe with Google Photorealistic 3D Tiles:
Prompt:
Remove the globe and default tileset and add Google Photorealistic 3D Tiles.
Create an .env file for me to add my ion access token.
Make sure your .env file is added to .gitignore.
Your agent should have created a .env file with a placeholder. Open it and paste your Cesium ion access token. The file should look like:
VITE_CESIUM_ION_ACCESS_TOKEN=eyJhbGci...your_real_token...
Note: Vite exposes environment variables prefixed with VITE_ to client code via import.meta.env. Never commit real tokens to version control.
Ask the agent to start the dev server.
Prompt:
Start the dev server.
Open http://localhost:5173 in your browser. You should see the globe rendered with Google Photorealistic 3D Tiles. If you see a white screen, check the browser console—this is a good moment to practice debugging with your agent.
Now for the main feature. Send a detailed prompt describing what you want:
Prompt:
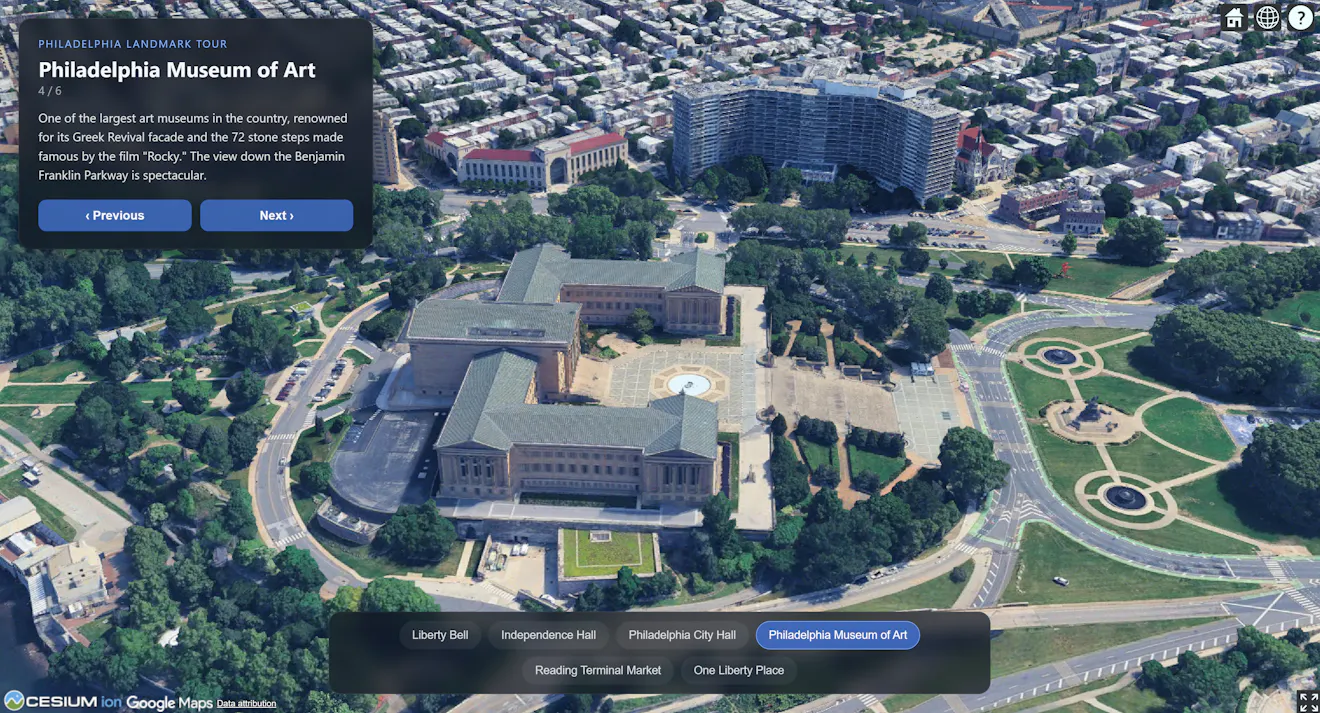
Now add an interface that shows a location tour of landmarks around Philadelphia.
It should have UI overlaid on the CesiumJS viewer that allows the user to navigate between landmarks and to learn about the currently selected location.
Make sure the camera looks at the currently selected location and is not positioned directly above it.
Disable the viewer's default geocoding and tile selection UI.
In order to publish your application to the web for anyone to access, we recommend a service like Vercel. To deploy the app we just built run the following in your terminal from your project’s root directory:
npm install -g vercel
vercel login
vercel
You can also follow Vercel’s Getting Started Guide to install agent plugins and skills to more easily allow you to instruct your agent to perform this deployment step.
Once the base app is working, you can keep iterating with prompts:
Add more landmarks:
Add the Reading Terminal Market and the Schuylkill River Trail to the tour.
Change the UI style:
Make the info panel have a glassmorphism effect with a blur backdrop.
Add keyboard navigation:
Let me press the left and right arrow keys to move between landmarks.
Auto-advance:
Add an auto-play mode that moves to the next landmark every 8 seconds.
- Try the AI Quickstart Tutorial if you haven't set up your agent yet.
- Follow the guide to Build a Flight Simulator with CesiumJS Using AI.
- Explore CesiumJS documentation for more 3D capabilities.
- Try loading your own 3D Tiles from Cesium ion.