Hide Regions of 3D Tiles or Terrain with Clipping Polygons
ClippingPolygons are used to selectively hide regions of either 3D tilesets or terrain. This feature is useful when isolating areas of interest in a global dataset, adding overlapping tilesets such as a design model inset into an existing dataset, and more.
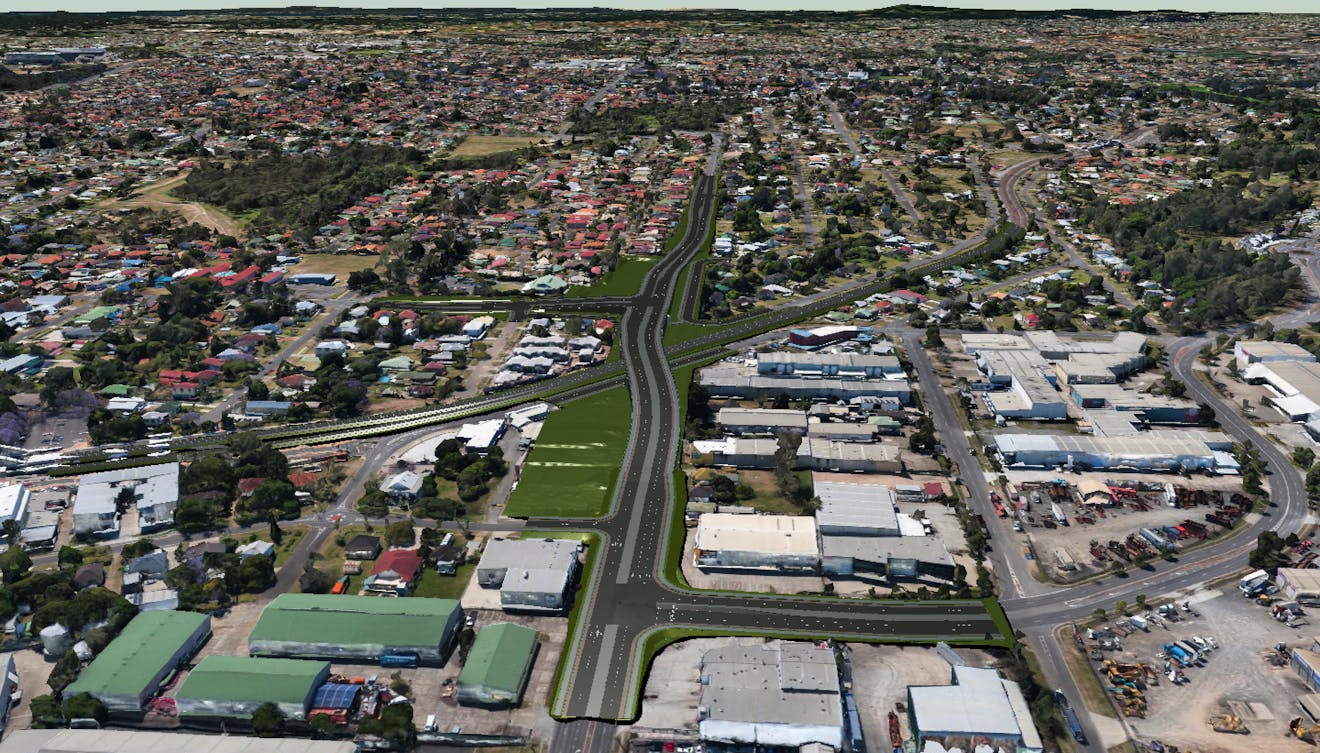
In this tutorial, we’ll inset a proposed roadway design model into Google 3D Photorealistic 3D Tiles to give the user additional geospatial context important for the project.
You’ll learn how to:
- Inset a design model into Google Photorealistic 3D Tiles
- Isolate an area using inverse clipping regions
- A basic CesiumJS app. See the CesiumJS Quickstart tutorial to get a CesiumJS app up and running. Ensure your app is targeting CesiumJS 1.117 or later.
- A Cesium ion account and token.
Start by setting up a Cesium Viewer and adding the Google Photorealistic 3D Tiles dataset from Cesium ion.
For a more detailed tutorial, see Photorealistic 3D Tiles from Google Maps Platform in CesiumJS.
const viewer = new Cesium.Viewer("cesiumContainer", {
  timeline: false,
  animation: false,
  sceneModePicker: false,
  baseLayerPicker: false,
  globe: false,
});

// Set the optimal lighting for the area of interest
viewer.scene.skyAtmosphere.show = true;
const currentTime = Cesium.JulianDate.fromIso8601(
  "2020-01-09T23:00:39.018261982600961346Z"
);
viewer.clock.currentTime = currentTime;

// Add Photorealistic 3D Tiles
let globalTileset;
try {
  globalTileset = await Cesium.createGooglePhotorealistic3DTileset();
  viewer.scene.primitives.add(globalTileset);
} catch (error) {
  console.log(`Error loading Photorealistic 3D Tiles tileset. ${error}`);
}
Next, we'll define the area of the Photorealistic 3D tileset to clip out so we can replace it with our design model. To do so we’ll need a list of positions, which we'll get from a GeoJSON file hosted on Cesium ion that is populated with the polygon positions.
Often external apps will define a footprint or outline. Here, we’ll use a hosted GeoJSON file to load a list of positions for convenience. But you can also use additional data sources, such as KML or CZML, or manually define a list of positions as described later in Step 3.
We’ll also take advantage of the polygon defined by these positions to set the camera to point to the relevant location.
Add the following lines:
// Load a GeoJSON file with positions defining the project footprint
let footprint;
try {
  const resource = await Cesium.IonResource.fromAssetId(2533131);
  const dataSource = await Cesium.GeoJsonDataSource.load(resource, {
    clampToGround: true,
  });

  viewer.dataSources.add(dataSource);

  footprint = dataSource.entities.values.find((entity) =>
    Cesium.defined(entity.polygon)
  );
  footprint.polygon.outline = false;

  // Zoom to data location, and set the home view
  const cameraOffset = new Cesium.HeadingPitchRange(
    Cesium.Math.toRadians(95.0),
    Cesium.Math.toRadians(-18.0),
    600.0
  );
  viewer.zoomTo(footprint, cameraOffset);
  viewer.homeButton.viewModel.command.beforeExecute.addEventListener((e) => {
    e.cancel = true;
    viewer.zoomTo(footprint, cameraOffset);
  });
} catch (error) {
  console.log(`Error loading geojson. ${error}`);
}
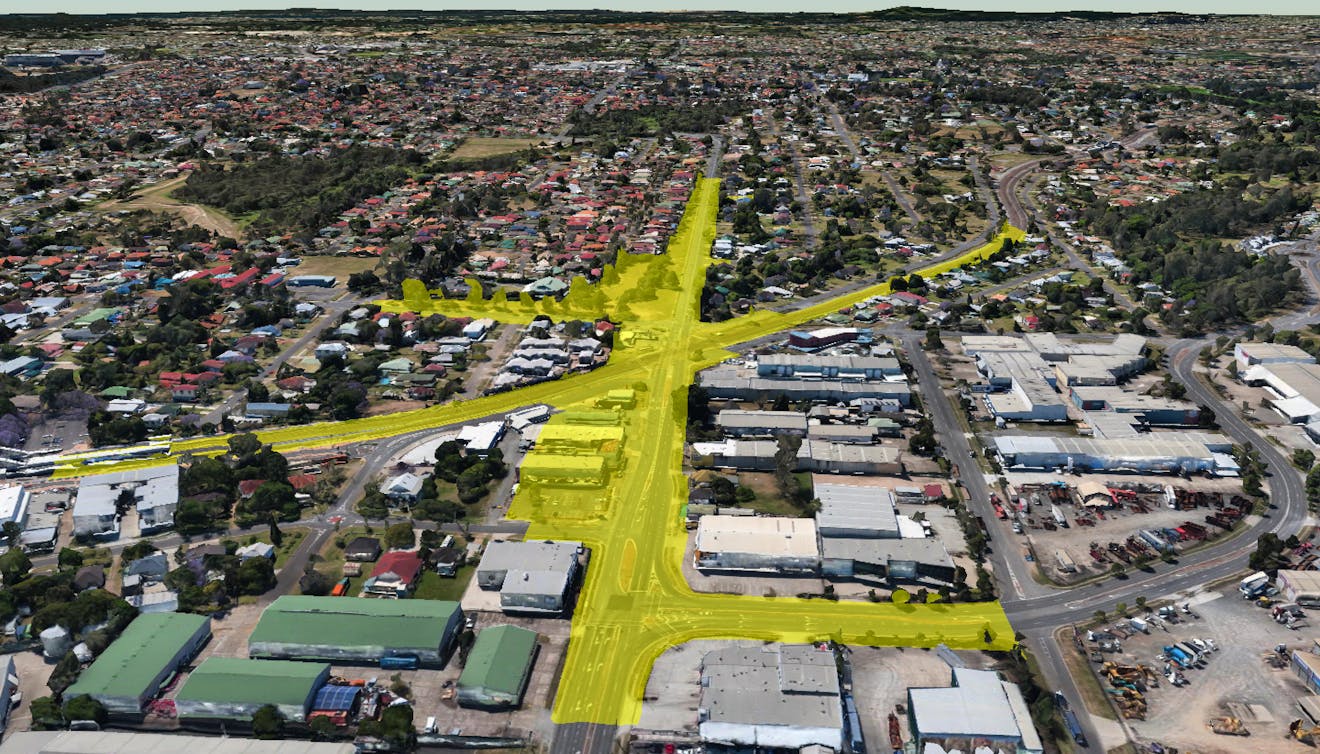
Now that we can confirm our positions, let’s extract the positions and use them to define the ClippingPolygon.
Add the following lines:
// Hide footprint
footprint.show = false;

// Add clipping polygons based on the loaded footprint polygon
const positions = footprint.polygon.hierarchy.getValue().positions;
const clippingPolygons = new Cesium.ClippingPolygonCollection({
  polygons: [
    new Cesium.ClippingPolygon({
      positions: positions,
    }),
  ],
});

// Add the clipping polygon collection to the global tileset
globalTileset.clippingPolygons = clippingPolygons;

ClippingPolygons can also be created directly from a list of world space positions. For example:
new Cesium.ClippingPolygon({
      positions: Cesium.Cartesian3.fromDegreesArray(
      [
        -105.0077102972673, 39.75198671798765,
        -105.0095858062031, 39.75049417970743,
        -105.00969000114443, 39.75035082687128,
        -105.00972838875393, 39.75013579705808,
        -105.00971742086537, 39.74997136204101,
        -105.00962967775735, 39.749768979944236,
        -105.00932806082336, 39.74928832007956,
     ]),
}),
Lastly, we’ll inset a 3D tileset of the final design model, filling the area we cut out in the last step, by loading it from Cesium ion.
// Add tileset of proposed new road
let buildingTileset;
try {
  buildingTileset = await Cesium.Cesium3DTileset.fromIonAssetId(
    2533124
  );
  viewer.scene.primitives.add(buildingTileset);
} catch (error) {
  console.log(`Error loading building tileset.
  ${error}`);
}
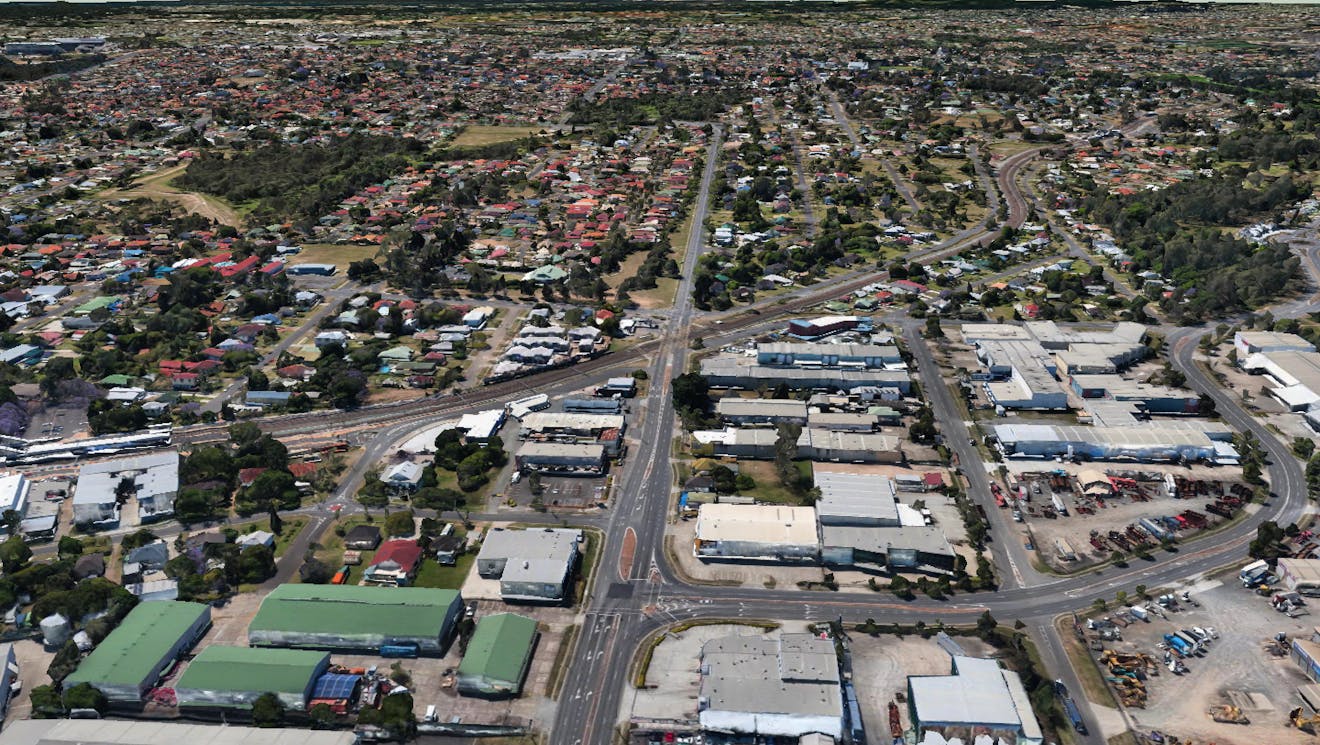
Sometimes, it’s valuable to isolate a single area at runtime. For instance, to show just the area in the design footprint, we can invert the clipping region.
Add the following lines:
// Hide the design tileset
buildingTileset.show = false;

// Invert the clipping region
clippingPolygons.inverse = true;
Next steps
The complete Sandcastle example is available, including options for each of the above steps.
Additionally, see the Clipping Region Sandcastle example for how to dynamically add or remove ClippingPolygons, and how to apply them to terrain datasets.
Need help, or have questions about clipping? Visit the community forum.
What are you creating with CesiumJS? Share your work with us by tagging Cesium on LinkedIn.