Navigate a BIM/CAD model tree
In this tutorial, you build a tree panel that lists the subjects, models, categories, and elements of a BIM/CAD model. Each level loads when you expand it, and clicking an element in the 3D view opens the tree down to that element. .
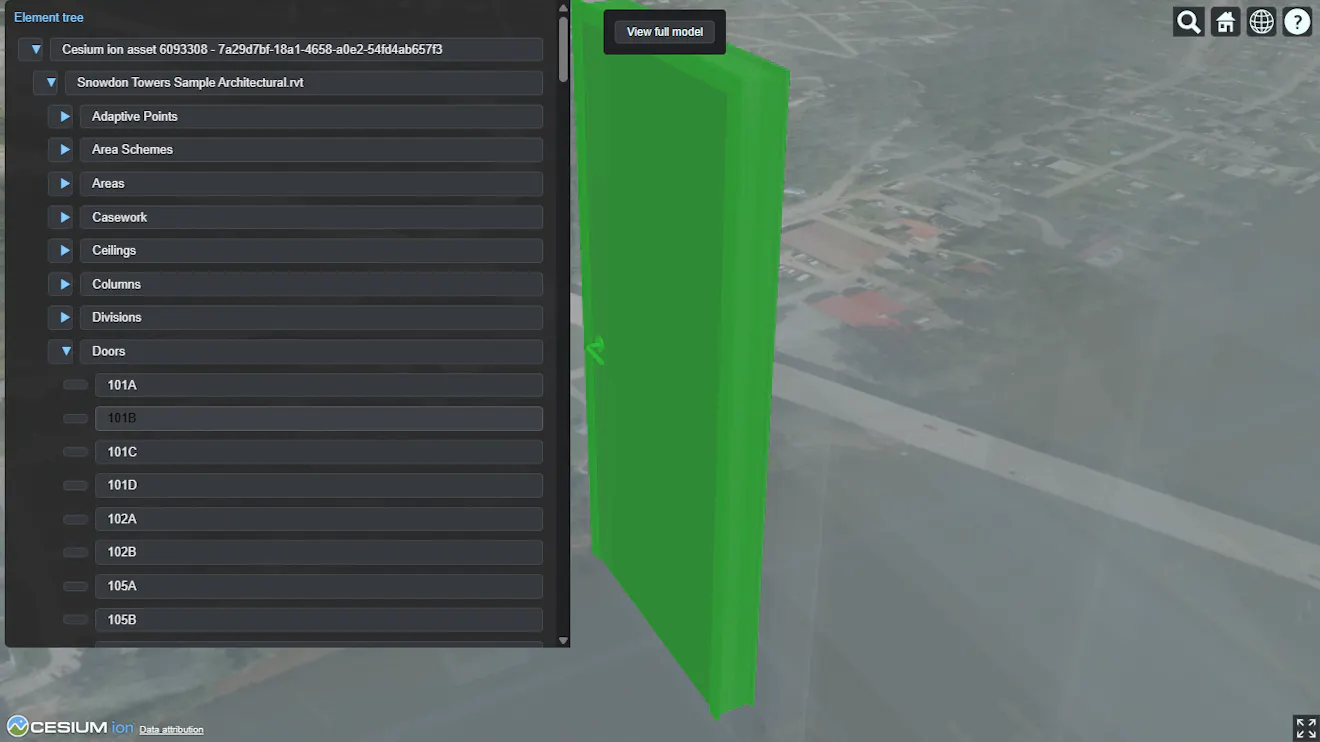
The tree panel open to the Doors category of the architectural file, with door 101B selected and highlighted green in the 3D view.
- A 3D Tiles asset backed by a BIM/CAD Database model. This includes models tiled with the BIM/CAD Tiler with Database or added from Bentley Infrastructure Cloud (BIC).
- Familiarity with creating an
IonAssetElementService, picking elements, and callinggetElement. Working with the Asset Elements API covers all three.
The tree follows the model structure of the BIM/CAD Database. Each node has a kind:
subject: the root of the tree. Subjects can contain other subjects. In the sample asset, which combines four Revit files, the root subject has one subject per file, such asSnowdon Towers Sample Architectural.rvt.model: a model inside a subject. Some assets list categories directly under a subject instead, as the sample asset does.category: a group of elements, such asDoorsorWalls.element: a single object from the source file, such as a wall, beam, or door.
Element nodes can also have children. For example, a dining table element can contain its chairs. Use hasChildren to decide whether a node can expand.
Every node has these fields:
{
  key: "eyJrZXki...", // opaque, pass it back to get this node's children
  label: "Doors",
  hasChildren: true,
  id: "3298534883626",
  kind: "category",
}
The id is a decimal string, the same form that getElementId returns for a picked feature. Only element nodes have a location in the scene, so they are the only nodes you can fly to.
Create the service for your asset, then call getElementTreeChildren with no arguments. It returns the nodes at the top of the tree.
const elementService = Cesium.IonAssetElementService.fromAssetId(ASSET_ID);// Seed the tree with the root nodes (getElementTreeChildren with no key).
const { nodes: rootNodes } = await elementService.getElementTreeChildren();
for (const node of rootNodes) {
treeRoot.appendChild(createNodeElement(node));
} createNodeElement builds one row of the tree panel and wires its click handlers. Each row is two buttons, a toggle and a label, so you can Tab to each row and press Enter or Space. The Sandcastle has the full widget code.
To list a node’s children, pass its key as nodeKey. The key is opaque, so pass it back exactly as you received it.
A large model can have thousands of elements, so load each level only when the user expands it. In the Sandcastle, each row has an expandNode function. It requests the children once, adds a row for each child, and keeps them in loadedChildren, so expanding the node again does not call the API. While the request runs, loading holds it, so a reveal that expands the same node reuses the request instead of sending another:
async function expandNode() {
  if (!node.hasChildren) {
    return [];
  }
  expanded = true;
  li.classList.add("expanded");
  toggle.setAttribute("aria-expanded", "true");
  toggle.setAttribute("aria-label", `Collapse ${labelText}`);
  toggle.textContent = "▼";

  if (!loaded) {
    toggle.textContent = "…";
    // Pass the opaque node key as nodeKey to fetch this node's children.
    if (!loading) {
      loading = (async () => {
        const response = await elementService.getElementTreeChildren({
          nodeKey: node.key,
        });
        const children = response?.nodes ?? [];
        loadedChildren = children;
        for (const child of children) {
          childList.appendChild(createNodeElement(child));
        }
        loaded = true;
        return children;
      })();
    }
    try {
      return await loading;
    } finally {
      loading = undefined;
      toggle.textContent = expanded ? "▼" : "▶";
    }
  }
  return loadedChildren;
}
The toggle shows “…” while the request runs, and its aria-expanded and aria-label attributes tell screen readers whether the node is open. expandNode returns the children, which the next section uses to walk down the tree.
When the user clicks an element in the scene, you know its id but not where it sits in the tree. getElementTreeParents answers that. It returns the path from the root down to the element, as kind and id pairs:
// getElementTreeParents("3298534891539")
{
  path: [
    { kind: "subject", id: "1" },
    { kind: "subject", id: "3298534883340" },
    { kind: "category", id: "3298534883626" },
    { kind: "element", id: "3298534891539" },
  ],
}
This is the path for door 101A in the architectural file. The last entry is the element itself. If no path exists, the promise rejects.
To reveal the element, walk the path from the root. At each step, find the loaded node with the same kind and id, then expand it to load the next level:
// Find a tree node by its kind and ID, which together identify a path entry.
function findPathNode(nodes, pathEntry) {
  return nodes.find(
    (node) =>
      node.kind === pathEntry.kind && String(node.id) === String(pathEntry.id),
  );
}

// Expand ancestors from the parent endpoint's root-first path and reveal the
// matching element row in the tree panel.
async function revealElementInTree(elementId, selection) {
  const result = await elementService.getElementTreeParents(elementId);
  if (
    selection !== activeSelection ||
    !Cesium.defined(result) ||
    result.path.length === 0
  ) {
    return;
  }

  let nodes = rootNodes;
  let treeNode;
  for (let i = 0; i < result.path.length; i++) {
    const pathEntry = result.path[i];
    const node = findPathNode(nodes, pathEntry);
    if (!node) {
      return;
    }

    treeNode = treeNodesByKey.get(node.key);
    if (!treeNode) {
      return;
    }
    if (i < result.path.length - 1) {
      nodes = await treeNode.expand();
      if (selection !== activeSelection) {
        return;
      }
    }
  }

  selectTreeLabel(treeNode.label);
  treeNode.label.scrollIntoView({ block: "nearest" });
}
activeSelection counts clicks. Each await checks it, so a slow response from an earlier click never overrides a newer one. treeNodesByKey maps each node key to its row, and each row’s expand is its expandNode function.
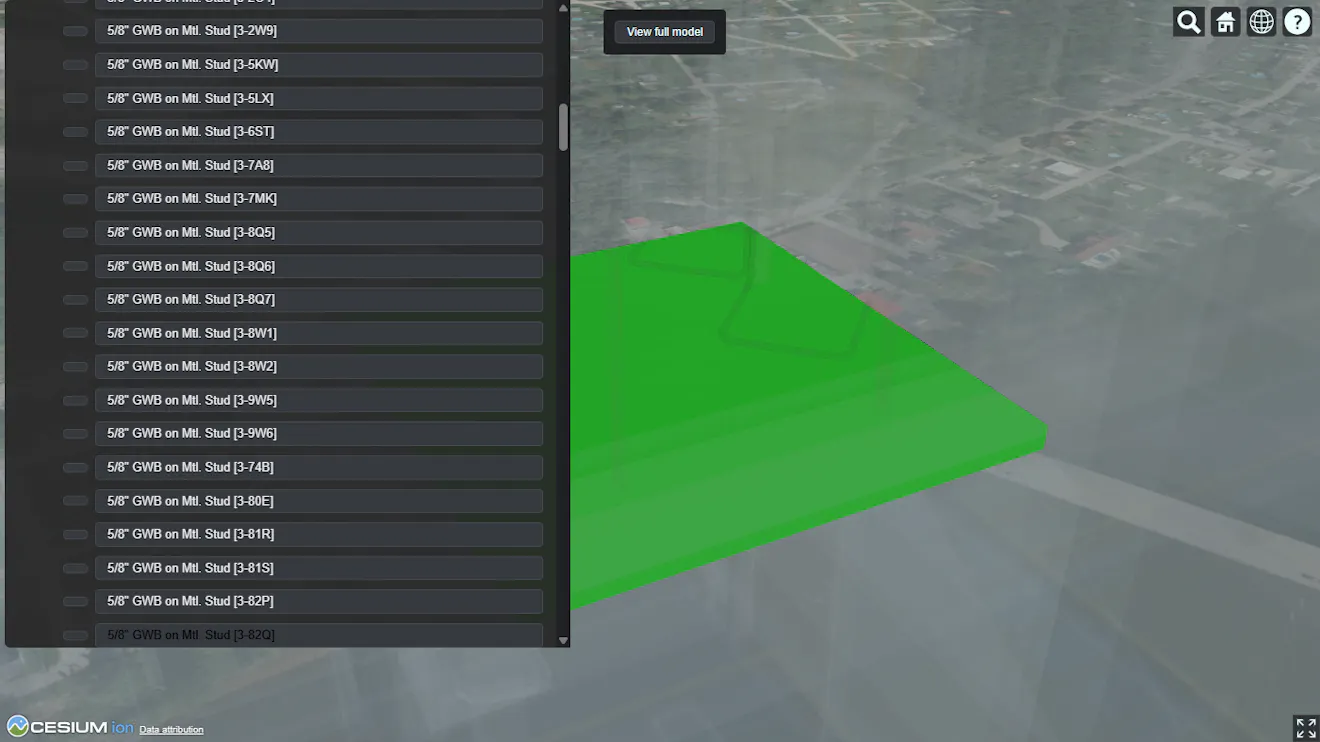
An element clicked in the 3D view and highlighted green, with the tree expanded and scrolled so its row shows at the bottom of the panel.
The click handler reads the element id from the picked feature. It then highlights the element and reveals it in the tree at the same time:
const clickHandler = new Cesium.ScreenSpaceEventHandler(viewer.scene.canvas);
clickHandler.setInputAction(async function (movement) {
  const feature = viewer.scene.pick(movement.position);
  const elementId = Cesium.IonAssetElementService.getElementId(feature);
  if (!Cesium.defined(elementId)) {
    clearSelection();
    return;
  }

  try {
    const selection = ++activeSelection;
    // Fetch element details for camera framing and its tree path in parallel.
    await Promise.all([
      selectElement(elementId, selection),
      revealElementInTree(elementId, selection),
    ]);
  } catch (error) {
    console.error(error);
  }
}, Cesium.ScreenSpaceEventType.LEFT_CLICK);
selectElement stores the id in selectedElementId and calls tileset.makeStyleDirty(). The style’s color function, evaluateElementColor, compares each feature’s element id with the selected one. Both are decimal strings, so === works:
const id = Cesium.IonAssetElementService.getElementId(feature);
return id === selectedElementId
  ? Cesium.Color.clone(Cesium.Color.LIME, result)
  : Cesium.Color.clone(Cesium.Color.WHITE.withAlpha(0.05), result);
selectElement then calls getElement and getBoundingSphere to fly the camera to the element. Working with the Asset Elements API explains both calls. Clicking an element row in the tree calls the same selectElement function.
When the camera starts flying to an element, the Sandcastle shows a View full model button. It clears the selection, collapses the tree, and zooms back out to the whole model.
A single level returns at most 1000 children. If a node has more, getElementTreeChildren rejects with a 400 error (“Hierarchy level has more than 1000 nodes”), and there is no paging. In the sample asset, the Walls category of the architectural file is over the limit, so it does not expand, and a wall you click in the 3D view is highlighted but not revealed in the tree. The Sandcastle does not handle this error. In your own app, catch the rejection and close the node or show a message.
Check the response body in error.response, not just error.statusCode. A malformed nodeKey also returns 400, the same status as a level with more than 1000 children.
Only element nodes have a location. Selecting a subject, model, or category row marks the row as selected, but does not change the 3D highlight or move the camera.
IonAssetElementService, including its tree methods, is experimental and may change without the standard deprecation period.
- Open the complete example in Sandcastle.
- Inspect element properties and run filtered queries in Working with the Asset Elements API.
- Total numeric properties across a filtered set of elements in Aggregate BIM/CAD element properties.