Using the BIM/CAD Tiler with Database
Cesium ion allows you to tile BIM/CAD models used in the architecture, engineering, and construction (AEC) industry, like Industry Foundation Classes (IFC), to visualize them in a geospatial context and share them on the web.
The BIM/CAD Tiler with Database is currently in Technology Preview. APIs for working with this tiler and the data it produces might change prior to General Availability.
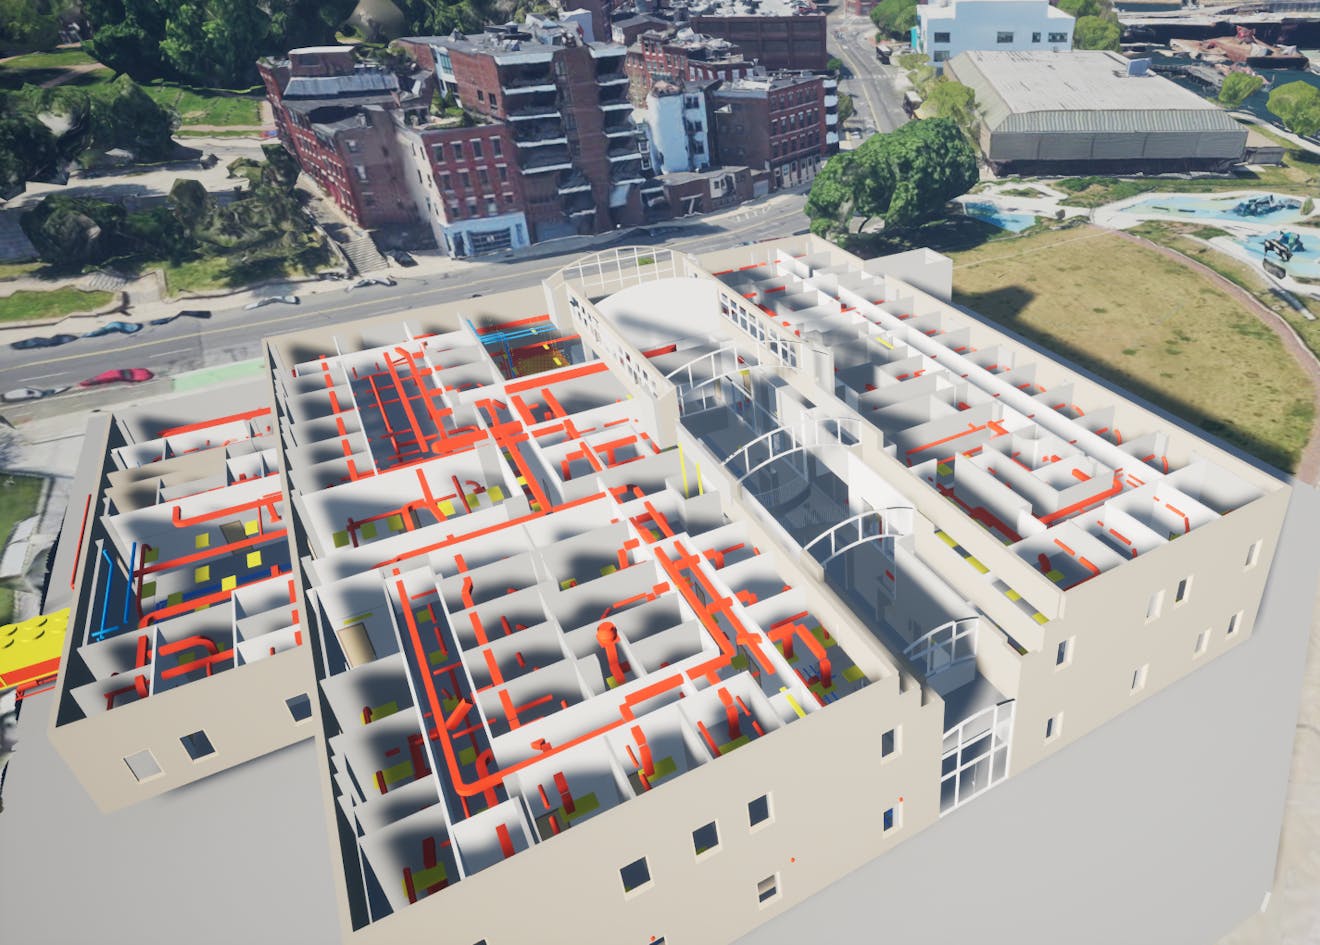
IFC model as 3D Tiles visualized in Boston, Massachusetts, USA, on top of Google Photorealistic 3D Tiles within Cesium for Unreal. Source data: BSI (2020) "Medical-Dental Test Files," buildingSMART International.
You need a Cesium ion account to take this tutorial.
Cesium ion is an open platform for tiling and hosting. It will serve you BIM/CAD models as 3D Tiles to any compatible client, like CesiumJS.
| Format | File Extension |
|---|---|
| Revit | .rvt |
| Industry Foundation Classes | .ifc |
| MicroStation Design | .dgn |
| AutoCAD Drawing | .dwg |
| Drawing Exchange Format | .dxf |
Cesium ion tiles your model into 3D Tiles when you upload it.
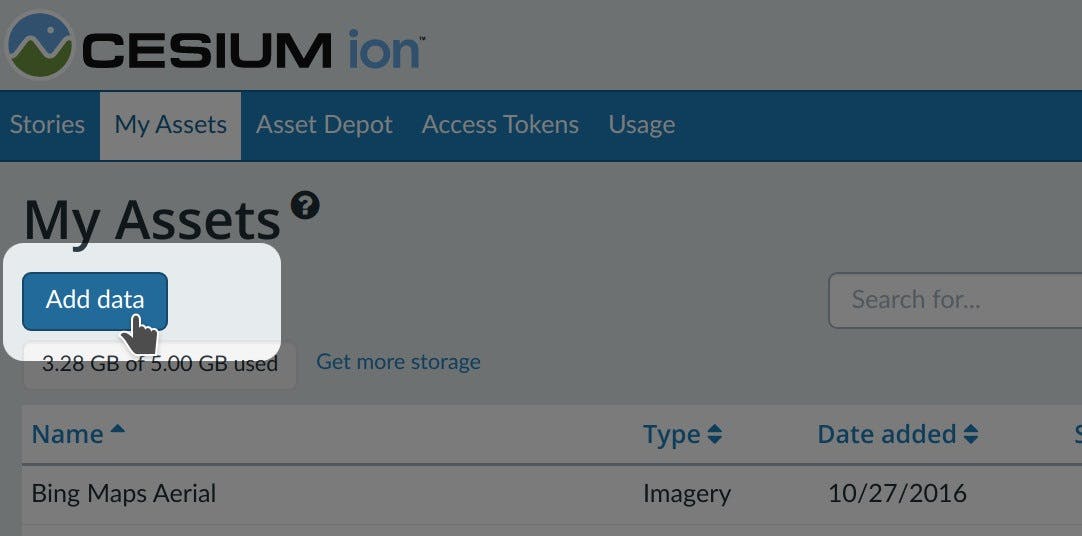
- On the My Assets tab of Cesium ion, press Add Data to upload your model, or you can simply drag and drop your files into the Cesium window.¹
- Select BIM/CAD (3D Tiles + Database).
¹All files in a single upload must be the same format. Uploading files of mixed formats is not supported.
For additional per-format details, see the BIM/CAD Model Formats FAQ.
BIM/CAD Tiler with Database requires your file to be georeferenced in a known projected coordinate system. Files without location data cannot be placed on the globe.
- Automatic detection. Some formats embed CRS information that the tiler uses to locate your model automatically. This is not guaranteed. File setup varies, and applications do not always write CRS data consistently, so automatic detection may fail even when CRS information is present.
- Manual CRS input. You can specify the horizontal and vertical CRS for your data manually. This overrides automatic detection.
- Horizontal CRS. You can search for a Horizontal CRS by CRS code, EPSG code, or CRS description.

- Vertical CRS/Height Reference. Choose the Height Reference that matches the height datum used by your BIM/CAD model. If your model appears underground or in the sky, this may be due to using the wrong Height Reference
Cesium Stories
The easiest way to visualize and share your asset is with Cesium Stories.
- In the Stories tab, click New story.
- Under Assets, click the Add asset button and choose your asset.
- Click on the zoom button (magnifying glass) to go to your asset in the scene. Adjust the view to your liking.
- Click on Capture view to save the view.
- Click Share and give your story a name.
You can now share your data in an interactive scene! Learn more about Stories with this tutorial.
Use your asset in a custom app
When you click on an asset in My Assets in Cesium ion, you’ll see a preview panel on the right side of the screen.
- The preview panel displays the asset ID, which you’ll need for loading this asset in CesiumJS or other engines.
- You’ll find a code snippet for loading this asset in CesiumJS at the bottom of this panel.
- Click Open complete code example to see your asset in Sandcastle.
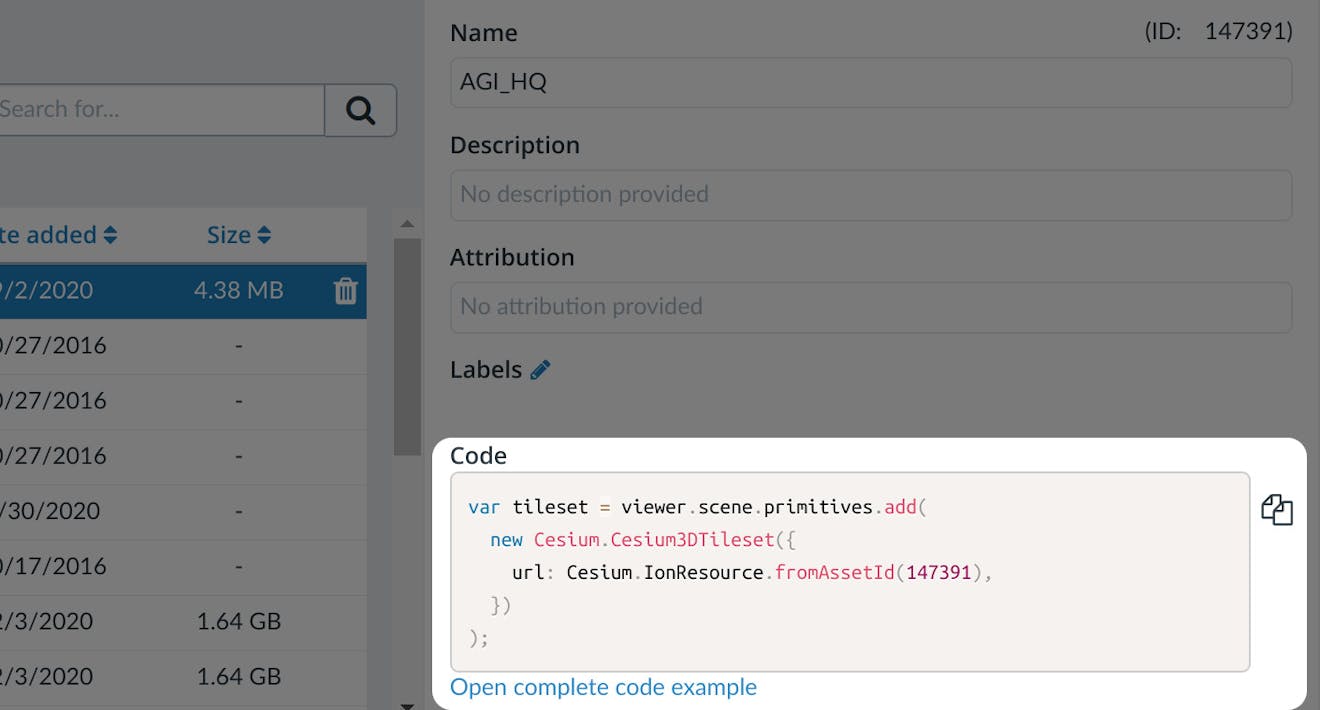
You’ll find a code example for adding this asset to your CesiumJS app at the bottom of the asset preview window.
Learn how to set up a CesiumJS app with the quickstart guide.
Learn how to filter or query element properties in your application.
Use your asset in a rendering engine
You can create realistic visualizations and share your assets in rendering engines such as Unreal Engine, Unity, and NVIDIA Omniverse.
- Launch your rendering engine.
- Using the appropriate Cesium ion plugin or extension, connect to your Cesium ion account.
- Add the selected asset to your scene; follow these guides:
- Adding Datasets with Cesium for Unity
- Adding Datasets with Cesium for Unreal
- Adding Datasets with Cesium for Omniverse