3ds Max
This tutorial will walk you through how to use the Cesium ion 3ds Max plugin to tile your content into 3D Tiles. This allows you to share highly complex scenes on the web without losing detail.
We’ll also look at how you can visualize your designs in a real-world context by combining your 3D data with the accurate & globally curated Cesium World Terrain.
- Download and install Autodesk 3ds Max.
- You need a Cesium ion account to take this tutorial.
Download the Cesium ion plugin from the Autodesk App Store, then run the installer.
Once the installation is done, you can verify that the Cesium ion plugin was installed correctly by opening up 3ds Max and checking the File > Export menu. You should see the Export to Cesium ion option as shown below.
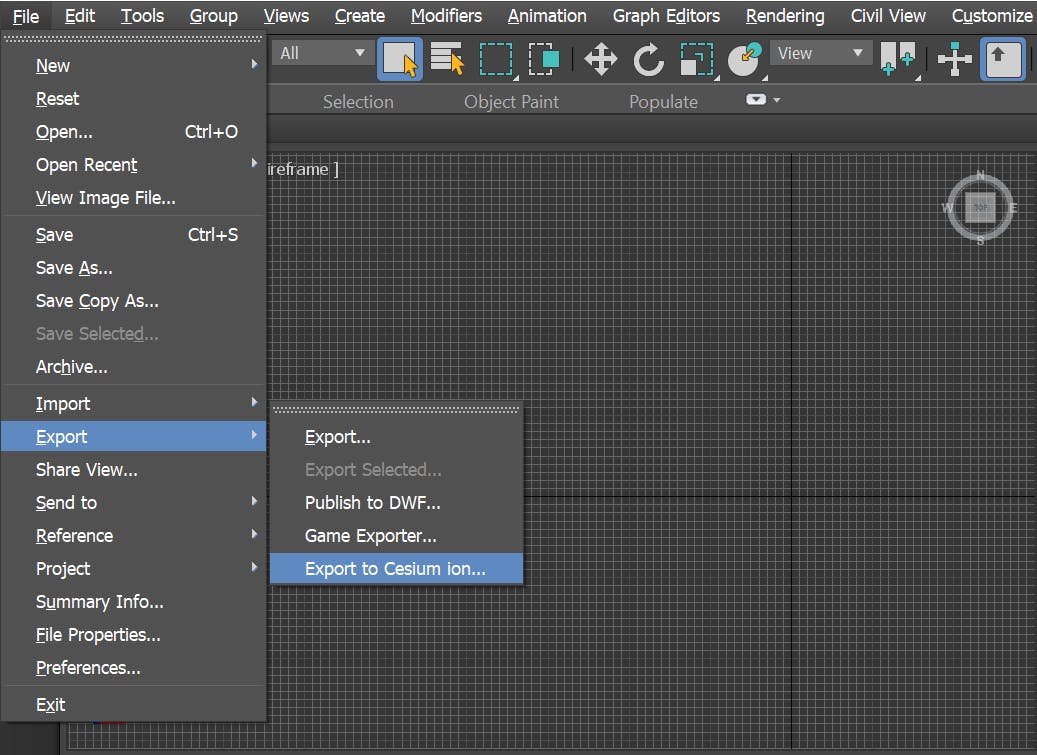
If you don’t see it you may need to restart 3ds Max so it loads the newly installed plugin.
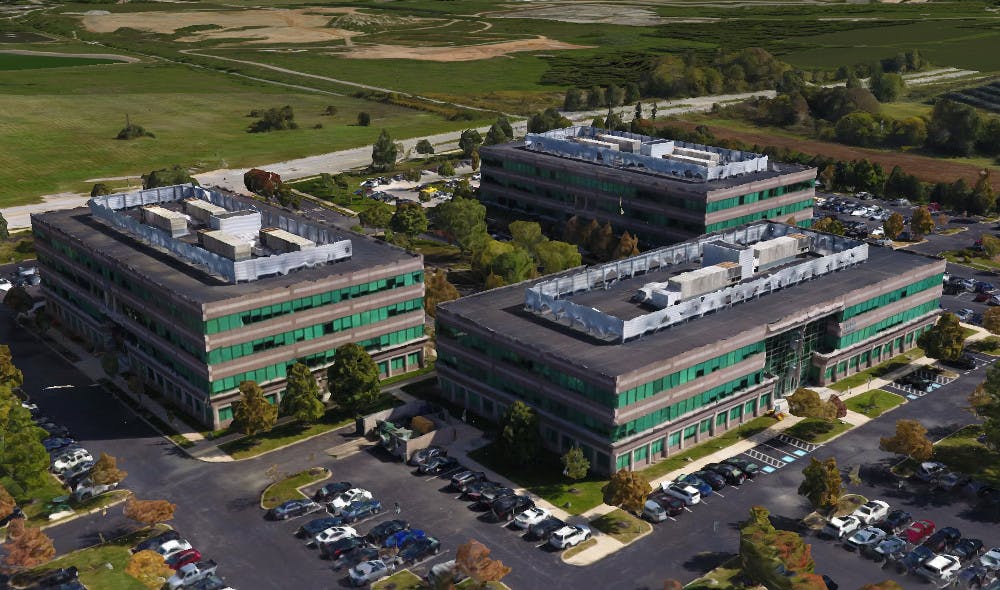
For this tutorial we’ll be using a photogrammetry model of the AGI headquarters in Exton, PA (where Cesium first started!). Download it by clicking here.
Extract the ZIP file you’ve downloaded, and drag and drop the AGI_HQ.obj file into your 3ds Max scene. Once it’s done importing, go to File > Export and then click the Export to Cesium ion button as shown below.
The first time you do this you’ll need to authorize the plugin to access your Cesium ion account. The plugin will automatically open a page in your web browser for you to log in to your Cesium ion account. Click Allow when prompted in the screen below.
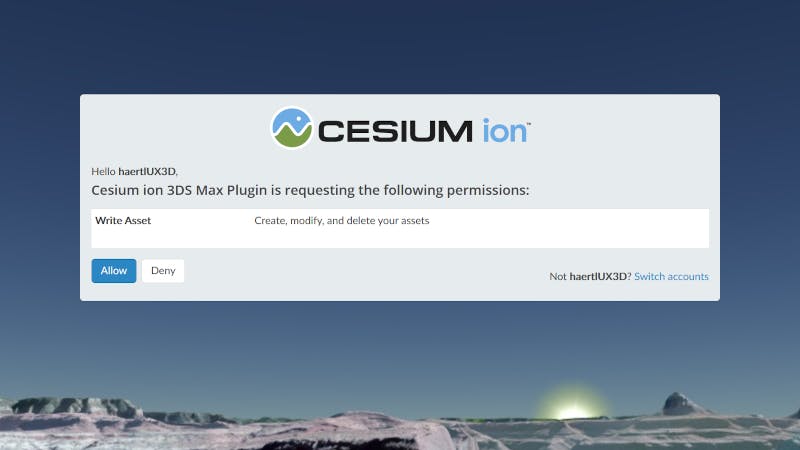
The next page will confirm that permission has been granted. You can close your browser window and return to 3ds Max.

Now you’re set up to export 3D content to Cesium ion. Select 3D Capture in the model type dropdown since this is a photogrammetry model.
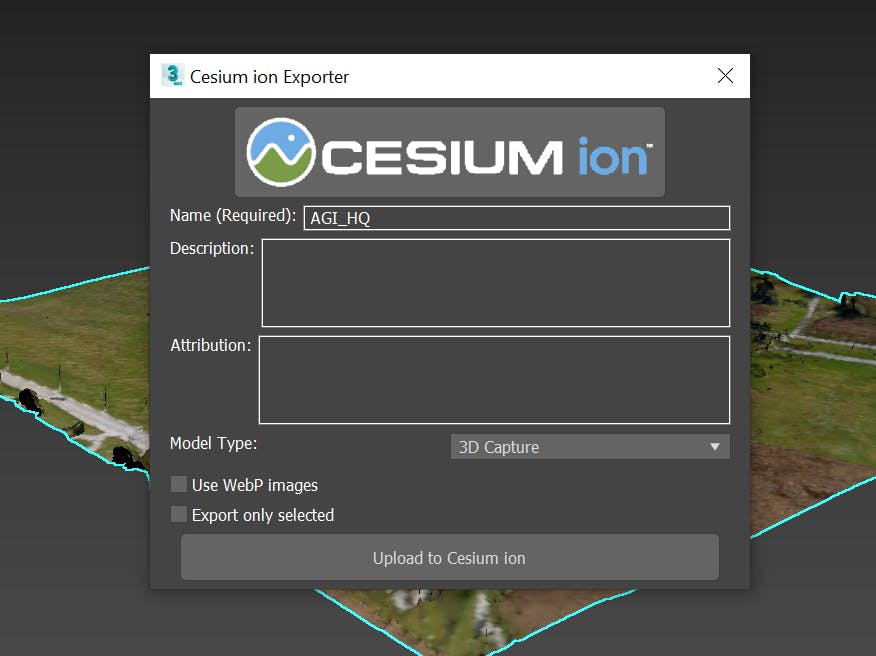
Then click Upload to Cesium ion. Once the upload is complete you’ll be redirected to your Cesium ion dashboard where you can monitor the progress of this job.
This model already has its materials baked to a texture. If you’re exporting your own model, make sure that you’ve baked all materials to textures. This texture baking guide describes how to do this.
When this job finishes you’ll have a 3D Tileset of your content hosted on Cesium ion. This can be streamed into any client that supports 3D Tiles, such as CesiumJS. Even models that are several gigabytes large will load in seconds since 3D Tiles makes it possible to stream in only the data required for any given view.
Before we share this data, we’re going to look at how to place this model into its real world location on the globe. For datasets that embed geographic metadata, like point clouds, Cesium ion will automatically place them in the right location. Since OBJ models don’t contain this type of metadata, we will position our model using Cesium ion’s tileset editor tool instead.
Select the model you just uploaded in your Cesium ion dashboard and click Adjust Tileset Location on the right side of the screen:
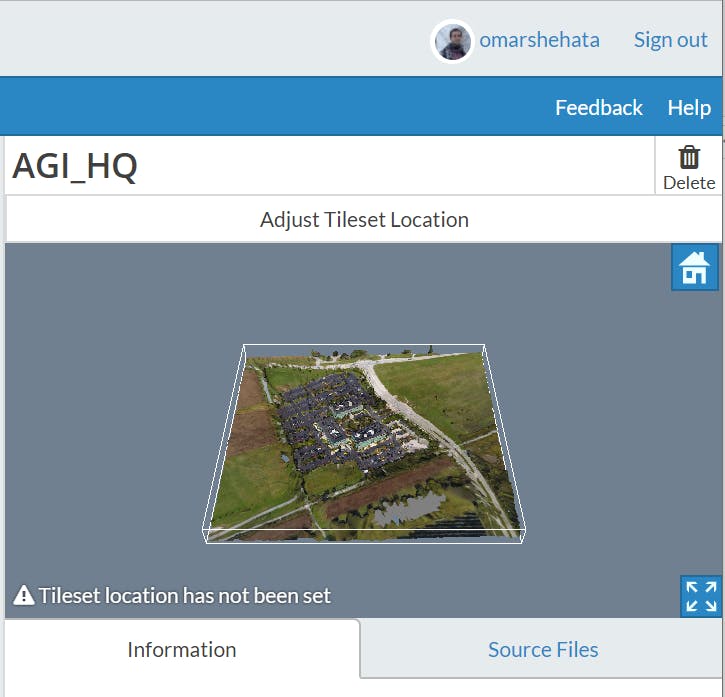
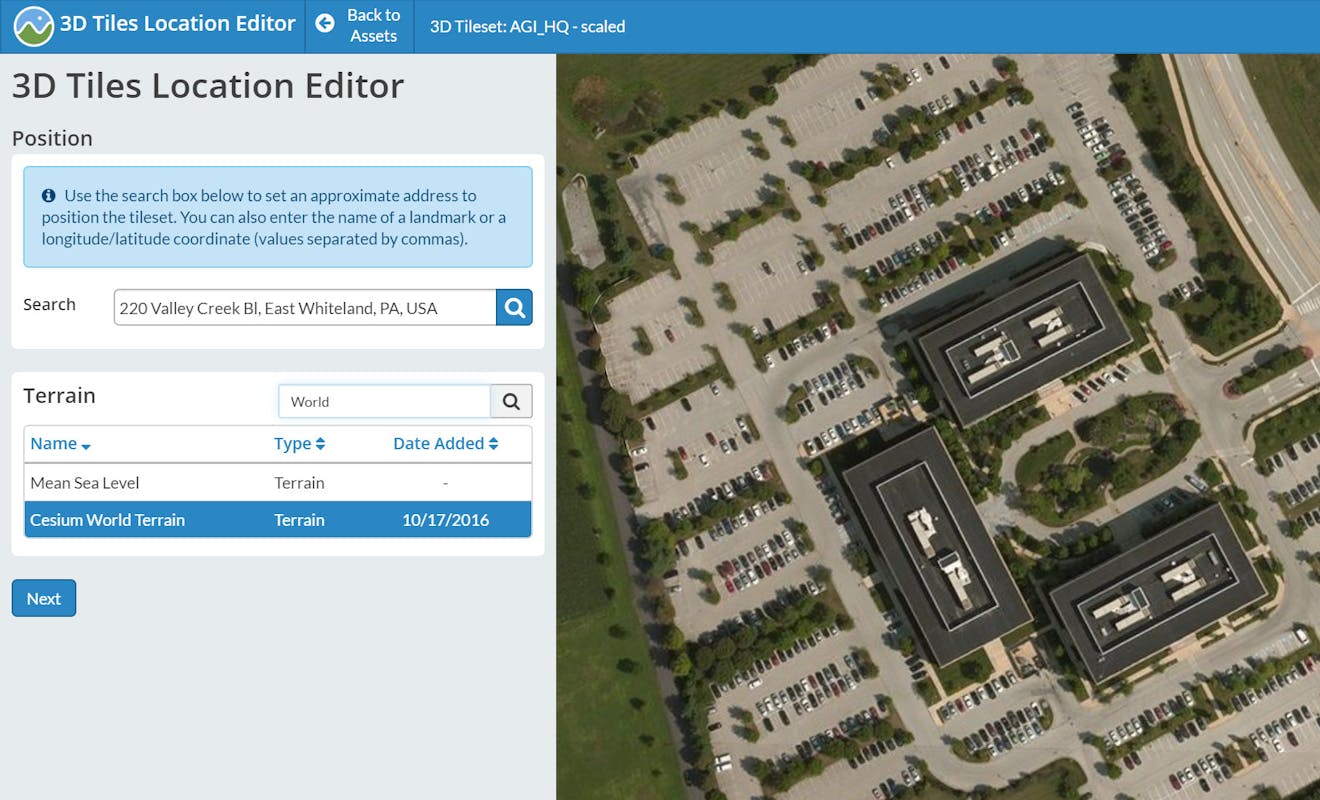
Here you can enter an exact longitude and latitude to place your model, or an address. Since we’ve spent years commuting to this place, we know the address is:
200 Valley Creek, Bl, East Whiteland, PA, USA
Make sure Cesium World Terrain is selected as shown below, then hit Next:
Now your 3D Tileset will be generally in the right area, but not exactly in the correct location. You can use the 3 axes to move the tileset in 3D space. When geolocating models by hand, one helpful technique is to push the tileset partially underground so it’s easy to see the landmarks in the satellite imagery that can help you align your model to the correct location.
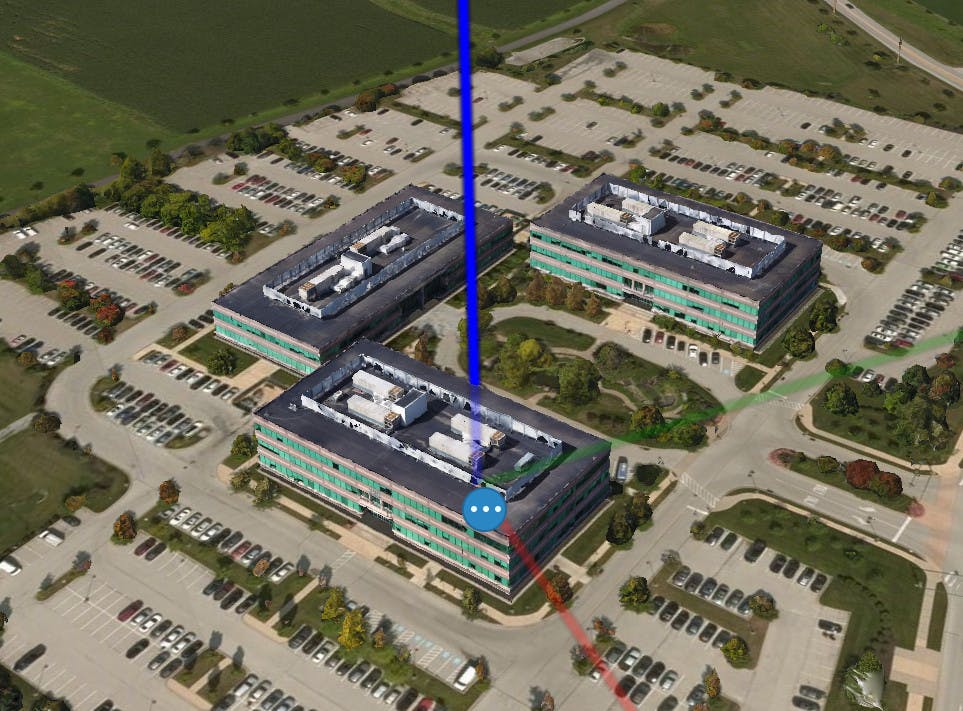
Once you’re happy with where your tileset is, you can click Save in the bottom left corner. You can now see your model in its real-world context.
For this tutorial we chose 3D Capture as the model type since this model was generated through a photogrammetry process from drone-captured images. For other types of models that were authored in a modeling environment like 3ds Max, choose 3D Model. This provides a hint to the Cesium ion tiling pipeline about how best to tile your content.
If you have smaller models you’d like to host on Cesium ion without tiling into 3D Tiles, choose the 3D Model (convert to glTF) option. This is useful when you have dynamic models that you want to animate in your scene, like vehicles or drones.
Now that you’ve created a 3D Tileset of your data, the getting started guide is a good next step for learning how to share it on the web with CesiumJS or combine it with other datasets.