STK
- Have a running instance of STK 11.7 or newer.
- You need a Cesium ion account to take this tutorial.
The first step is to add some 3D data to your Cesium ion account that we’ll later stream to STK.
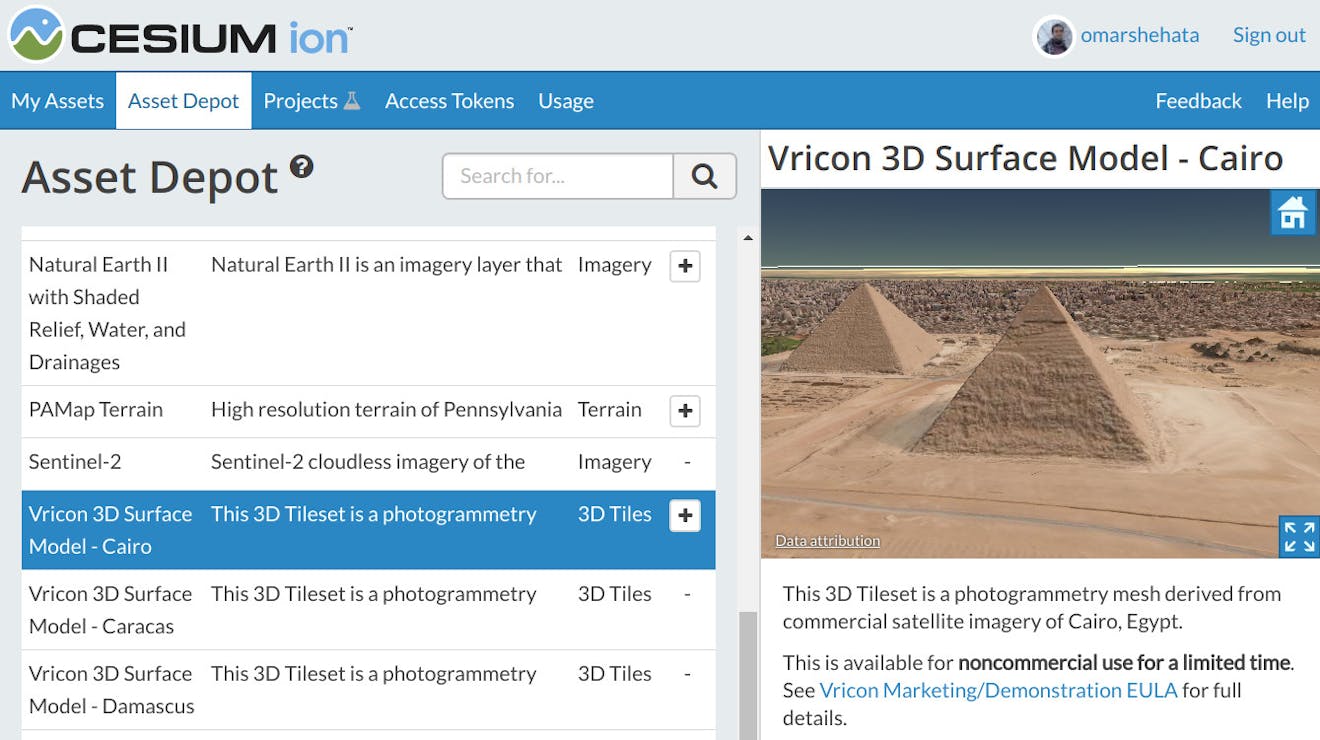
Login or create an account on Cesium ion, then navigate to the Asset Depot. This is where you can find curated 3D Tiles, terrain and imagery that you can add to your account.
Find the Vricon 3D Surface Model - Cairo asset and click the “+” button to add it to your account:
You can also upload your own 3D data to your Cesium ion account. Read about the types of data that Cesium ion currently supports.
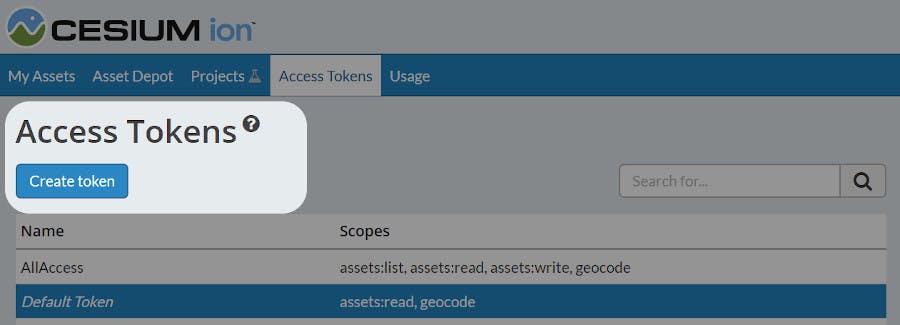
To give STK acess to read data from your Cesium ion account, you need to create an access token.
In your Cesium ion dashboard, navigate to the Access Tokens page. Then click the Create Token button.
Give your new token a name and read/list access to your assets as shown below.
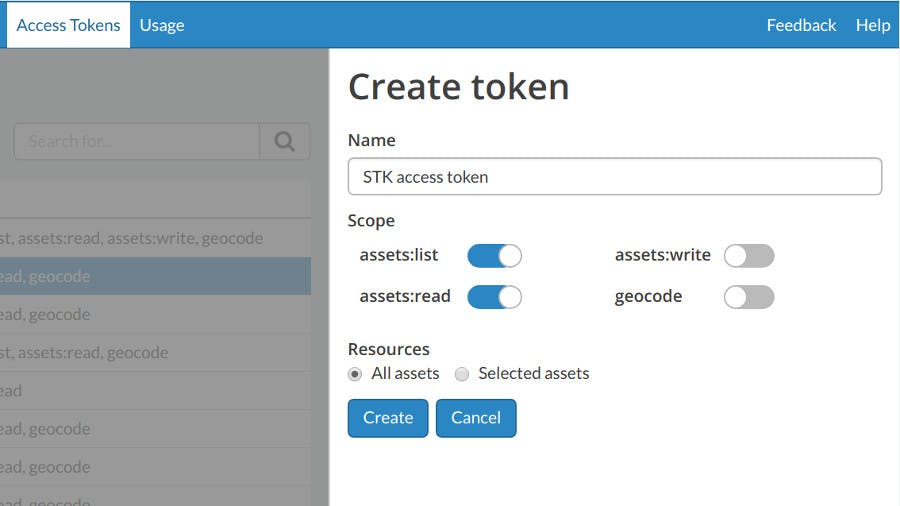
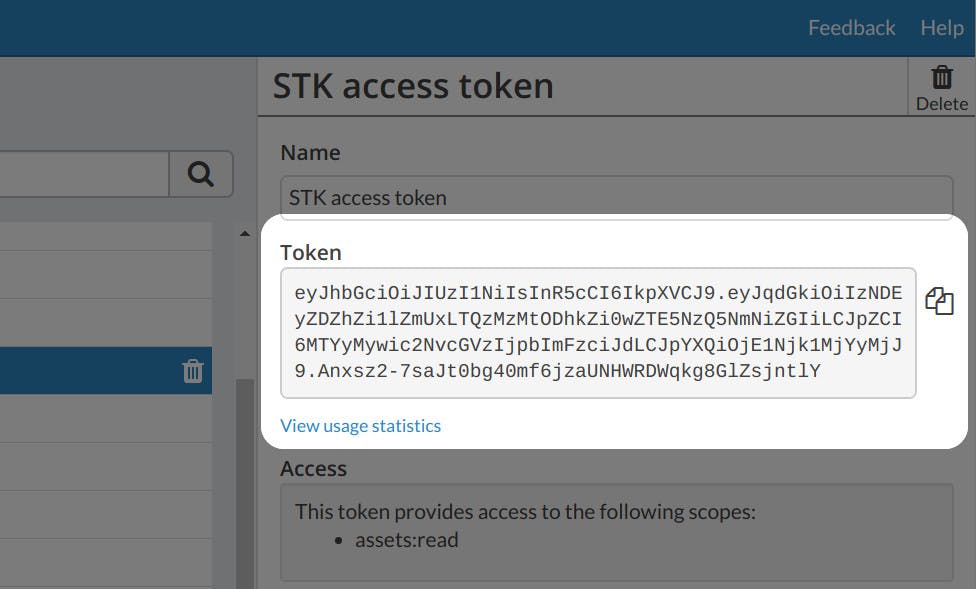
Click Create and then copy your newly created token from the panel on the right.
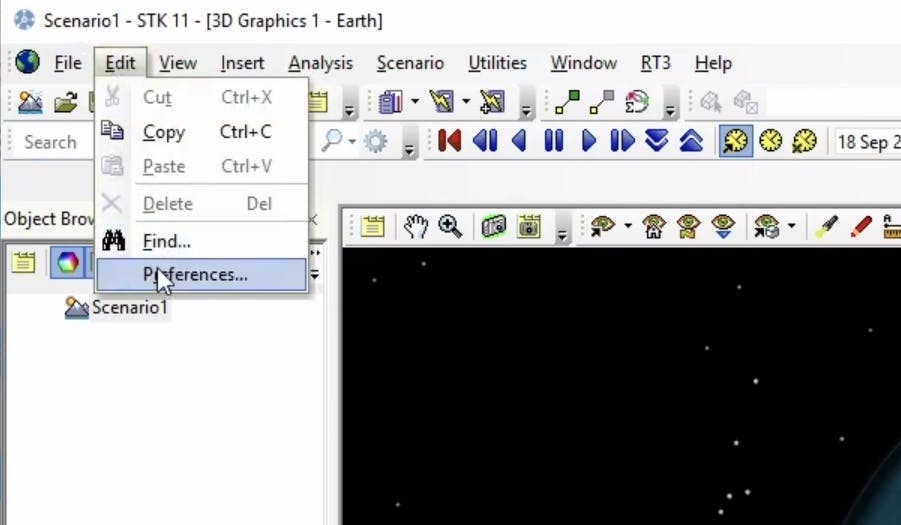
Open up STK and click on Edit > Preferences:
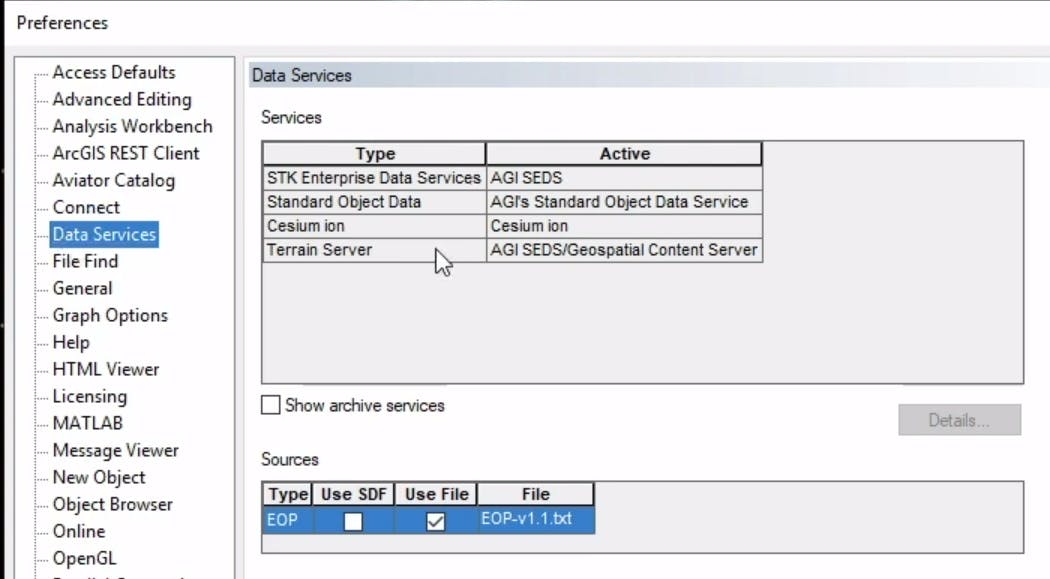
In the preferences window, select Data Services on the left-side menu. Then double click on the Cesium ion service.
Here is where you can add the access token you created in Cesium ion earlier. Click the “+” button to add the token. Name it “Demo” and paste the token itself in the “Value” column as shown below.
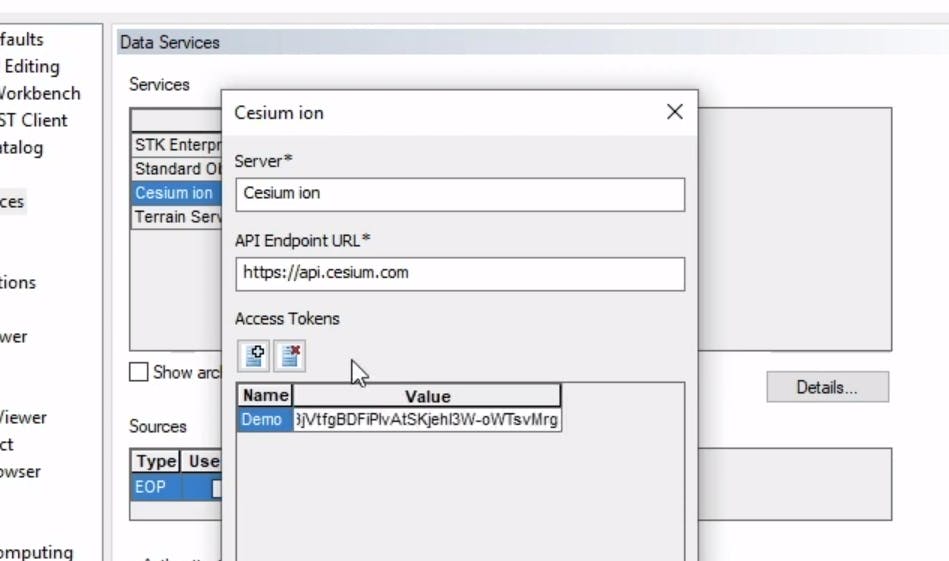
Press OK to confirm. Your STK instance now has access to the data in your Cesium ion account.
Now that we’ve connected STK with Cesium ion, we can add a 3D Tileset to the scene. Click on the “+” button in the Globe Manager panel in the bottom left of the screen, and select Add 3D Tilesets… as shown below.

In the new window, click on the Hosted button and then select Cesium ion from the server drop down. This will show you all the 3D Tilesets that are available using the configured access token.
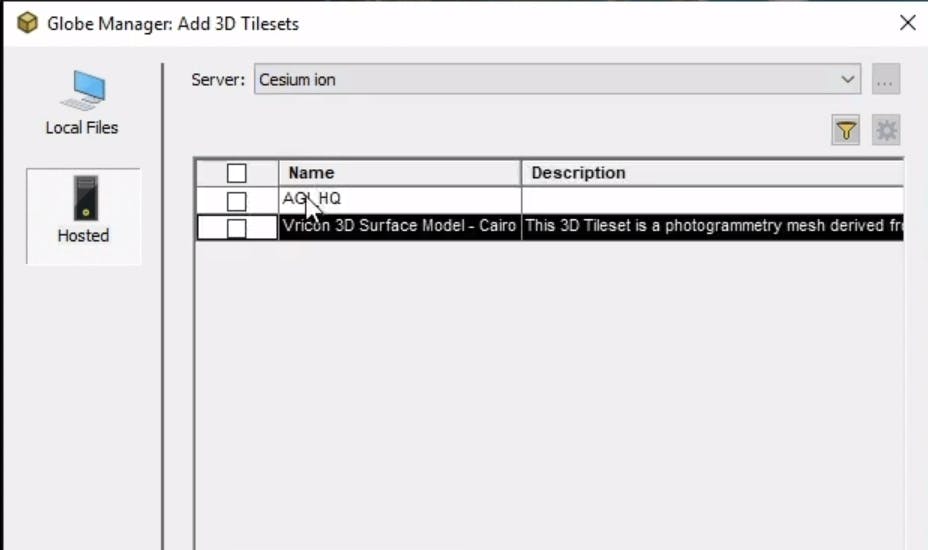
You can select one or more 3D Tilesets in this list, then click Add.
Finally, you can zoom to your 3D Tileset by right clicking on it in the Globe Manager panel and selecting Zoom To. You now have a 3D Tileset streaming inside of STK as you move the camera around.
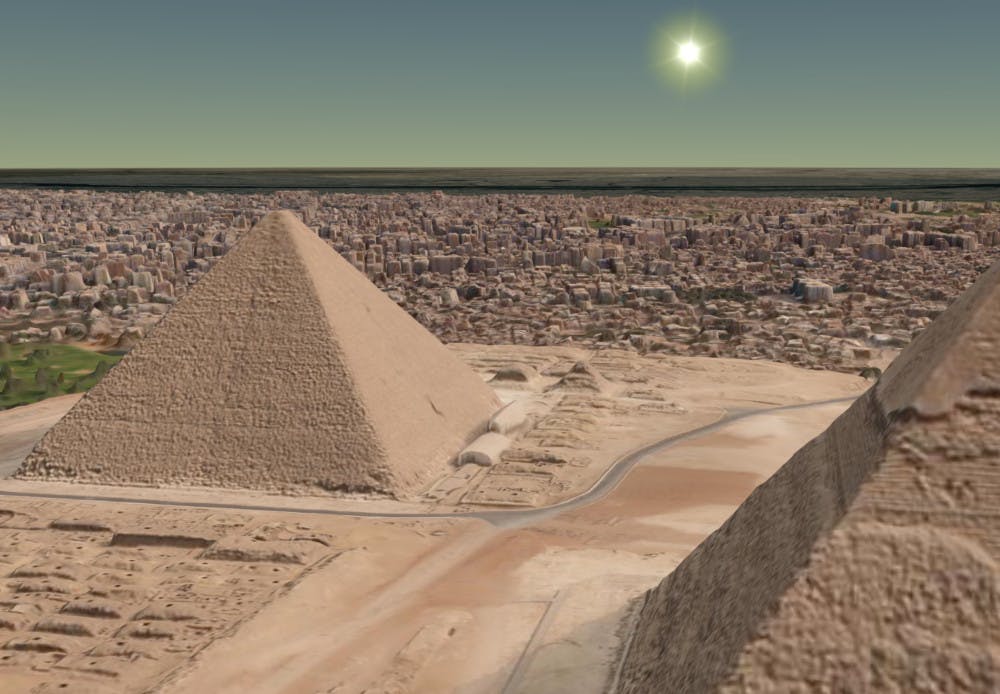
STK currently supports 3D Tiles that contain photogrammetry and 3D buildings. Support for point cloud tilesets is currently under development.
Now that you’ve set up STK to pull 3D Tiles from Cesium ion, you can use this to quickly access highly detailed 3D content without having to transfer these massive datasets around.
STK can export the results of your analysis as a CZML document that can be viewed on the web with CesiumJS. This way you can share a full interactive 3D scene since the data is already hosted in the cloud. Learn about how to export your data in the CZML Exporter section of the STK documentation.