CesiumJS: Intermediate Applications
The CesiumJS: Intermediate Applications learning path will teach you the features needed to create a standalone application with CesiumJS.
Introduction
This lesson will cover how to handle user interactions within your CesiumJS application.
Why are interactions important?
Most web applications will require user interaction, and CesiumJS has a few UI elements in the viewer that deal with the most common interactions. Still, there are times when your application will need additional support and customization. As shown in this Sandcastle example, you may also need to pare down the default UI if the Cesium widget isn’t needed.
The Cesium UI can be edited; this example shows the viewer without UI widgets.
Enabling interactions past the basic controls in the default viewer will be critical to developing an application that goes beyond the foundational level covered in the previous learning path. Let’s look at how we can use the features CesiumJS provides to meet these needs.
How can I make the most of user interactions?
CesiumJS has built-in functions that help with capturing everyday interactions via the mouse and gestures. For example, ScreenSpaceEventHandler and ScreenSpaceEventType provide a way to listen to and categorize user inputs. Developers can also incorporate native JavaScript event listeners into their applications if the added complexity isn’t required.
Assignment
- Follow along with the Drawing on 3D Models and Terrain blog post describing how
Scene.pickandScene.pickPositioncan enable dynamic user interactions. - Recreate the Sandcastle example shown in the Drawing on 3D Models and Terrain blog post, and rebind the event types to your preferred inputs. Try using keystrokes or gestures and recreate the same functionality.
Additional resources
This section contains helpful links related to the lesson’s content.
To see different ways to capture and utilize user interactions, look at the following Sandcastle examples:
If you want to dive deeper, Cesium’s reference documentation for SceenSpaceEventType and ScreenSpaceEventHandler cover the supported syntax.
Knowledge check
This section contains questions to check your understanding of this lesson. Review the content again if you’re having a problem answering a question.
- Which events are covered by
ScreenSpaceEventType, and which are not? - Which feature enables user interactions with specific features of 3D Tiles?
Introduction
This lesson will cover geospatial and mapping concepts important for creating a practical application with CesiumJS.
What is the difference between 2.5D and 3D?
Most people know the difference between 2D and 3D regarding maps. Think of the difference between a flat map you lay on your table and a globe. The tricky part comes when trying to distinguish between 2.5D and 3D visualizations. Many 2D mapping tools attempt to bridge the gap between 2D and 3D, resulting in 2D maps with extrusions representing buildings and structures rather than 3D data.
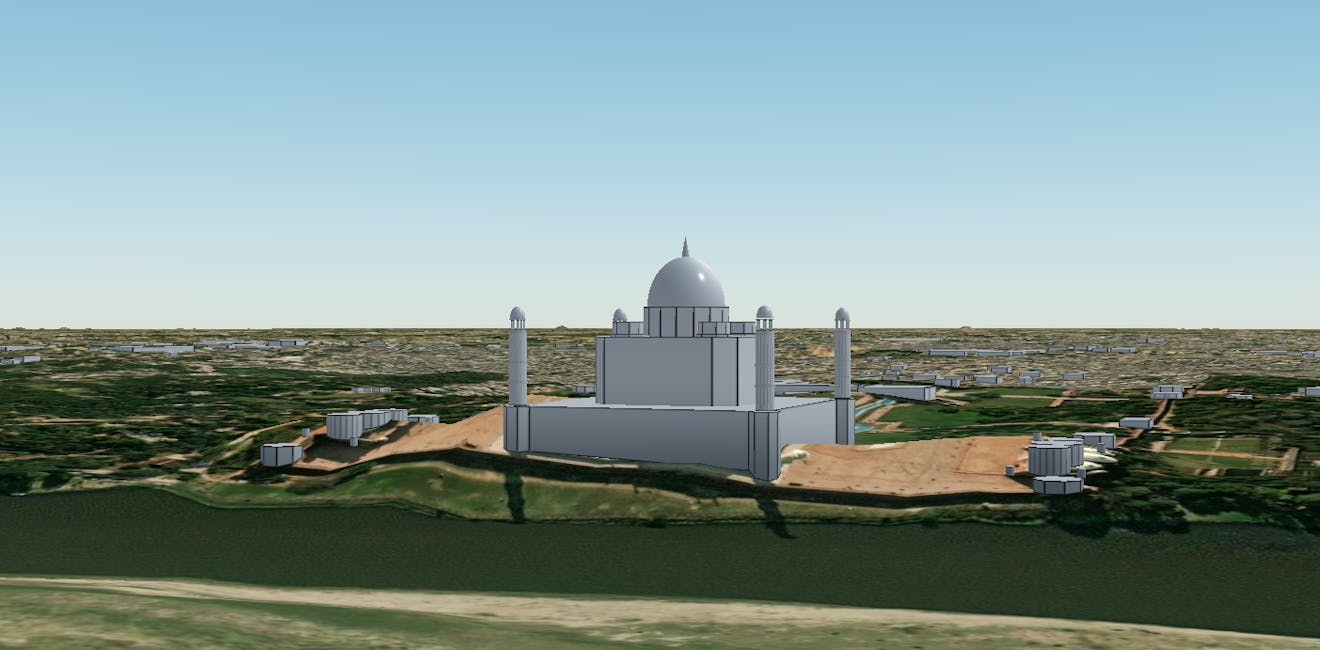
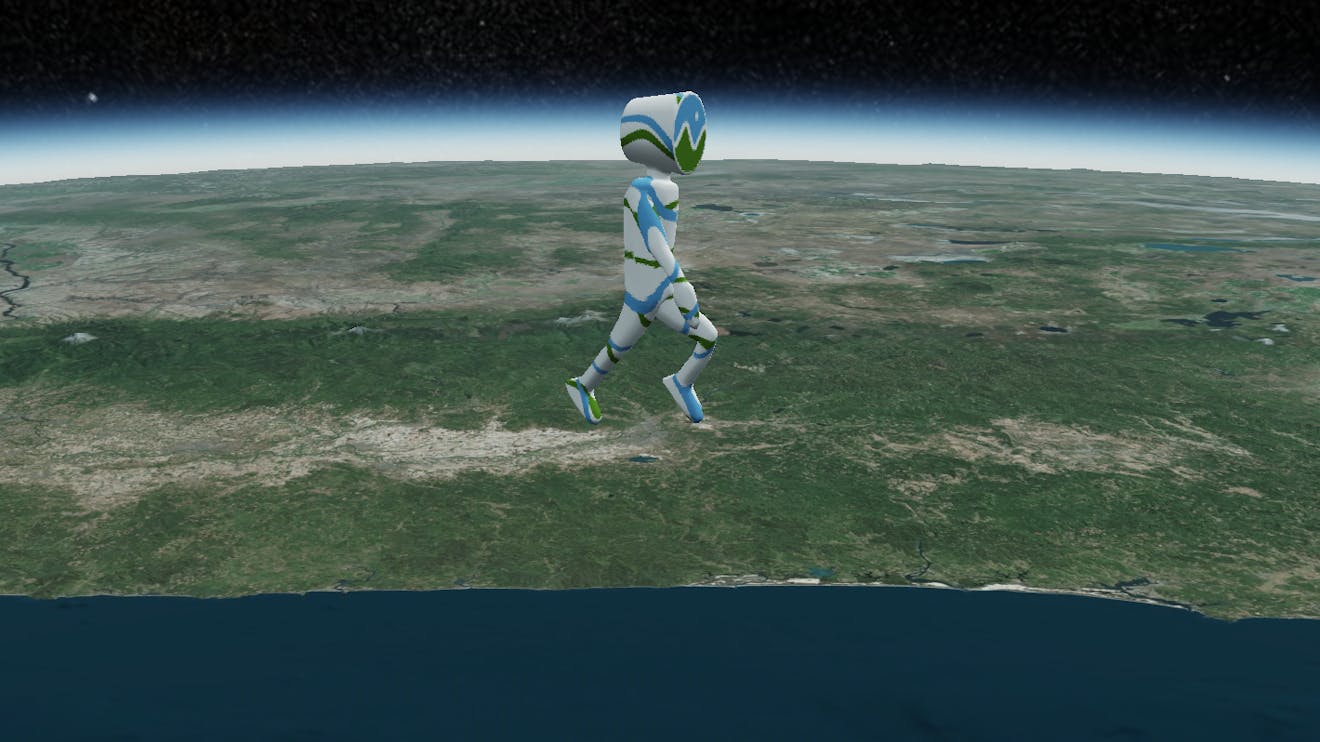
CesiumJS enables 3D visualization, allowing developers to display detailed 3D models.
Unlike 2.5D representations, 3D engines capture the height detail shown in the image above. In a 2.5D map, the extruded footprint can represent each building only. As a result, accuracy in 2.5D falls behind that of 3D.
Why are data structures important in mapping?
We discussed some benefits of using 3D over 2D and 2.5D, but the size of the data can be a challenge. Cesium created 3D Tiles to deal with the size and complexity of heterogeneous data, and CesiumJS was built to stream and render those tiles as efficiently as possible.
Traditional geospatial applications utilize data structures such as quadtrees to manage the data efficiently, and 3D Tiles can still use that data structure, but 3D data is better suited to other optimized spatial subdivisions, such as octrees and k-d trees.
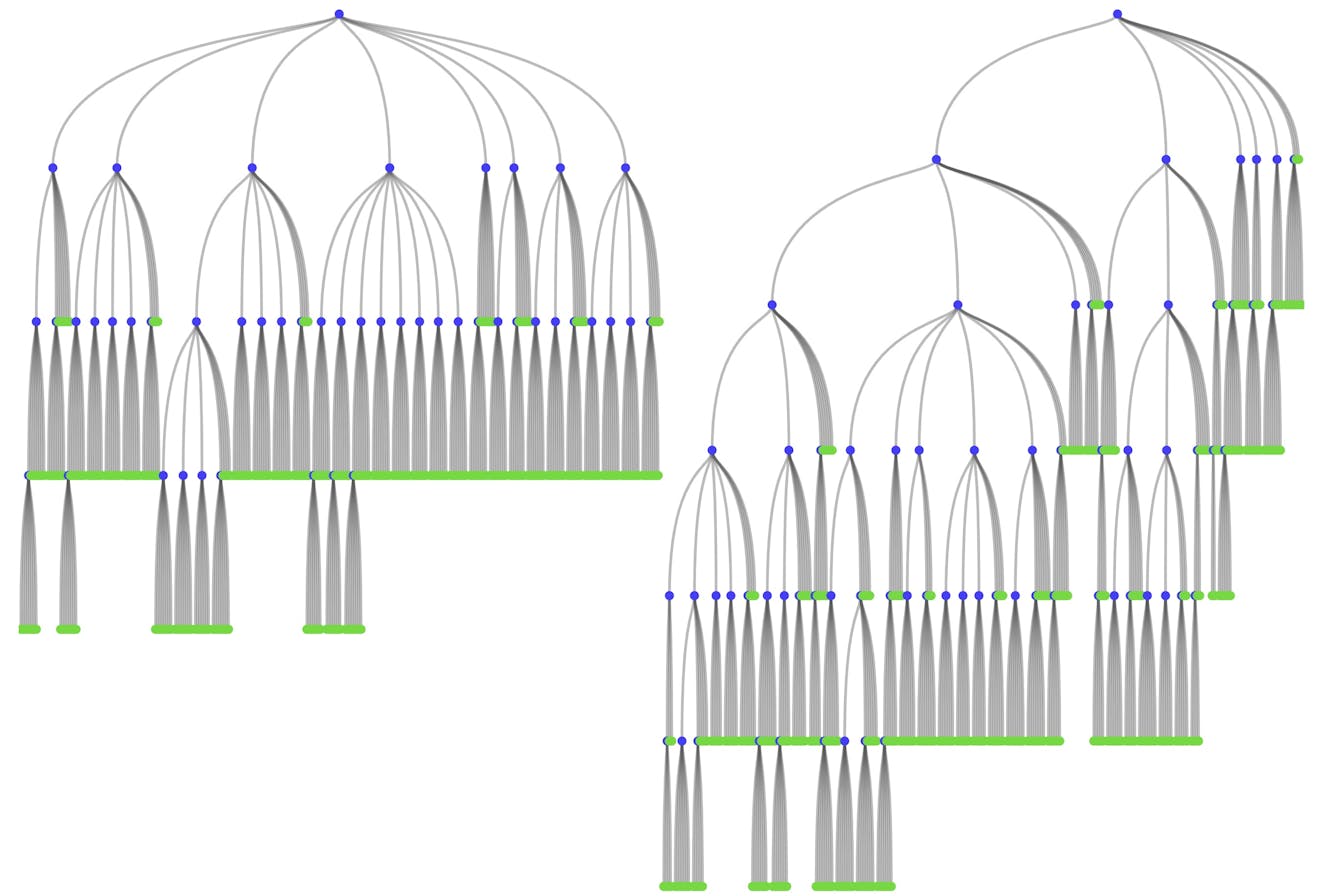
The octree on the left is optimized and non-uniform, while the octree on the right is uniform but unoptimized.
Optimizing data structures, such as the left tree above, helps reduce streamed and stored data inefficiencies so that CesiumJS can operate on a browser without running into performance or memory problems.
What is the difference between vector and raster data?
If you are new to geospatial data, you may need to learn the difference between vector and raster data. Since both are common, it is helpful to understand how each type of data can be used in Cesium.
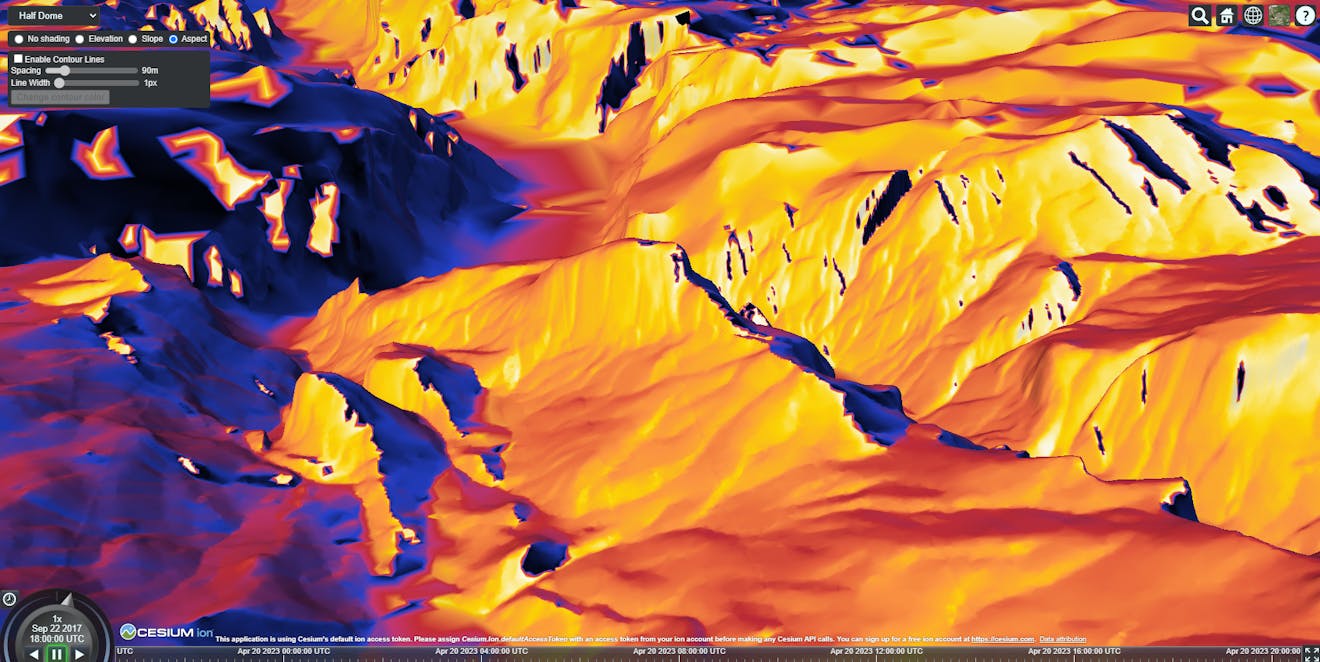
First, let’s look at raster data to understand how it is used. Raster data is best described as a dataset made of pixels. Most people will associate raster data with images because they can contain visual information. Still, raster data can also be used to capture information, such as the height of the terrain or soil types.
Vector data, on the other hand, is composed of points, polylines, and polygons. Because of the networked structure of the data, vector datasets are often used to capture information about precise locations such as roadways and geographic boundaries.
Since Cesium can work with both types of data, it’s not required to use one or the other, but it helps to understand the benefits of each when creating practical geospatial applications.
Why is data fusion important?
You may have encountered the term “data fusion” in other contexts. In the context of Cesium, we think of data fusion as showing multiple data sources together in a combined manner so that we can understand how they intersect, overlap, and interact. Multiple approaches in CesiumJS allow users to take advantage of the potential for data fusion, including classification, styling, and filtering.
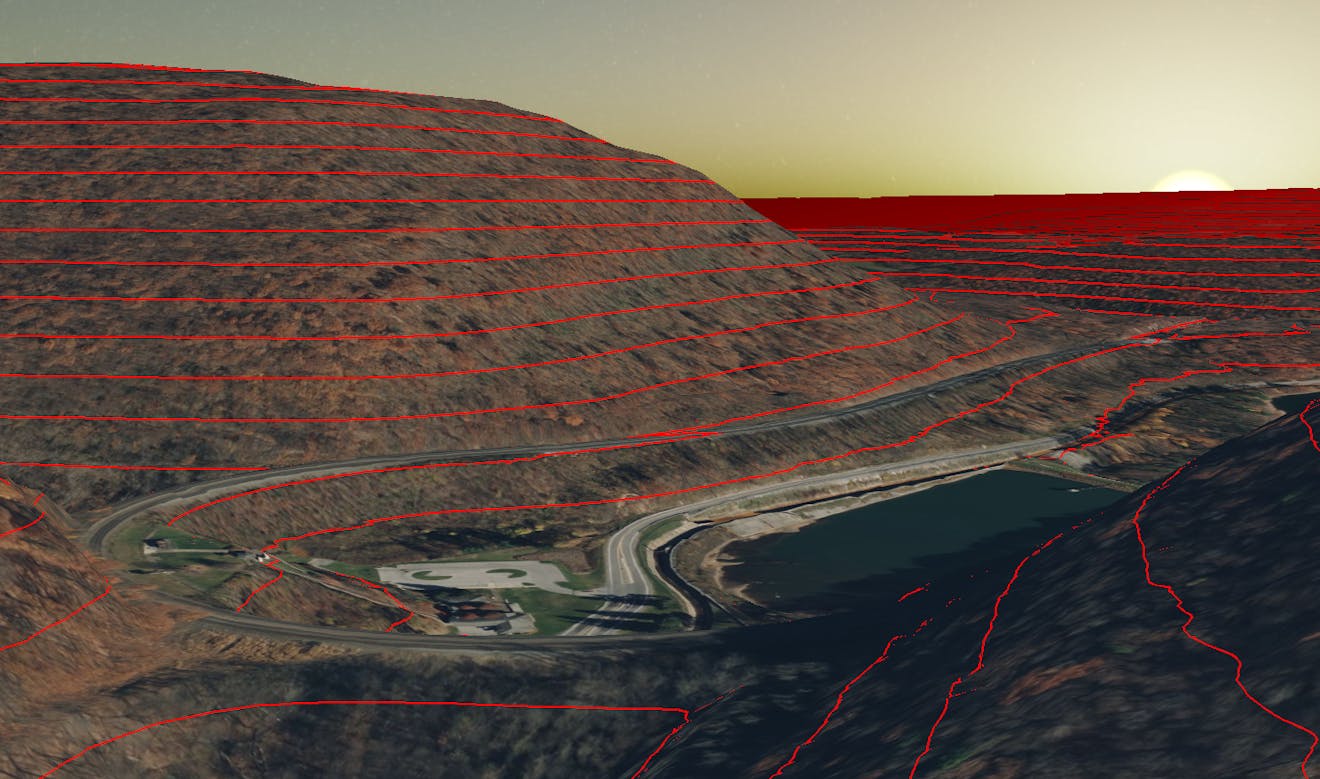
Classification is a flexible system in CesiumJS that allows you to highlight and annotate your data using geometries or tilesets. Classifications allow you to visually differentiate between features, even if they occur over different datasets, which can be most helpful when you have metadata consistently across multiple tilesets.
Classifications can also differentiate between terrain and 3D Tilesets, as shown in this Sandcastle example, where the same geometry is used to classify terrain, 3D Tiles, or both simultaneously.
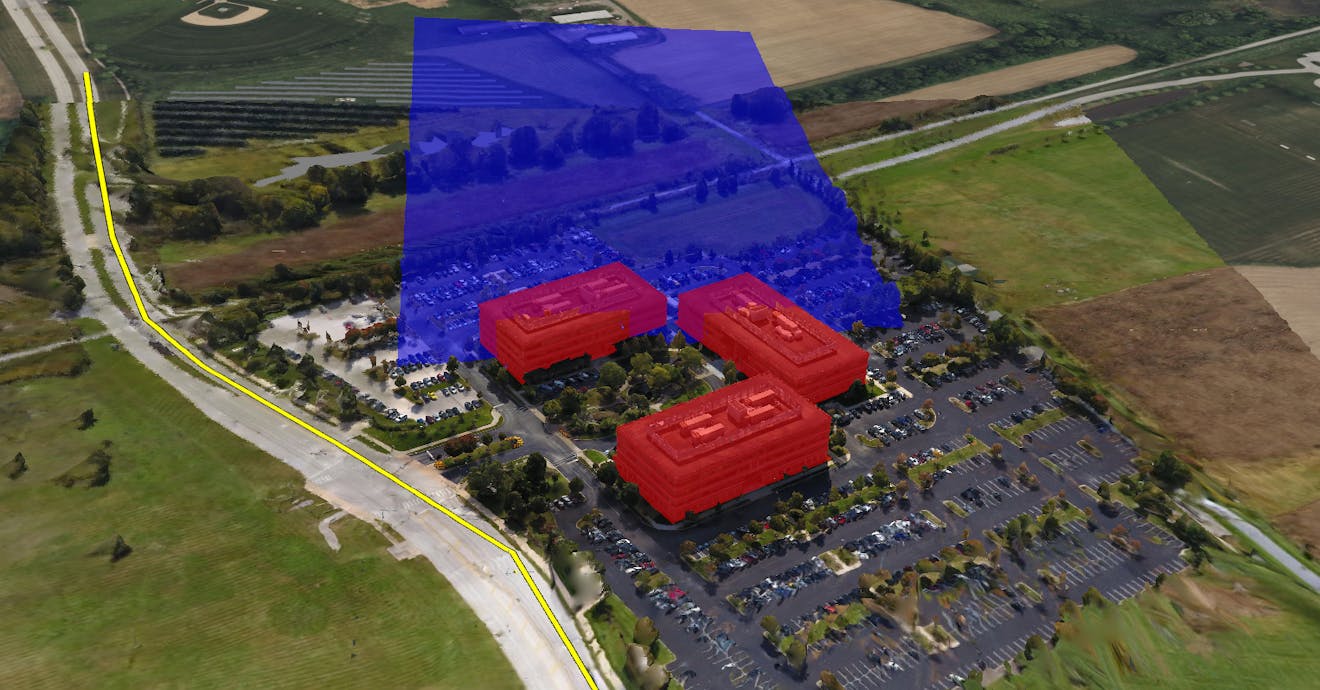
Classification can help developers annotate their data using geometry or tilesets.
Styling allows for faster visual analysis of different datasets using shared metadata. The resulting patterns and intuitive visualizations give users an easy tool for highlighting the data that would otherwise be limited. Filtering takes the concept further by limiting which portions of the data are visible, which you can explore in this Sandcastle example.
Assignment:
- Read Cesium’s 2.5D Is not 3D presentation to understand the underlying differences between both representations.
- Read through Optimizing Subdivisions in Spatial Data Structures and Optimizing Spatial Subdivisions in Practice.
- Follow along with the Dynamically Annotating 3D Tiles blog post to understand how classification can be quickly included.
- If you haven’t gone through the tutorial yet, take some time to get familiar with the concepts covered in the Styling and Filtering 3D Tiles tutorial.
Additional resources
This section contains helpful links related to the lesson’s content.
- This short article by Patrick Cozzi covers some basic concepts used in quadtree data structures.
- In this lesson, we discussed some downsides of 2D and 2.5D maps. If you want to learn more about 2D map projections, read this article by GISGeography.
- Another article by GISGeography covers vector and raster data in more detail.
- Explore the Photogrammetry Classification Sandcastle example to see how highlighting can be toggled on/off per tileset.
- Follow the Data Fusion with 3D Tiles presentation for more context on the topic.
Knowledge check
This section contains questions to check your understanding of this lesson. Review the content again if you’re having a problem answering a question.
- In which ways do 2.5D and 3D maps differ?
- What are some of the pros and cons of 2D geospatial applications?
- What are some of the pros and cons of 3D geospatial applications?
- Why is it essential to have an optimized data structure for storing 3D Tiles?
- What is a practical example of using vector data?
- Why is classification through geometry used?
Introduction
This lesson will cover the concepts needed to build a sample web application using webpack.
Why is module bundling necessary?
Module bundlers are tools that bundle all of your application's JavaScript modules into a single file that a browser can execute. Bundlers also help manage dependencies within your application and ensure that everything is loaded in the correct order.
In this lesson, we will focus on webpack, just one of many module bundlers developers can use to create web applications. Rollup, FuseBox, and Parcel are other module bundlers you could use.
How do I get started with webpack?
We have a detailed guide on GitHub that walks you through the steps to get your CesiumJS application running locally in your browser through webpack. If you have completed the previous lessons in the CesiumJS learning path, you are ready for the tutorial in the Assignment section at the end of this lesson.
What should I do if I need to run CesiumJS offline?
If your application cannot be connected to the internet or needs to operate with limited connectivity, there are options for using CesiumJS. In the Assignment section, we link to documentation with the steps required to disconnect CesiumJS from external sources.
Assignment
- Follow along with the CesiumJS and webpack tutorial on GitHub. After you complete this, you can run your Cesium web application locally, which you will need for the practical application.
- Read through the GitHub documentation for setting up CesiumJS in an offline environment. Even if your application is online, it’s helpful to understand which components require connectivity.
Additional resources
This section contains helpful links related to the lesson’s content.
- Follow the CesiumJS Quickstart tutorial if you did not complete it in the CesiumJS: Fundamentals learning path.
- To explore self-hosted solutions, peruse the Cesium On-Premise page.
- Webpack offers a Getting Started tutorial that goes more in depth on the specifics of bundling in webpack.
Knowledge check
This section contains questions to check your understanding of this lesson. Review the content again if you’re having a problem answering a question.
- What are the benefits of using a bundler when creating a web application?
- What are some examples of static assets that will need to be served alongside the CesiumJS JavaScript files?
- Which two widgets should be disabled for CesiumJS to work in an offline environment?
Now that you understand the concepts needed for intermediate applications in CesiumJS, put them into practice. Create a CesiumJS web application that utilizes the following concepts:
- Create at least two different types of user interactions.
- Demonstrate how geometry can classify terrain or 3D Tilesets.
- Bundle your web application using webpack.
Next steps
You have learned enough concepts to create your application and become a Cesium Certified Developer. We want to see how you can apply these skills to a real problem. To receive certification for your work, your project submission must meet these criteria:
- Demonstrate how your CesiumJS application solves a real-world use case using the concepts learned in the CesiumJS learning paths.
- Explain how you pinpointed this use case and why Cesium works well to solve it.
- Describe any additional integrations that improved your application, e.g., third-party data, other JS libraries, etc.
Apply to become a Cesium Certified Developer and present your application and code for review. If you're unsure about your project, you can still apply and start the process to hear feedback on your work.