CloudAhoy Migration to Cesium
This is a guest post by Andrew Simpson of CloudAhoy about their transition from Google Earth to Cesium. For more info on moving from the GE plugin to Cesium, see the tutorial series. - Sarah
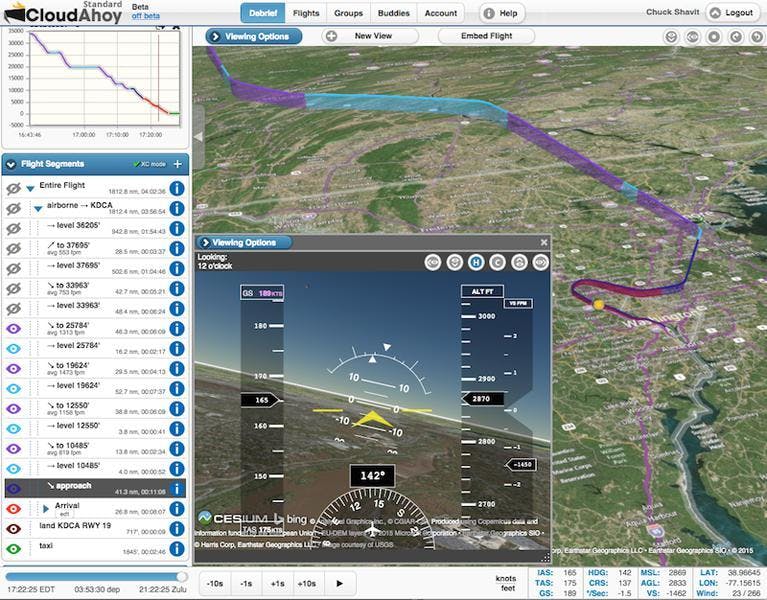
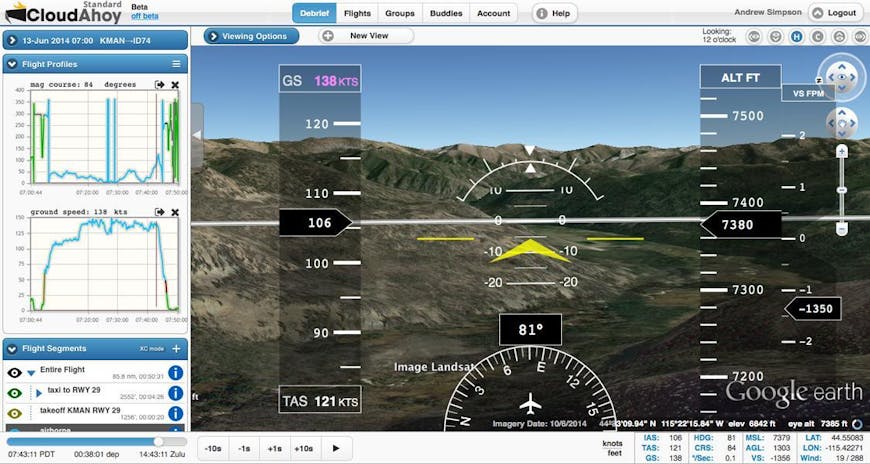
CloudAhoy is a web application for pilots to debrief their flights. During the flight we capture GPS and other data via the user’s iPhone, iPad, Android, external GPS device, or the aircraft avionics. This data is uploaded to our servers, where we combine it with additional aeronautical data and process it all by the CloudAhoy engine.
After landing, the pilot can review the flight in detail. The flight can be visualized statically over 2D or 3D maps, or dynamically by a motion visualization that displays a synthetic view from the cockpit. We break the track into recognizable segments of flight (takeoffs, landings, maneuvers, etc.), provide graphs for each parameter of flight, allow the user to import and sync video, display wind barbs, overlay instrument procedures, recreate the flight in a virtual cockpit view with a heads-up display, change the POV, and more, all useful for detailed debrief.
We’d been using Google Earth plugin and it worked well, with some ongoing issues: the user had to download the plugin, which was very inconvenient. It would sometimes crash unexpectedly, forcing the user to reload the browser. Also, Google Earth is supported only on Windows and Mac platforms, meaning that on tablet we could only implement our 2D view, even though many of our users use our service primarily on tablets.
With the announcement that Google Earth would be deprecated in December 2015, it became clear we needed an alternative. Chuck, our founder, stumbled upon Cesium and we started the development work. The benefits were very alluring: no plugin to install, a crossplatform solution, and a responsive community of developers. Here’s some tips we learned from our experience to help your migration.
Migrating 3D Track Mode
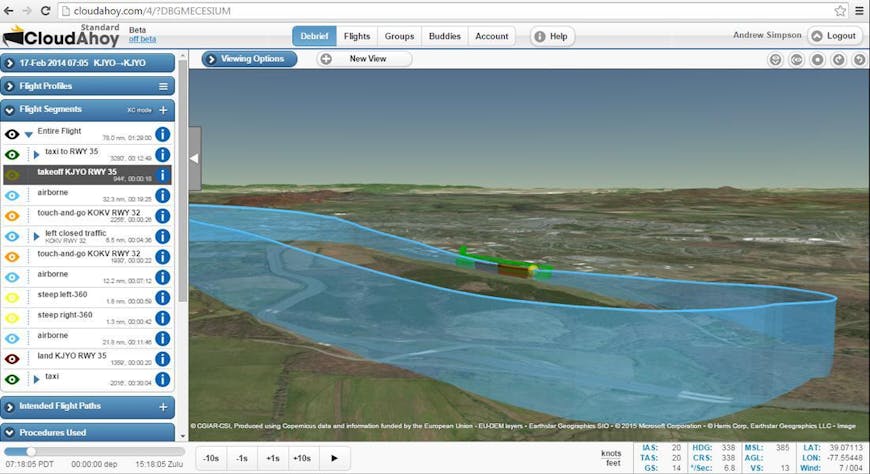
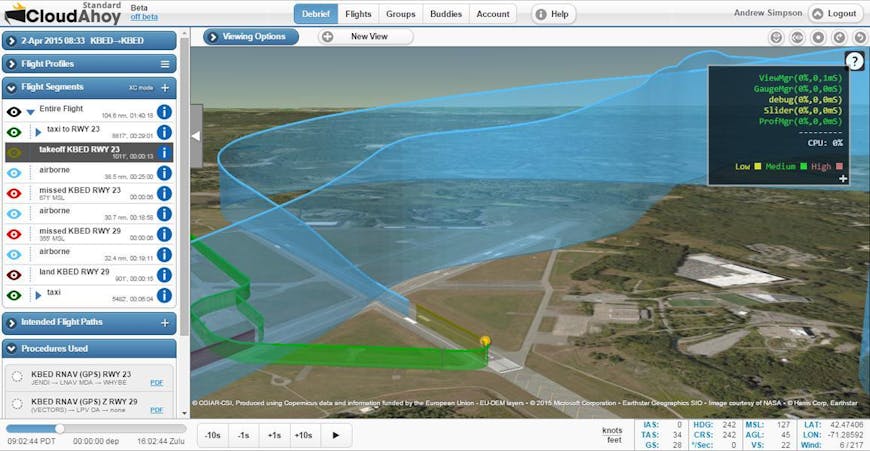
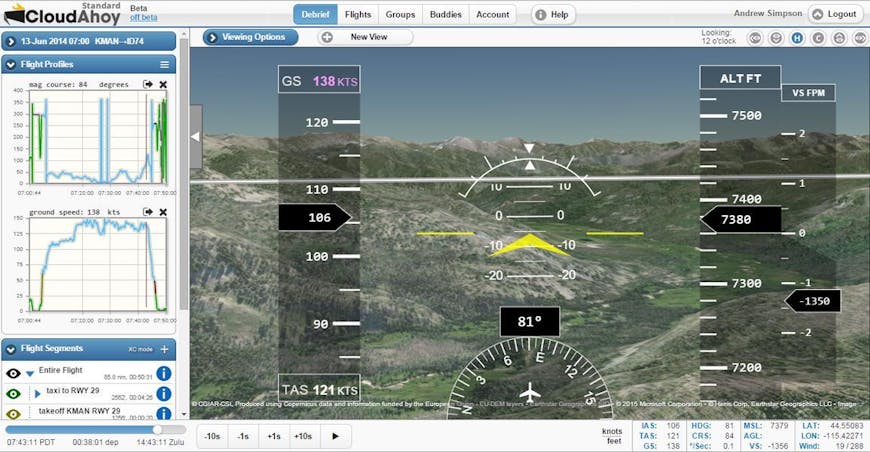
Our 3D track mode allows users to view their flight track on a virtual earth and rotate around it, zoom in, pan, etc.
Drawing the flight track itself is pretty simple. We loop through each segment of flight and add a polyline entity for each, populated with the GPS positions for that segment,
viewer.entities.add( {
  polyline: {
    positions: Cesium.Cartesian3.fromDegreesArrayHeights( positions ),
    width: 3,
    material: Cesium.Color.fromCssColorString( cssColor )
 }
} );
where positions is an array containing [ lon, lat, alt, lon, lat, alt, etc. ] for all the GPS positions in the flight segment, and cssColor is a variable containing something like #ff0000, or whatever CSS color code is associated with the current segment.
However, this only draws a flight track above the ground; it doesn’t connect the surface to the track, as we had with Google Earth (by setting the extrude flag). So we also draw a wall below the line. A wall in Cesium is like a line, but 1) connected from the line positions to the surface and 2) not visible from directly above.
We draw a wall after we draw the line for the flight track, like so:
viewer.entities.add( {
  wall: {
    positions: Cesium.Cartesian3.fromDegreesArrayHeights( positions ),
    material: Cesium.Color.fromCssColorString( cssColor )
  }
} );
Positions and color for the wall are the same as those applied to the polyline. This yields a flight track that is visible from directly above as well as from the side.
Some of the challenges we faced as part of the migration were resolved thanks to Cesium’s monthly releases, which got issues we raised fixed right away. Early on during the migration of our 3D track we encountered a bug with the entity system that was difficult to pin down because it was timing-dependent. Our flight tracks were often not drawn correctly, and sometimes not drawn at all. We submitted a reproducible scenario to Cesium’s github issues list, using code that could be pasted into their Sandcastle environment, and the Cesium team promptly responded. They identified a race condition that was causing the problem and fixed it in their next release, 1.7, which was published a few weeks later.
In track mode you can click on any segment of flight and the app will zoom into it. In Google Earth we usedcreateLookAt/setAbstractViewto accomplish this. In Cesium we useflyToBoundingSphere, because it allows us to specify all the parameters we need, longitude, latitude, altitude, heading, pitch, and range:
var destination = Cesium.Cartesian3.fromDegrees( lon, lat, alt );
var sphere = new Cesium.BoundingSphere( destination );
viewer.camera.flyToBoundingSphere( sphere, {
  offset: new Cesium.HeadingPitchRange( heading, pitch, range )
} );
That is, we first create aCartesian3object from our longitude, latitude, and altitude, then create a BoundingSphere object from those coordinates, then callflyToBoundingSpherewith the bounding sphere and aHeadingPitchRangeobject created from our heading, pitch, and range variables. The camera then animates to the specified location.
CloudAhoy also allows the user to overlay “instrument approaches,” predetermined courses that pilots to follow land while in conditions with low to no visibility. We simply fed the same KML we used with Google Earth into Cesium:
var source = new Cesium.KmlDataSource();
var parsedKml = new DOMParser().parseFromString( kml, ‘application/kml’ );
source.load( parsedKml );
viewer.dataSources.add( source );
However, we came across one caveat: when the <coordinates> tag is empty in the KML, it causes a problem with Cesium’s KML mechanism. Our solution was to simply remove any empty <coordinates> tags. The issue has been promptly fixed by Cesium.
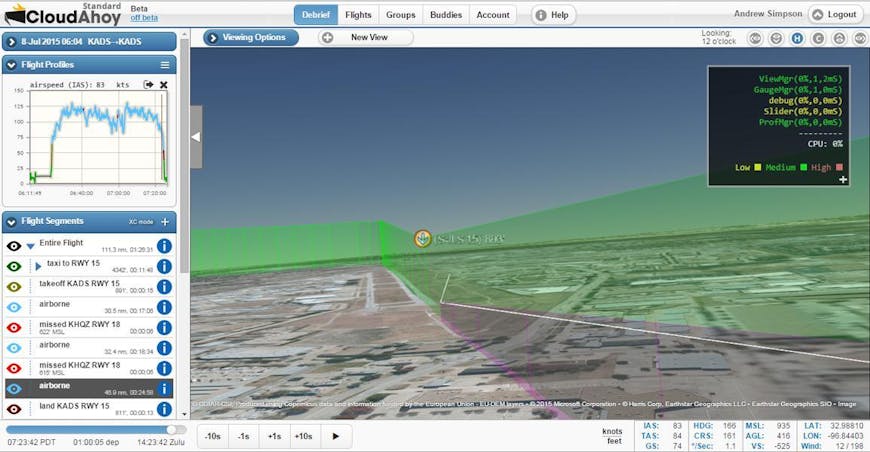
Migrating Cockpit Mode
Our cockpit mode allows users to revisualize flights from the point of view of the cockpit. The idea is to move the camera along the positions of the flight track, so the implementation is fairly simple for any given point in the flight: move the camera to the position, pitch, and heading stored for that time.

In Google Earth, we usedcreateLookAt/setAbstractViewto accomplish this. With Cesium, we usesetView:
var cartographic = Cesium.Cartographic.fromDegrees( longitude, latitude, altitude );
viewer.camera.setView( {
  positionCartographic: cartographic,
  heading: Cesium.Math.toRadians( heading ),
  pitch: Cesium.Math.toRadians( -( 90 pitch -) ),
  roll: Cesium.Math.toRadians( -roll )
} );
However, as you can see in the example above, we made some changes to how the values are passed to setView, as GE and Cesium seem to interpret the values differently. Whereas we were passing pitch directly to the methods in GE, in Cesium we use the formula -( 90 - pitch ), which seems to provide the proper result. And instead of roll, we use negative roll (-roll), which again provides the same result as GE. Of course, we also convert heading, pitch, and roll from degrees to radians, as GE uses degrees by default and Cesium uses radians.
When we first implemented cockpit mode, we ran into a major obstacle: when the camera was supposed to be very close to the ground (such as in takeoff and landing sequences), it appeared quite far above it, meaning that cockpit mode provided very little or no value when debriefing these segments of flight. Luckily, when we asked about this on the Cesium forum, the team promptly provided a solution, which was to simply add one line to the code after init:
viewer.scene.screenSpaceCameraController.minimumZoomDistance = 1;
The solution enabled us to fix the camera view immediately, and was released as the default in Cesium 1.14 so the fix is no longer necessary. We still have some problems at altitudes that are below the ellipsoid. Hopefully this will be addressed by Cesium in the future as well.
In the past, we’d used Google Earth to calculate AGL altitude (Above Ground Level) from MSL (above Mean Sea Level) altitude on the client by subtracting the elevation of the surface from the altitude of the current point of flight. With Cesium, we needed a way to similarly query the globe for the elevation of the terrain at any given point. The way to do this in Cesium is to use sampleTerrain, which queries the terrain heights and returns the value in a callback:
var positions = [ Cesium.Cartographic.fromDegrees( longitude, latitude ) ];
var promise = Cesium.sampleTerrain( _this.G.terrainProvider, 11, positions);
Cesium.when( promise, function( updatedPositions ) {
    displayAGL( { terrainHeight: updatedPositions[0].height } );
} );
Altitude: Sea Level and the Ellipsoid
A major discrepancy between Google Earth and Cesium is that Cesium interprets altitudes as “height above the ellipsoid,” whereas GE interprets them as “height above mean sea level.” For many applications the difference may not be significant; however, for CloudAhoy the accuracy of the altitude must be high so pilots can visualize important aspects such as landing and instrument approach.
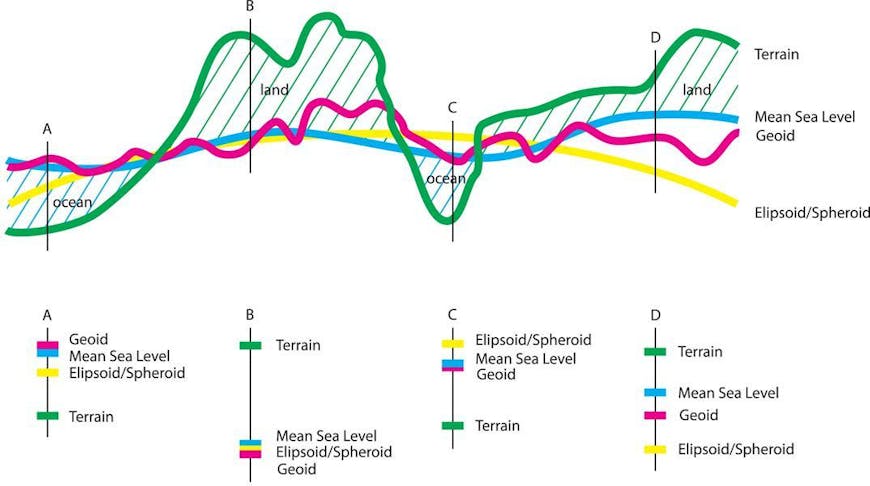
Image from ICSM.
You can read a detailed explanation of the difference between the two altitudes, but on a practical level, it means that the same [lat,lon,alt] point plotted in both GE and Cesium will not appear at the same height above the terrain. Thus, if you have MSL altitudes (as we do on the server), you must convert them to altitudes above the ellipsoid in order to display them with Cesium. This applies both to the rendering of the flight track in 3D, and to animating the flight in cockpit view.
This is a database of geoids. We have used an excellent C++ library called GeographicLib to compute geoid altitudes. You can also find more information and a demo of the conversion.
To get accurate altitude above MSL during the flight the server sends the web client both the aircraft’s altitude above MSL, and the geoid height above the ellipsoid. The sum of these two numbers is the altitude above the ellipsoid, which we send Cesium. For numerical data display we use the altitude above MSL.
Performance and Stability
To keep Cesium running smoothly even on systems with limited processing power we have taken several steps: careful performance tuning, runtime monitoring of performance problems, and limitation on usage (which we hope are temporary).
Performance tuning: In our web app, especially while in playback mode, we have multiple operations running at a time: updating the camera position in Cesium, updating an HTML5 canvas heads-up display, updating graphs of flight parameters, and updating the flight metrics table, among others. In order to balance these operations, we limit how frequently they can be run each second, so that any single process does not consume a disproportionate amount of resources.
Runtime monitoring: We use FrameRateMonitor to detect when Cesium is consistently running at a suboptimal level. If the framerate consistently dips below a certain threshold, we halt rendering (by setting viewer.useDefaultRenderLoop to false) and display a message to the user.
Limitation of usage: With Google Earth we had been allowing users to launch multiple 3D windows so they could see both track and cockpit mode at the same time. With the resource requirements of Cesium this has been too taxing for systems, especially the iPad, so we have disabled this ability for now.
Stability issues:
The Safari browser is popular among our users, especially pilots using iPads. However, WebGL support is not complete in Safari, and there are bugs in the browser that often cause Cesium to crash. This is outside of the Cesium team’s control, but it still requires us to find a solution for browsers like Safari. The best we’ve come up with at the moment is to intercept rendering errors by using viewer.scene.renderError.addEventListener( callback ), destroying the current instance, creating a new instance, and restoring the last camera position.
Conclusion
Cesium is an exciting and viable replacement for the deprecated Google Earth plugin. It requires no software to install and will run on any platform. What challenges we faced in migrating are likely to decrease in the future as browsers begin to offer complete and stable WebGL support, and performance problems dissipate as older hardware is phased out.
Our success with Cesium wouldn’t have been possible without the support of the team on the Cesium forum. With their help we’ve been able to overcome every major obstacle we encountered while re-implementing 3D in our app. We’re looking forward to the future as they continue to improve an already great product.