iTwin: Adding Design Context Using Cesium ion
Combining iTwin Platform with Cesium brings rich engineering metadata into geospatial visualizations, enabling infrastructure models to be explored both in their real-world location and with all the associated design intelligence, properties, and context.
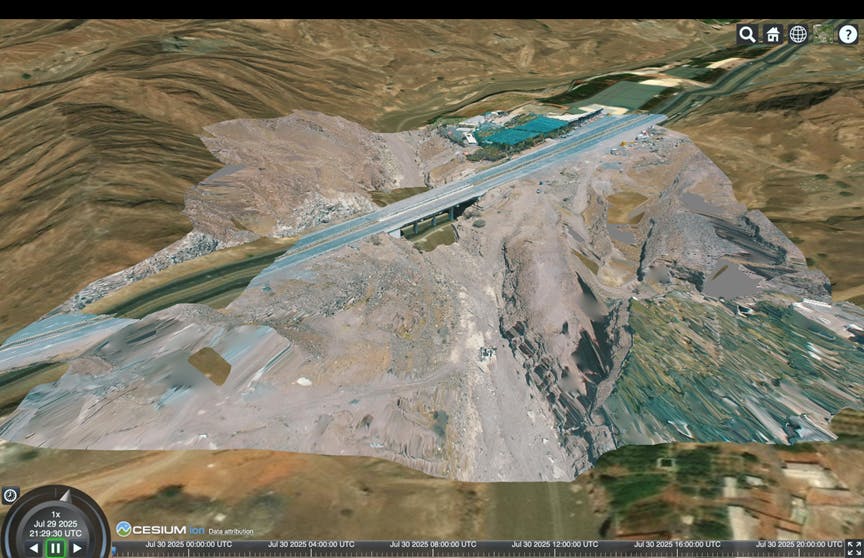
In this tutorial, you’ll add real-world context using Cesium ion. Global datasets like Cesium World Terrain or Google Photorealistic 3D Tiles provide accurate geospatial context, and infrastructure projects often require more site-specific data. That’s where Cesium ion reality modeling comes in: you can generate precise 3D context from drone-captured imagery. That’s what we’ll cover in this tutorial. In the next one, you’ll bring in the iTwin design model to complete the scene. The image below shows a preview of the final result—combining engineering data from a bridge project into a contextualized geospatial view.

You’ll learn how to:
- Add contextual 3D data from photos using Cesium ion.
- Set up a CesiumJS app to load Cesium ion assets.
- A Cesium ion account
- Node.js + npm installed
- Git installed
In this step, Cesium ion will use the provided photos to generate a reality model through 3D reconstruction. This takes approximately 50 minutes.
If you prefer to skip the reconstruction, you can upload a pre-tiled reality model instead, available here.
1 Download the bridge photo dataset.
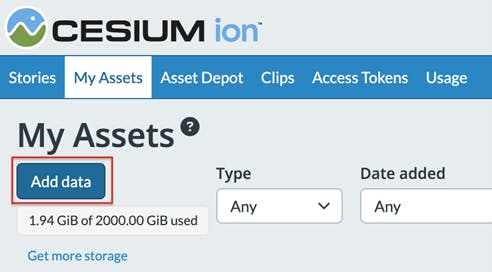
2Go to https://ion.cesium.com to upload the photos.
Click My Assets. Click Add Data, then Add files.
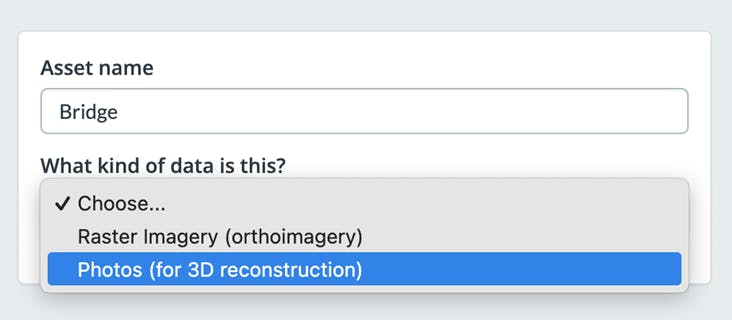
Select Bridge.zip and click Open.
Update Asset name (personal preference). For type of data, choose Photos (for 3D reconstruction).
Use the default Reconstruct models from photos settings.
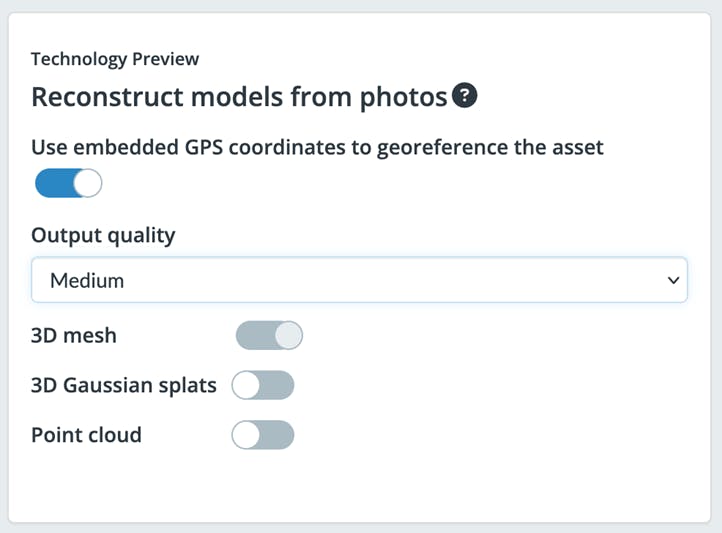
Click Upload.
Tiling may take 50 minutes or longer, depending on dataset size, upload speed, and current processing load on Cesium ion. It’s safe to step away while the model processes in the background.
3Once tiling is complete, you’ll see the asset on the Cesium globe. At the bottom of the right side of the preview, you’ll find the Cesium ion asset ID:
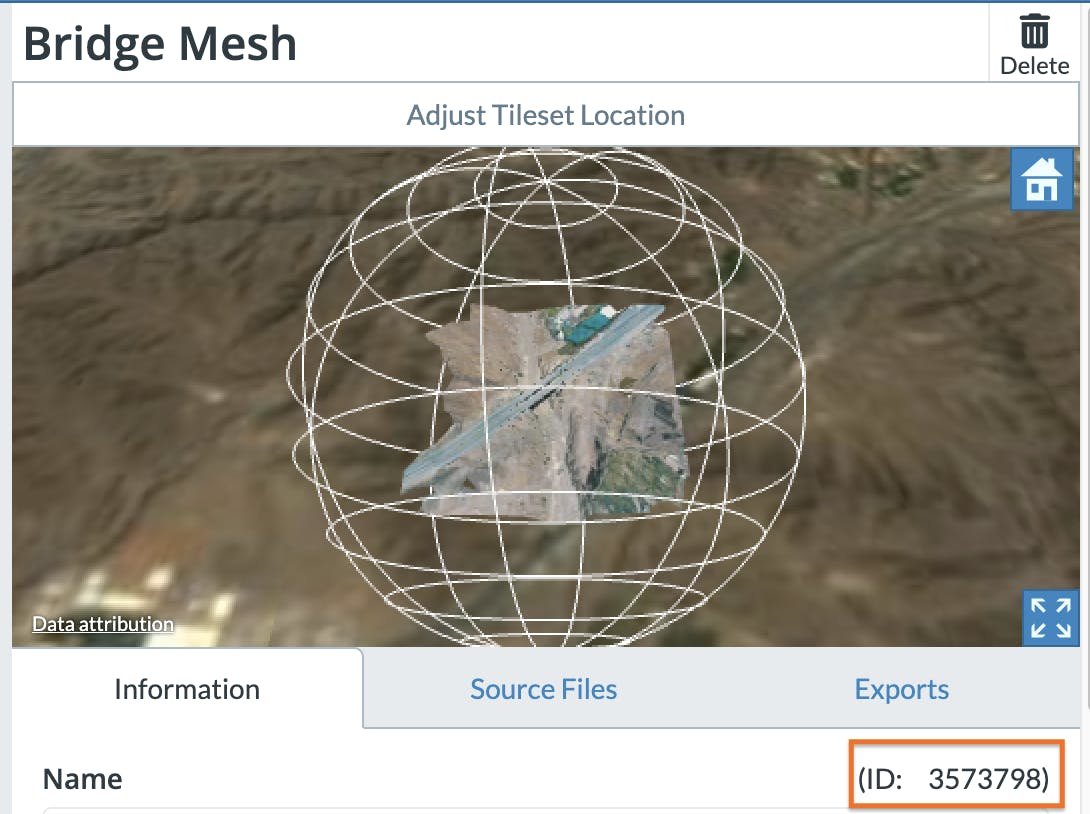
4Copy the asset ID for use during Step 3.
You’ll use a prebuilt CesiumJS + iTwin starter app to visualize the bridge asset.
1Clone the repository:
git clone https://github.com/iTwin/itwin-cesium-tutorial-app.git
cd itwin-cesium-tutorial-app
2Install dependencies:
npm install
3Rename .env.example to .env; then open it in a text editor and add your own Cesium ion token:
VITE_ION_TOKEN="your_access_token"
You can generate this from https://ion.cesium.com/tokens. Default permission settings will work for this tutorial, but for more information on permissions settings see our guide here.
4Start the app:
npm run dev
5Open the app in your browser (default http://localhost:5173) and you should see the Cesium globe.
Your app may run on a different port. Check the output of npm run dev to find the correct URL.
1In the cloned app repository, open src/main.js. You’ll add the code from the next steps to the end of the main function.
Add a tileset to the application that references context data asset. Be sure to replace "your-asset-id" with your Cesium ion asset ID from Step 1.
const railContextTileset = await Cesium.Cesium3DTileset.fromIonAssetId("your-asset-id"); // *** Replace your-asset-id ***
2Add the tileset to the scene:
viewer.scene.primitives.add(railContextTileset);
3Automatically zoom to the tileset once it’s ready:
viewer.zoomTo(railContextTileset);
4Save the file and refresh the browser. You should now see the asset loaded on the globe.
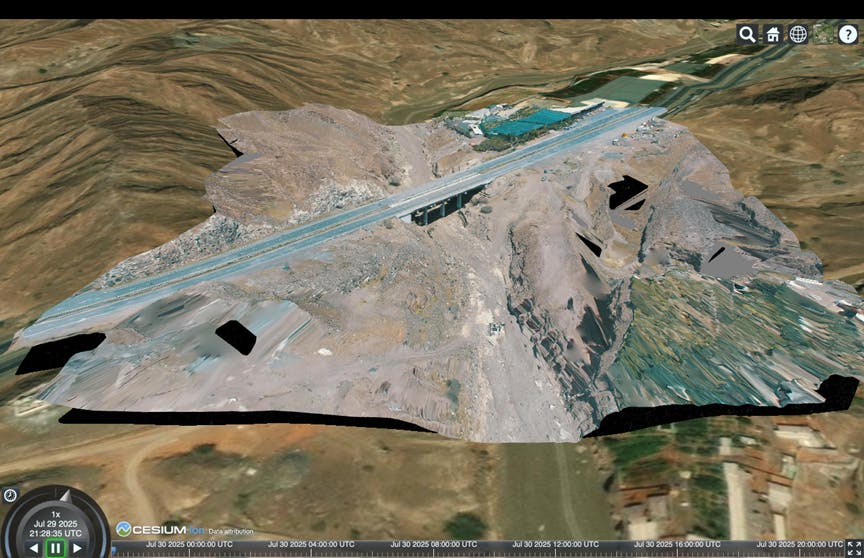
By default, Cesium World Terrain and your uploaded reality model may visually overlap, causing an unnatural doubling of the ground surface. To solve this, you'll use a clipping polygon to hide the terrain under the reality model footprint.
You’ll load a GeoJSON file that defines the area to clip and apply it as a clipping region to the globe’s terrain.
1Upload the footprint GeoJSON to Cesium ion.
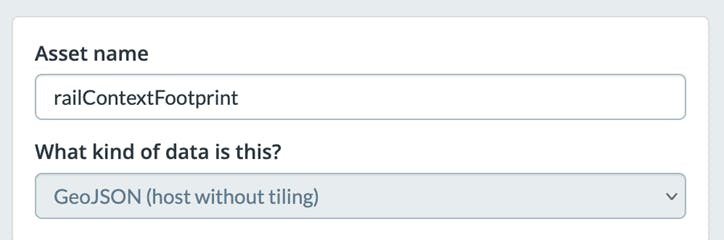
We’ve prepared a GeoJSON file (RailContextFootprint.geojson) that outlines the exact boundaries of the reality model. Upload it to your Cesium ion account:
Go to https://ion.cesium.com. Click My Assets, then Add Data > Add files. From there, select the RailContextFootprint.geojson file. Cesium ion automatically detects this as GeoJSON.
Click Upload.
After tiling completes, take note of the asset ID from the preview page—you’ll need it in the next step.
2Add the clipping polygon in code. Open src/main.js and add the following code to the end of the main function. Be sure to replace geojson-asset-id in the first line with your own asset ID.
// Load a GeoJSON file with positions defining the reality model footprint
const railContextBoundaryResource = await Cesium.IonResource.fromAssetId("geojson-asset-id"); // *** Replace geojson-asset-id ***
const railContextBoundaryDataSource = await Cesium.GeoJsonDataSource.load(railContextBoundaryResource);

let footprint = railContextBoundaryDataSource.entities.values.find((entity) =>
	Cesium.defined(entity.polygon),
);

// Add a clipping region based on the loaded reality model footprint
const positions = footprint.polygon.hierarchy.getValue().positions;
const clippingPolygons = new Cesium.ClippingPolygonCollection({
polygons: [
     new Cesium.ClippingPolygon({
          positions: positions,
          }),
     ],});

viewer.scene.globe.clippingPolygons = clippingPolygons;
3Save your changes and refresh the browser. You should now see the terrain surface clipped away underneath the reality model, eliminating visual conflict and giving your scene a cleaner, more accurate appearance.
You’ve successfully visualized contextual 3D data for an iTwin. This gives your design data meaningful location context. In the next tutorial, you’ll integrate design data into this same viewer to complete the iTwin visualization.
If you want a deeper dive into creating reality models in Cesium ion, check out this tutorial on reconstruction.